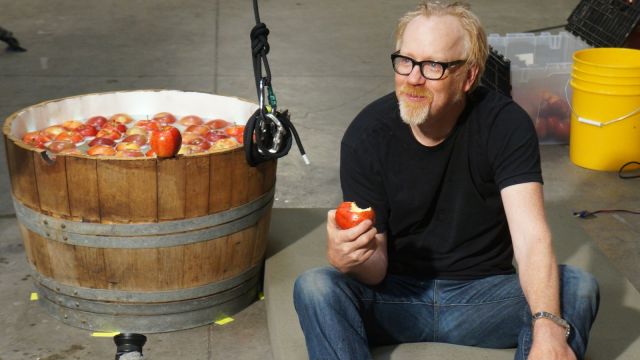
This week, Will, Norm, and Jeremy discuss landing spaceships on comets, Disneyland, Amazon’s speaker thing, Taylor Swift, net neutrality, and a whole lot more. Enjoy!
Premium: Watch Frank Ippolito Sculpt the Farnsworth Project!
For Tested Premium Members, here’s an extended sculpting session with Frank Ippolito where we discuss the details of the Farnsworth sculpture while the clay is still on actor Chuck Lines’ lifecast. We give Frank some feedback and learn about what references he uses to make Farnsworth look like a realistic old man. In the middle of the sculpting process, Frank also gets a visit from some of the directors who worked on Futurama to give him some feedback! To watch and follow along with the sculpt, sign up for a Tested Premium Membership by clicking here.
Bits to Atoms: The State of Resin 3D Printing Technologies

In light of our recent video on the Form 1+ printer and as a lead-up to a full review, I wanted to delve deeper into 3D printing with liquid resin, so let’s start with a primer on the state of resin 3D printing technologies and hardware.
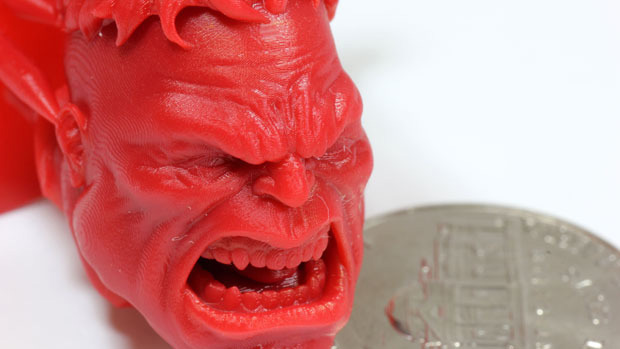
Printing with resin typically offers the highest resolution, detail and accuracy available with desktop 3D printing. For example, layer height for most resin printers ranges from 25 – 100 microns (.025mm – .10mm), as a comparison, human hair can range from 17 – 181 microns and typical filament printers (FFF), like the MakerBot, have a max resolution of 100 microns. Generally when talking about resolution you only hear about the layer height, but there is also accuracy as far as small details and resin printers excel in this area.
There are various methods of printing with resin, but all involve a liquid distributed in a thin layer and curved via UV light. Prints will typically have some type of support material or structure which must be cleaned off by either physical or chemical means. Most parts remain UV-sensitive, and should be kept from direct sunlight and/or coated or painted in some way to block UV. Let’s take a look at our options for resin printing.
STEREOLITHOGRAPHY (SLA)
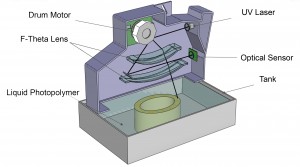
The most common type of resin printing is stereolithography (SLA) which was also the first form of 3D printing developed in 1986 by Charles Hull, the founder of 3D Systems–one of the biggest developers of 3D printing technology. SLA printing uses a laser to draw each slice of a model onto liquid resin which is cured by the UV light. The 3D Systems SLA machines print onto a platform that is lowered into a vat of resin. For each layer, a ‘wiper’ moves across the platform, distributing a thin layer of liquid resin and a laser mounted in the top of the machine draws the model onto the liquid. The liquid solidifies, the platform moves down, a new layer of liquid is distributed by the wiper and so on until the model is finished.
When finished, the model is lifted out of the tank and must be cleaned since it will have liquid resin clinging to it. Generally this is done by soaking in a bin of isopropyl alcohol which dissolves the loose resin. The model is solid, but to fully cure the resin, the model is usually ‘baked’ in a UV oven for a few minutes.
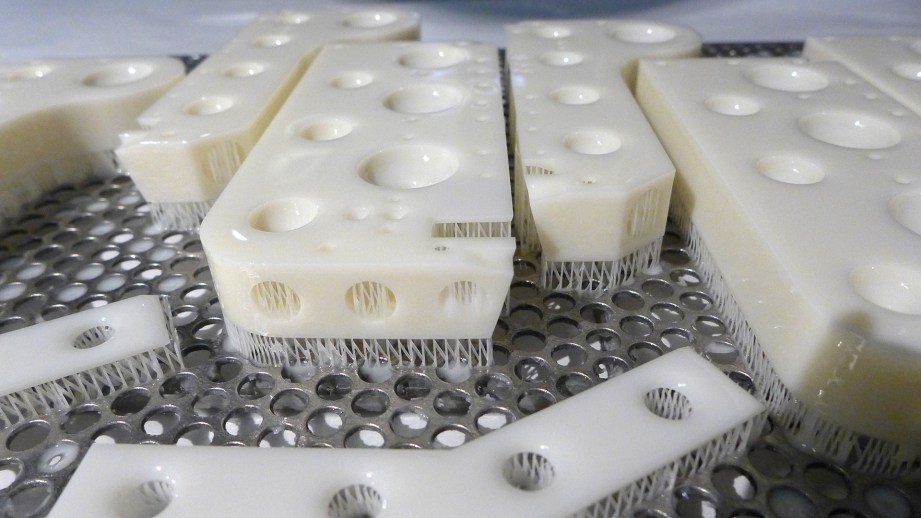
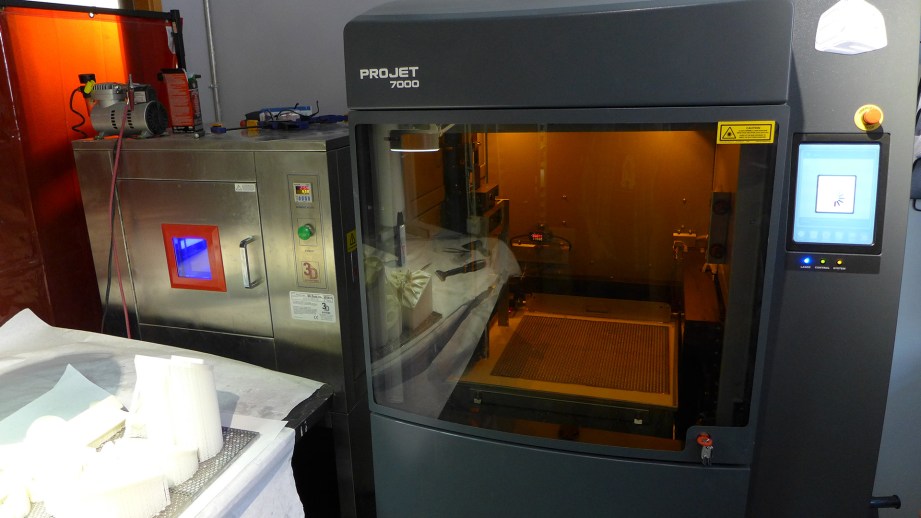
When printed, the model is held up by a lattice of supports which must also be removed. The supports will leave small marks on the model so faces that need to be the cleanest should be positioned upwards when printing. The supports are generally easy to remove and the plastic can be sanded if needed. While SLA printers tend to be very accurate, distortion can occur at the outer edges of the vat, but it’s usually negligible for most models. I used a 3D Systems ProJet 7000 to print the Millenbaugh Motivator for Adam’s Hellboy Mecha-Hand and the detail and accuracy was amazing. The resin was strong enough to tap screws into and the thin crankshaft, while not completely rigid, was able to drive the valves.
3D Systems dominates the SLA field (partly due to patents they hold) and the machines cost tens-of-thousands of dollars but consumer versions are starting to show up such as the Form 1+ which costs a little over $3000 but can rival the resolution of big SLA machines. Obviously with such a price gap, the Form 1 and similar machines aren’t going to produce quite the same quality, but they are quite impressive. Trade-offs are going to include a much smaller print envelope, slower print times, more failures, less accuracy and possibly less durable materials. But if you need to produce small, finely detailed prints, they are worth looking into. Stay tuned for a full write-up on my experience testing the Form 1+!
DIGITAL LIGHT PROCESSING (DLP)
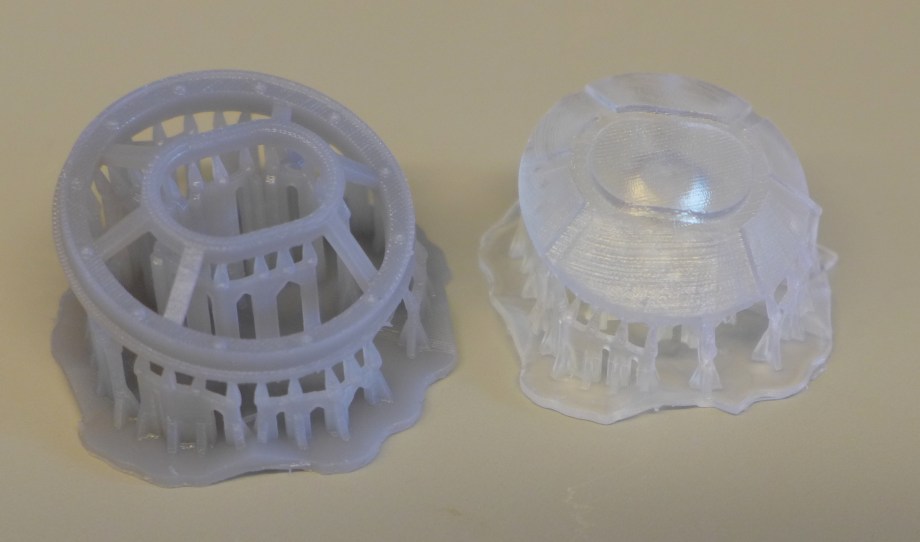
Digital Light Processing (DLP) printing is the next most common form of resin printing machines. To explain how these work, let’s look at the consumer-level machines first, such as the B9 Creator.
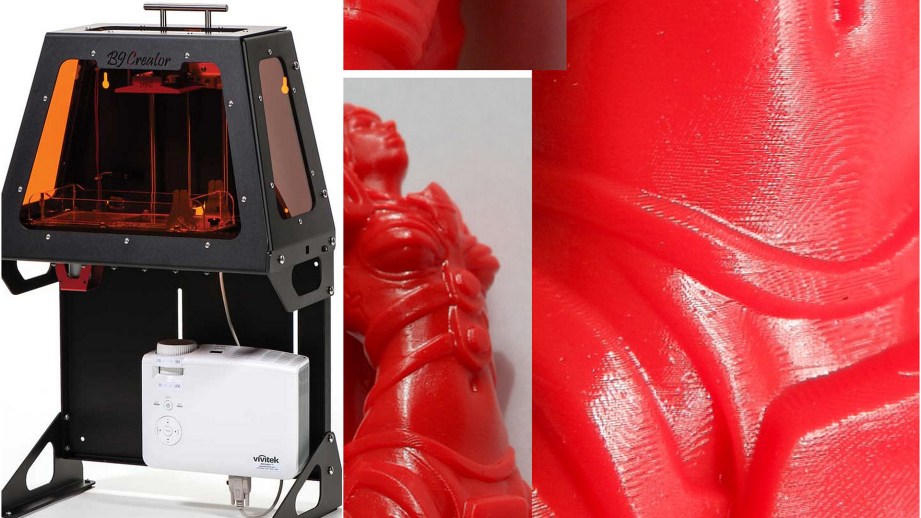
As you can see, in place of a laser, it has a video projector mounted to the bottom which may seem odd, but it’s kind of genius. These machines use DLP projector technology to cure each layer in one blast rather than drawing the layer with a laser. The advent of HD video and the advancement of small projectors with intense light and high pixel-density made these printers possible. Since each layer is zapped all at once, DLP machines can be faster and use less moving parts. (The SLA laser needs multiple mirrors and motors to direct the beam) This also makes DLP printers kit-friendly and B9 has both finished versions ($5800) and kit versions ($3700). The resin is still UV cured and requires alcohol clean-up, but the detail is really impressive. I have not been able to determine if this is true of all DLP printers, but with the B9, the print envelope shrinks as the resolution increases–I think this is due to pixel density of the projector.
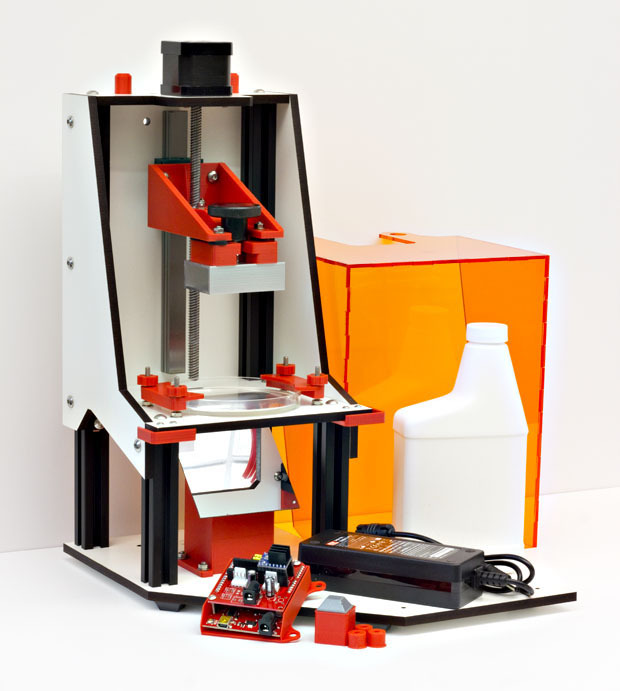
Another consumer-friendly DLP printer to look out for is the LittleRP, which was successfully funded on Kickstarter. They are offering a $1250 kit that easily assembles into a cute machine for doing small, highly-detailed prints. The build envelope is only 2.8″ x 1.5″ x 4″ but the detail is pretty amazing.
It’s geared towards user doing jewelry, miniatures, small mechanical assemblies, etc. A disadvantage of these consumer-level DLP machines is a required always-on computer connection as they use the VGA or HDMI output from the video card to transmit the layer information to the projector.
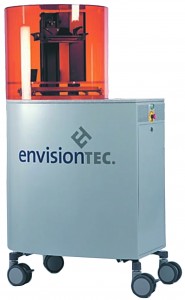
On the pro-end there’s EnvisionTec machines which use Texas Instruments DLP technology and probably don’t have the full-size projector but just the DLP elements needed for printing. EnvisionTec is the relative ‘new-guy’ on the block since being founded in 2002 but they have been producing really nice machines. Their design makes it quicker and easier to change materials versus SLA machines and they produce some of the best resin prints I have seen. If I were purchasing a printer I would be hard-pressed to choose between this and a 3D Systems machine.
POLYJET
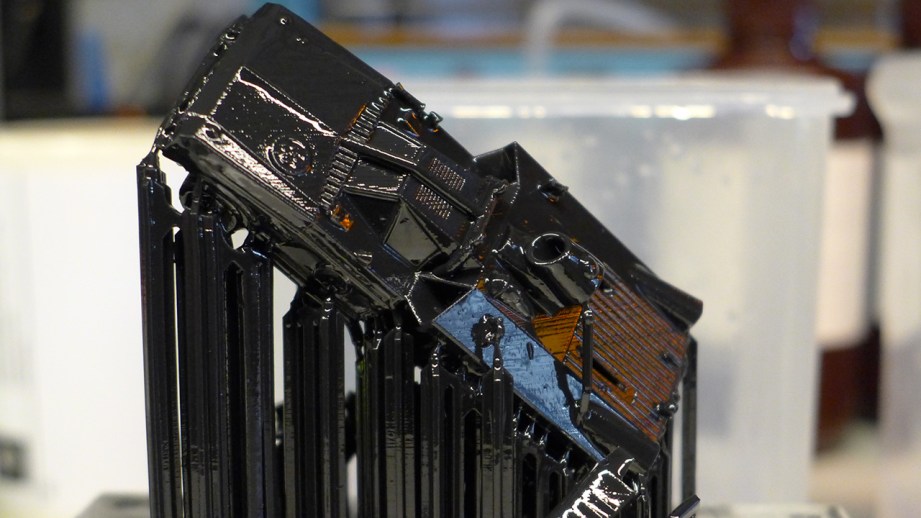
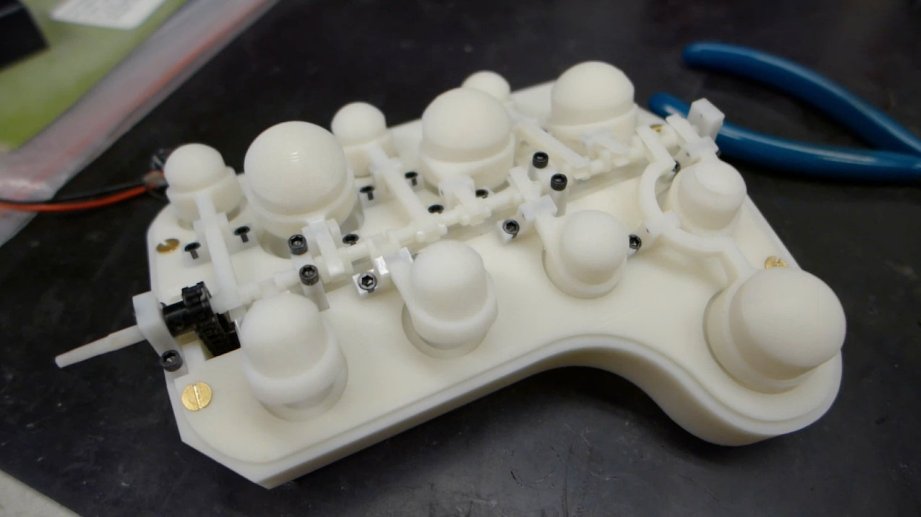
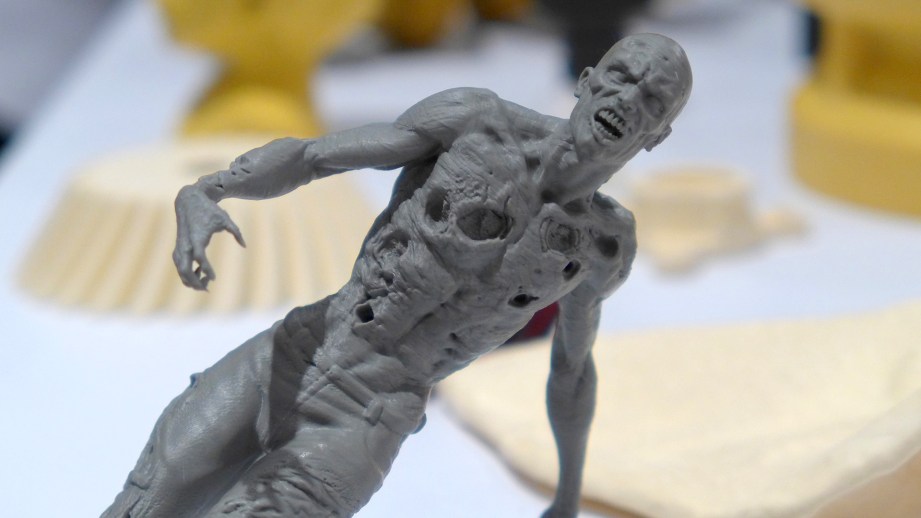
My old friend the Objet Connex500 by Stratasys (founded 1989, owner of MakerBot) is a polyjet printer which distributes liquid resin via inkjet-like printheads. Polyjets print on a print bed much like a filament printer does, so there’s no vat of liquid to deal with and no liquid to clean off post-print. If the model can be printed without any support, the surface finish will come out nice and shiny. If support is needed a wax-like material is used to encase the print and is a bit of a pain to clean off. Removing the support requires a waterjet and sometimes an additional cleaning with a mild lye solution. Since there is no liquid vat involved, materials can be swapped out easier via material cartridges which also allow for multiple materials in the same print. Black and white materials can be blended to make grays, opaque and clear can be mixed as well as rubber and solid, which is how I made the Octopod tentacles.
The Objet machines are the only ones I know that can print and bond multiple materials and the true rubber-like material is awesome. If you need to print in multiple materials or rubber, this is really the only way to go.
3SP: Scan, Spin, Selectively Photocure
Scan, Spin, Selectively Photocure (3SP) is a new SLA printing method developed by EnvisionTec and I’m not quite clear on the details. It uses a typical resin vat and laser but it appears that they have added a spinning octagonal mirror that directs the laser through a series of curved lenses before hitting the resin. I believe the lenses help to compensate for distortions that you may get at the edges of the tank on a typical SLA printer and helps speed up printing. I believe this was just released this year and time will tell if it’s a major leap forward.
HP’s Multi Jet Fusion
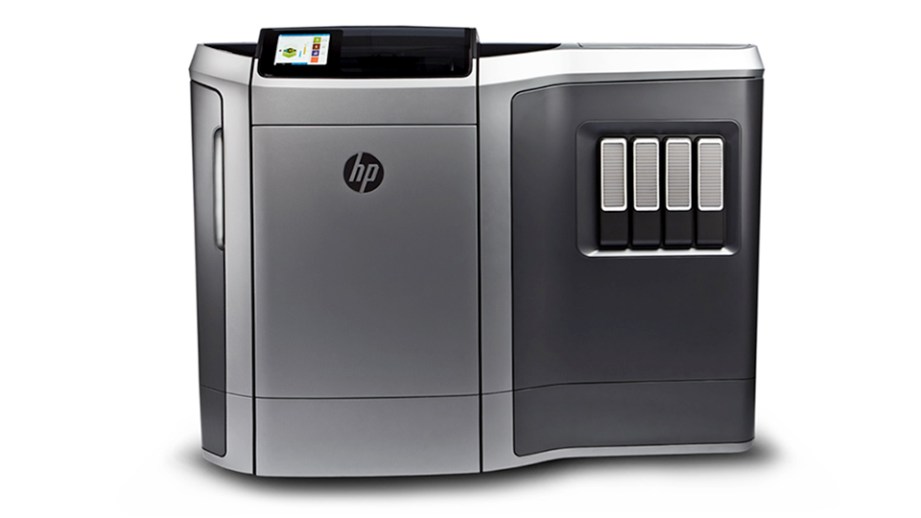
HP recently announced their entry into 3D printing with the Multi Jet Fusion which promises to be 10 times faster than other machines. It appears that it’s using technology similar to polyjet, which would make sense for HP. In addition, they are claiming it can print in multiple colors which would be a big jump that Stratasys also made on their Objet machines. HP also promises flexible and conductive materials which would be a big deal. I have not seen any prints in person and will remain cautiously optimistic until it’s 2016 release date.
While not the cheapest method out there, resin printing is the best choice if you need high accuracy, detail and strength. Options such as the Form 1+ are now within our grasp and bigger and better machines are assuredly on their way. I would not be surprised to see MakerBot introduce a resin machine, seeing as how they are now owned by Stratasys. I’m excited to see what happens!
Photo Gallery: The Making of the Farnsworth Project
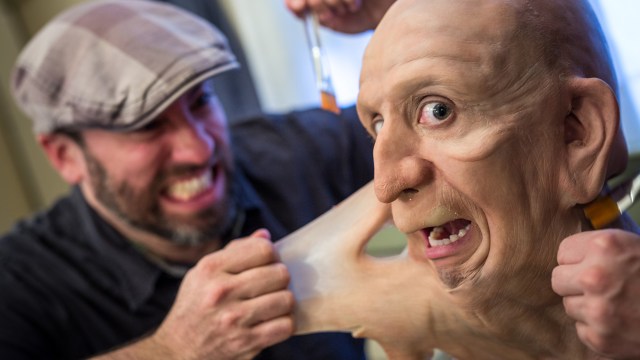


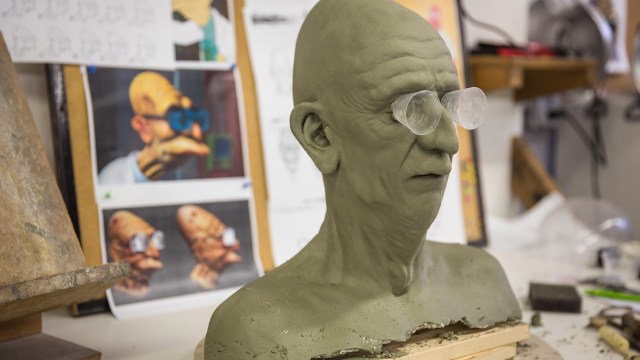
Real-Life Professor Farnsworth from Futurama!
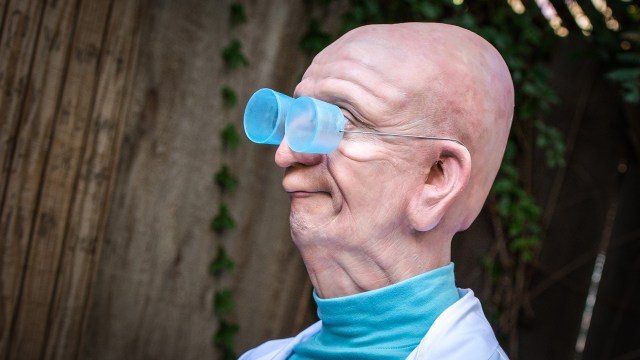
Good news, everyone! After creating the lifelike Zoidberg costume for us earlier this year, effects artist Frank Ippolito takes on another makeup challenge from the world of Futurama. This time, it’s Professor Farnsworth! Watch Frank bring the professor to life with sculpting, molding, and casting of prosthetics, and then applying the makeup on an actor to unveil at the Tested stage show! (This video was brought to you by Premium memberships on Tested. Learn more about how you can support us by joining the Tested Premium community!)
Video shot and edited by Joey Fameli
Music Library provided by Jingle Punks
Thanks to Chuck Lines for playing Farnsworth at our stage show!
How to Make a Two-Part Mold (of a Lightsaber!)
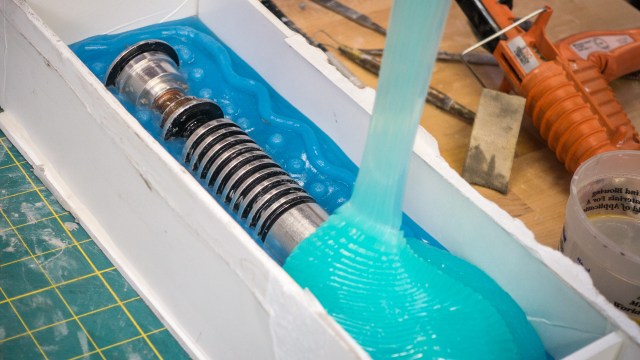
Frank Ippolito joins us at Adam’s shop for another step-by-step tutorial in prop making. This time, we learn how to make a two-part silicone mold that we can use to cast resin copies of complex objects. We demonstrate the technique by duplicating a lightsaber prop made by Adam! It’s not that difficult! (This video was brought to you by Premium memberships on Tested. Learn more about how you can support us by joining the Tested Premium community!)
Video shot and edited by Joey Fameli
Music Library provided by Jingle Punks
Thanks to Smooth-On for providing materials for this video
In Brief: Adam Remembers His Father’s Sesame Street Animations
In past episodes of Still Untitled and most recently in the video with animator Marty Cooper, Adam has talked about the influence of his father’s cartoons and animations on his life and art sensibilities. We got glimpses of the work of Lee Savage did for shows like Sesame Street, and Adam shares more of his memories in this guest post for AV Club to commemorate the show’s 45th anniversary. It’s a touching tribute.
On Bicycles – 11/11/2014
Show and Tell: 3D Printed Steampunk Octopod
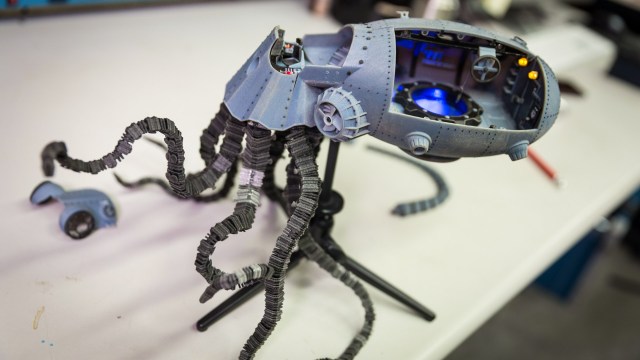
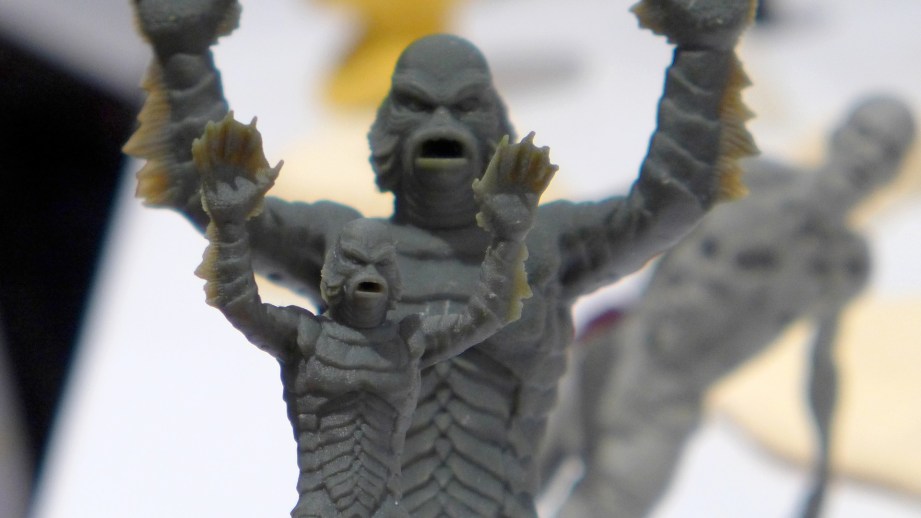
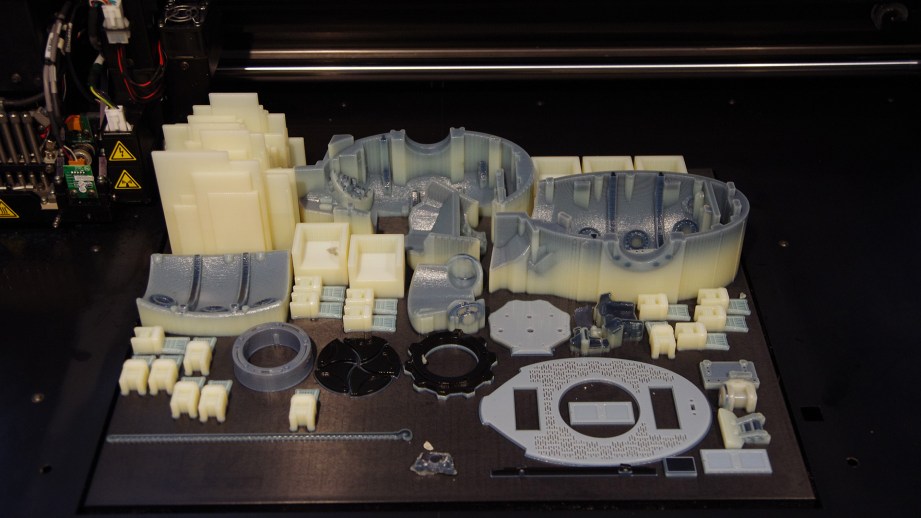
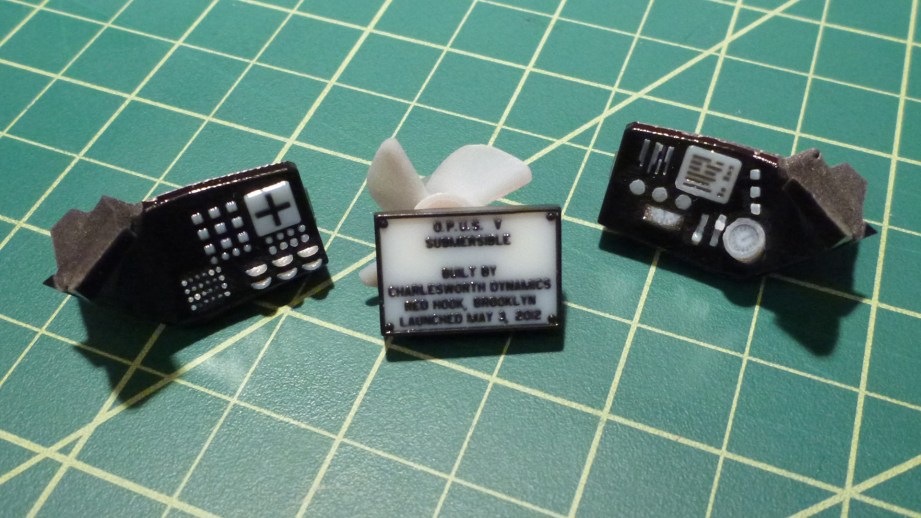
One final video from Norm’s recent trip to New York! Sean Charlesworth, our 3D printing expert, shares his famous steampunk octopod project, which we’ve talked about before had never seen in person. It’s a wonderfully designed and intricate model entirely conceived of and built by Sean–a project much more complex than your typical 3D printed piece.