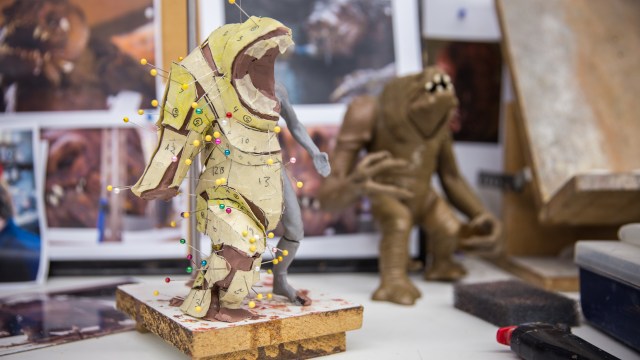
At this year’s Comic-Con, we unveiled The Rancor Project: a huge foam-fabricated costume built by effects artist Frank Ippolito. The project was inspired by a test suit made by LucasFilm for Return of the Jedi, which never made it to the film. To show you how the Rancor was created, we visit Frank’s workshop and walk through the design process, starting with a maquette sculpture and patterning by foam fabricator Ben Bayouth. Using these techniques, you can build your own creature costume! (Thanks to Model-Space.com for sponsoring this project!)
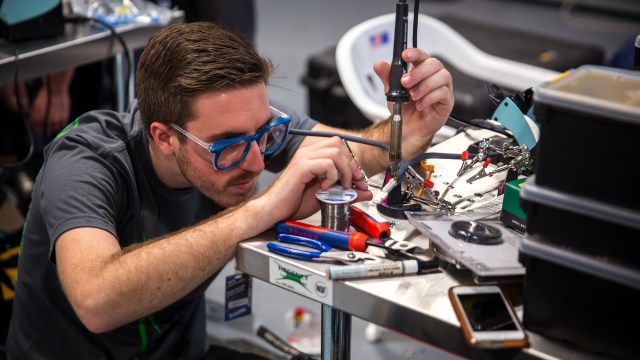
What does it take to build a BattleBot, and what technology makes a good combat robot? We chat with BattleBots competitor Will Bales about his matches and examine the parts of his HyperShock robot. From chassis to circuitry to weapons systems, we run through each component to give you an idea of how these 250-pound machines work!
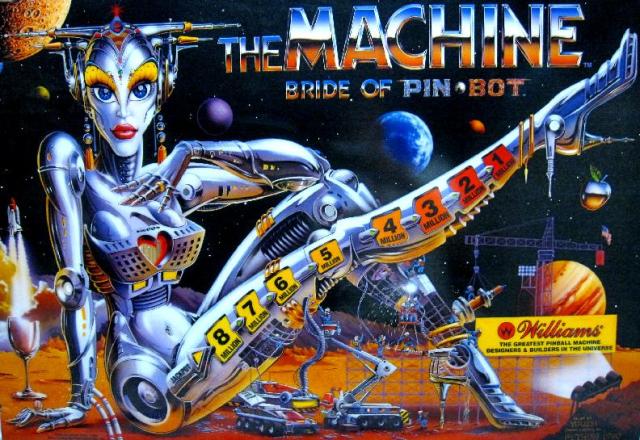
This week, Will and Norm are joined by the Internet’s Bonnie Burton to discuss quadcopter races, classic pinball machines, Ashley Madison, and dinosaur erotica. Enjoy!
Adam’s full Comic-Con 2015 panel, in which he’s joined by a few special guests on stage. Over the course of the hour, Adam and friends talk about Mythbusters, science education, costuming, and take questions from the audience!
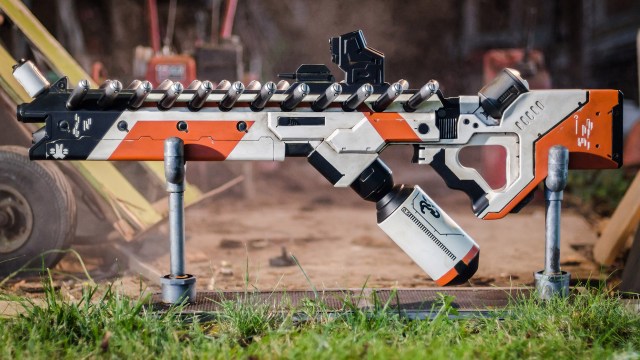
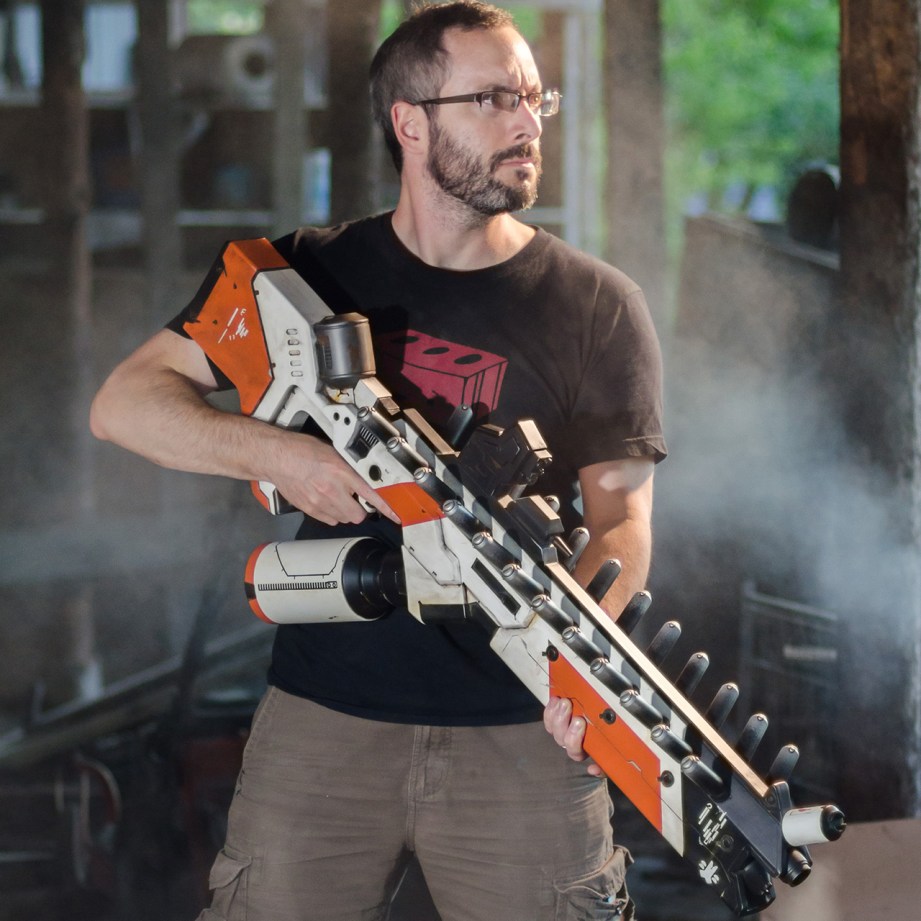
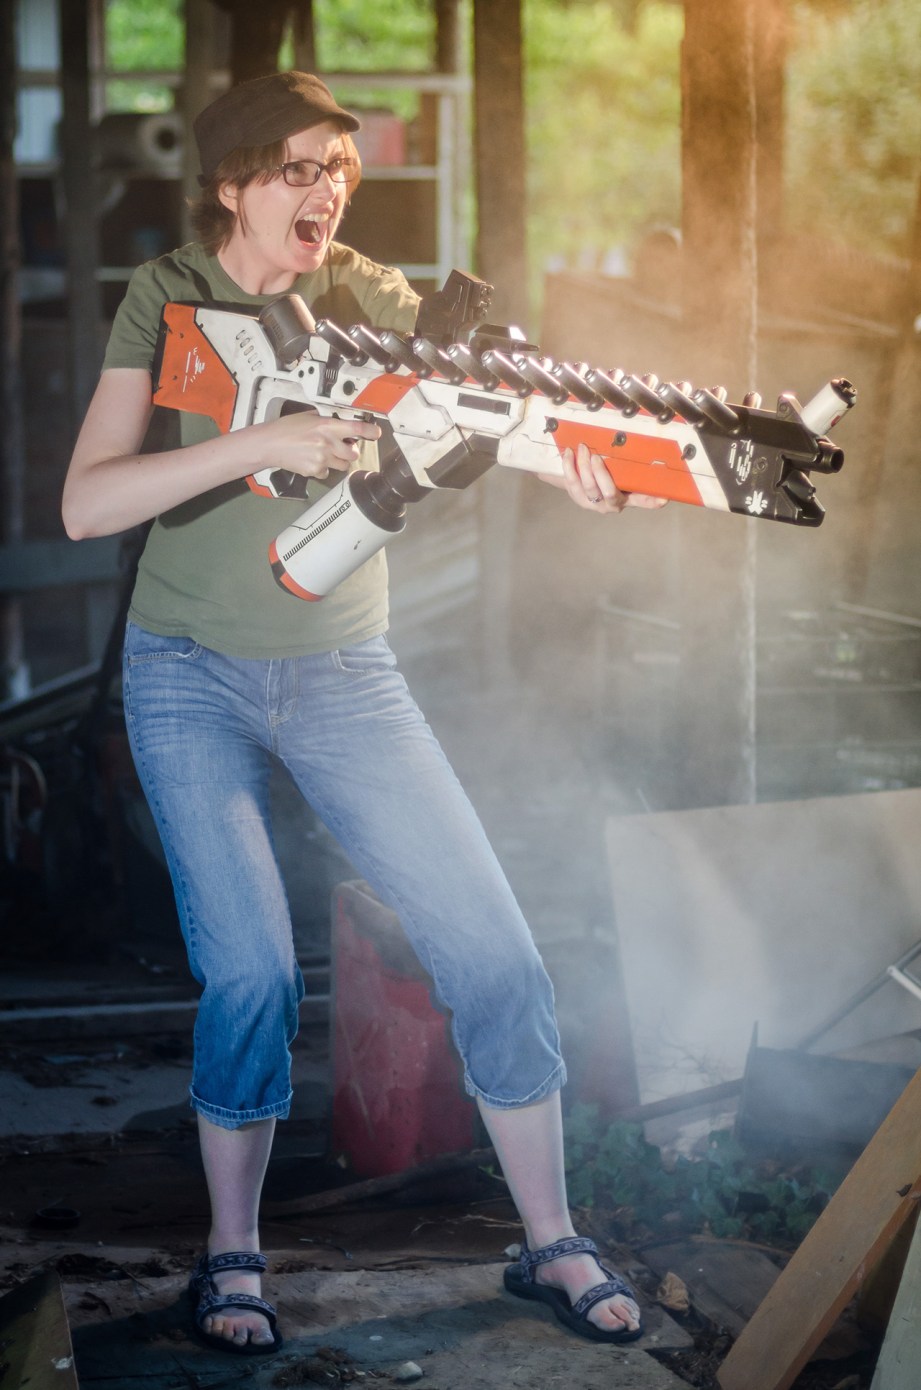
Over the past month, Punished Props’ Bill Doran built a 1:1 scale replica of the alien assault rifle from District 9 to unveil with us at Comic-Con. Bill’s build logs and videos will walk through his design and fabrication process, and his finished piece was unviled with a surprise at SDCC. Place your questions for Bill in the comments below! Here are parts 1, 2, and 3.
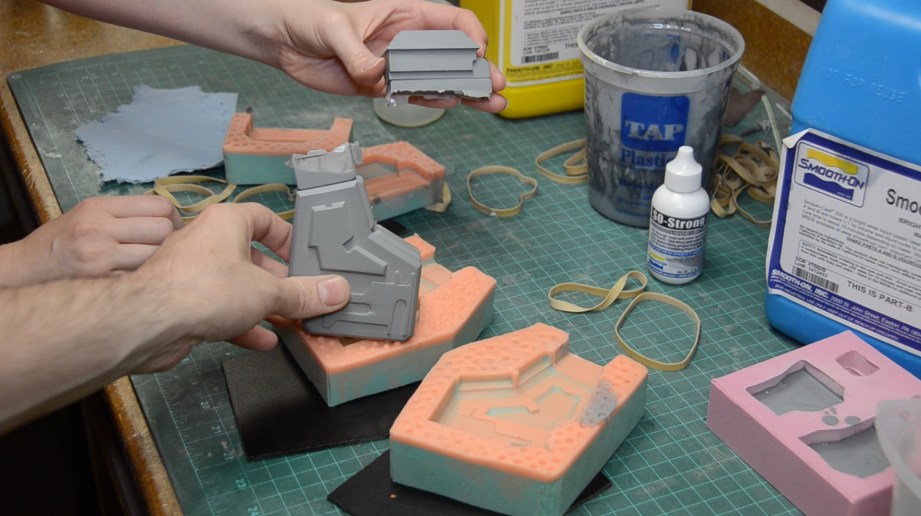
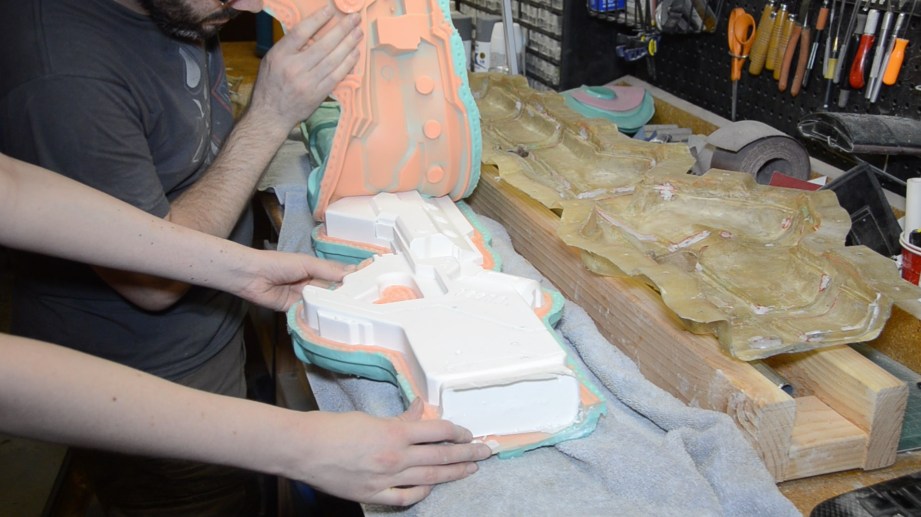
Here it is: the final part of the District 9 Gun Prop build! Fortunately, the molding process was fairly painless and yielded some very useful molds. When it comes to casting, having good molds can make or break a project, especially when you need 24 of something, as we did for this whacky alien gun.
Dump Molds
Most of the pieces for the gun were done with simple dump molds. This means all I had to do was mix up some Smooth-Cast 300 resin, tint it with a little SO-Strong black, and pour it into the molds we made. The only fancy business we did was to tap the mold around a bit to make sure no bubbles were trapped.
This process was used for the top scope pieces, the barrel pieces, some of the side greeblies, and all 24 of the tubes that stick out the sides of the barrel length.
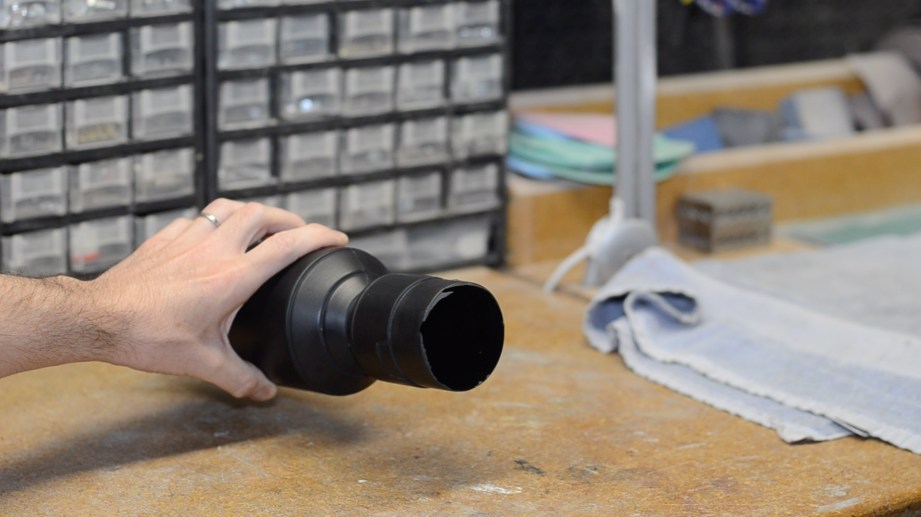
Rotocasting
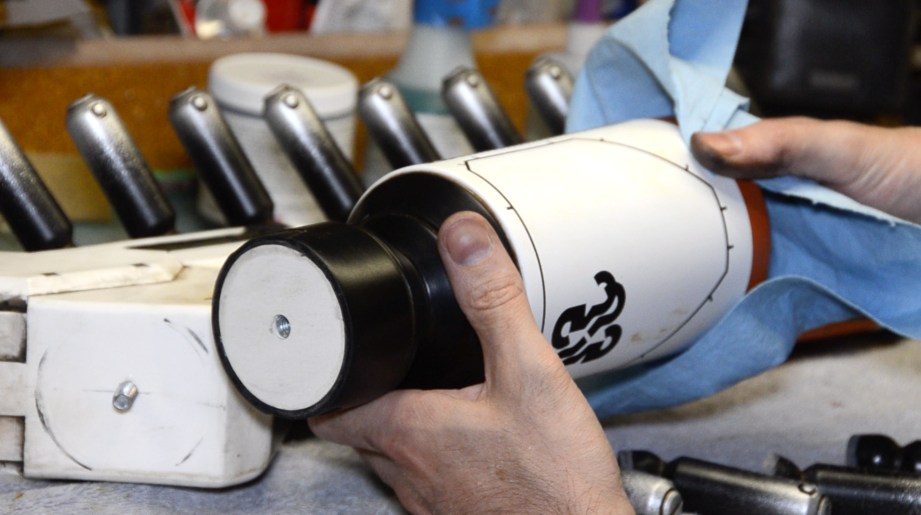
The large tube piece on the bottom of the gun needed to be handled in a different way. If we had just filled it up with resin, it would be extremely heavy, not to mention all of that wasted resin. Instead, we slush cast the inside of the mold with several layers of Onyx fast resin.
For a tubular shaped piece, it was actually quite easy. I dumped in a little bit of resin and then rolled the mold on the work bench surface until the inside of the mold was coated. Then I just had to keep rolling it to get an even coating of resin. We did this three to four times until there was a nice shell of resin inside the mold. It was left to cure before being demolded.
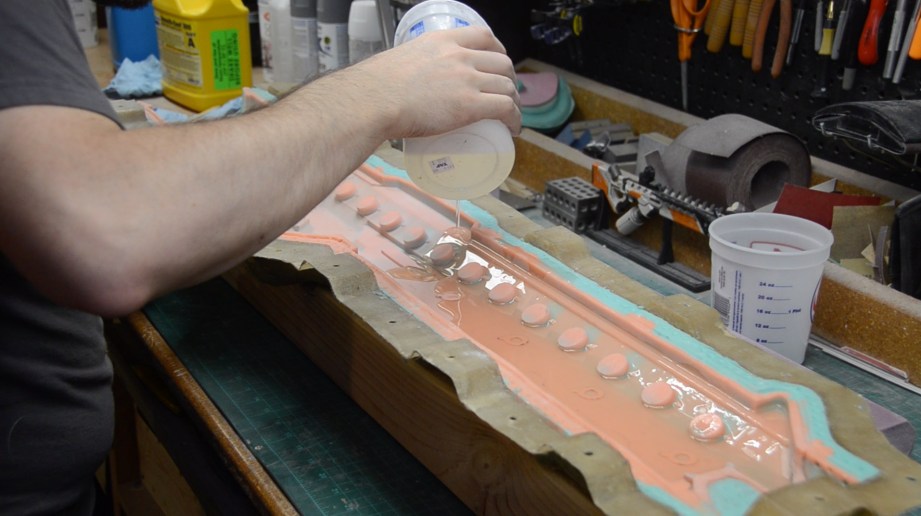
The Big Fella
For the main gun body piece, I knew we were going to have to get creative during the casting process. Like the previous tube piece, casting it solid would create a ridiculously heavy piece. I could have tried rotocasting it, and I plan to try that in the future, but for this first casting I wanted to hedge my bets and go with a solution that I knew would produce a workable piece.
I started by pouring some Smooth-Cast 300 into each side of the open mold. This way I could slush the resin around a bit and make sure there wouldn’t be any bubbles trapped in the recesses. When the resin started to kick, I laid in some insulation foam blocks that I had cut out. These floated on the resin layer and stuck to it as it cured. This way, when the mold was closed up, these foam filler pieces would stay in place when pouring the rest of the resin.
Once the resin was set up, the two mold halves were clamped together and we started filling up the remaining space with more Smooth Cast 300. This was done in stages; mixing up a cup of resin, pouring it in, and slushing it around to avoid any bubbles.
Once the resin was fully cured, we could retrieve the cast piece from the mold. I also trimmed off the pouring spout using my bandsaw.
Clean Up & Priming
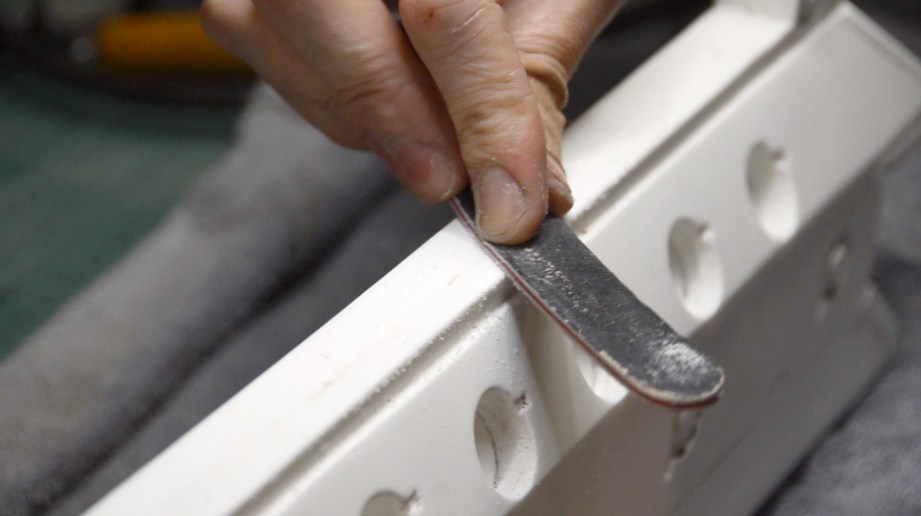
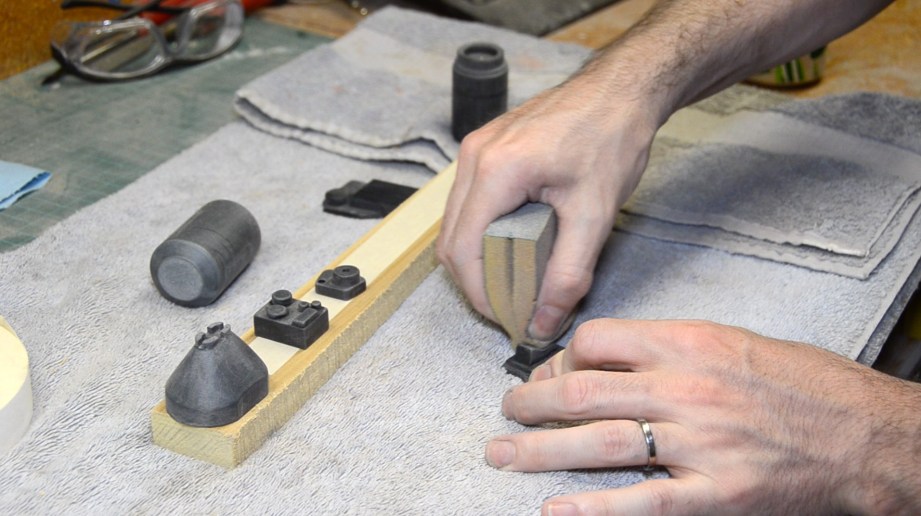
With all of the pieces cast and the pouring spouts cut off, everything needed just a little bit of clean-up. Anything that was cast from a two part mold had a bit of flashing along the seam that needed to be sanded off.
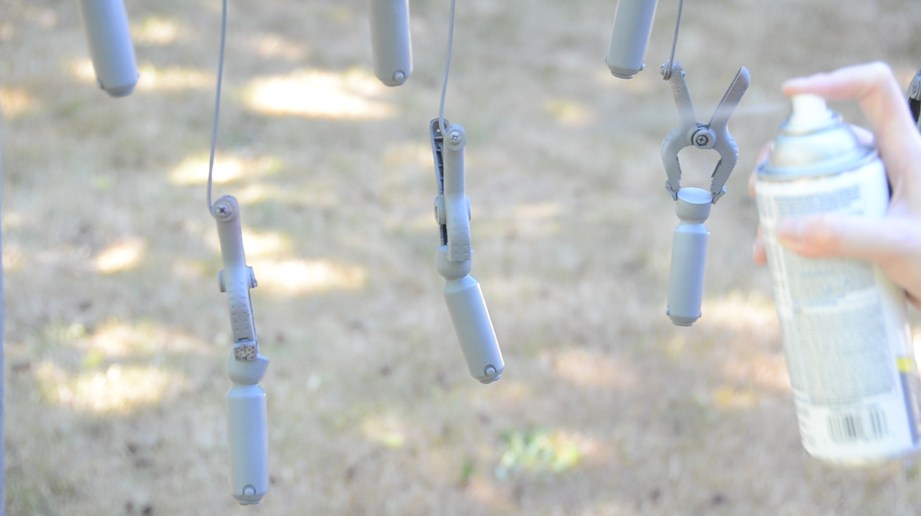
Every surface got a bit of a buffing with a high grit sanding sponge. This gave the surface a little bit of tooth for the paint to grab on to. Then every piece got hit with a good layer of rattle can primer and was allowed to dry.
Masking, Painting, and Stencils
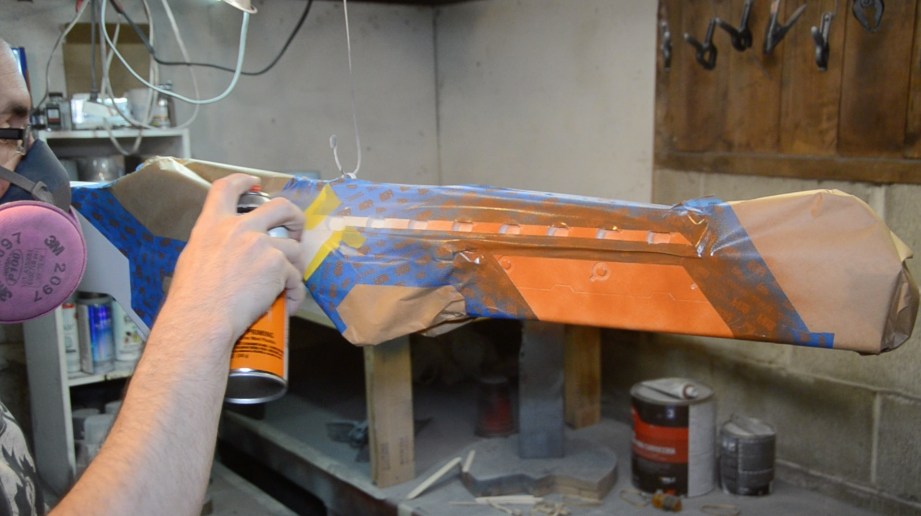
The first part of the painting process was to lay down the base coat of color. Most of the pieces for this guy either got a black or a white base coat, depending on the dominant color for that piece. Then I did a lot of masking. Especially on the main body piece, there were several areas that got a different color of paint, so they were masked off with tape before the next layer of paint was sprayed on.
Once areas were masked off, however, all that was needed was to apply a couple coats of spray paint to those areas to get the desired effect. For some of the pieces this was done multiple times to paint areas with different colors.
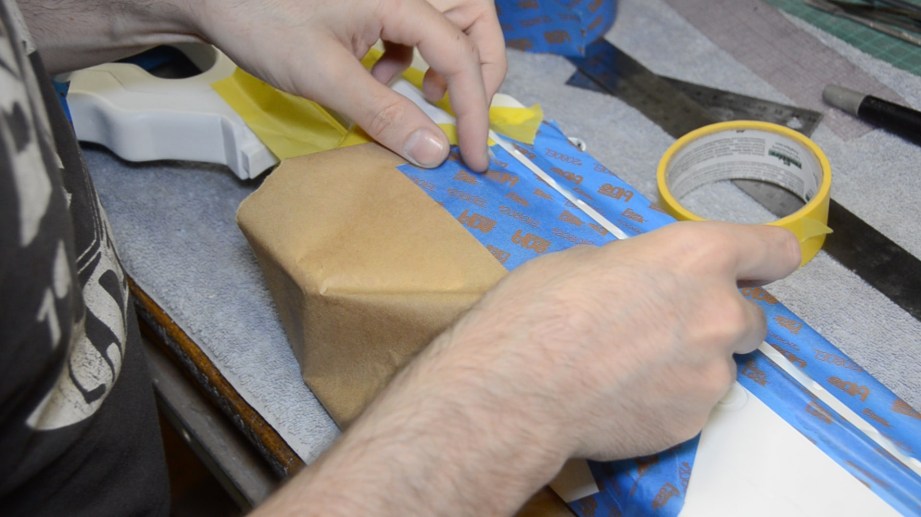
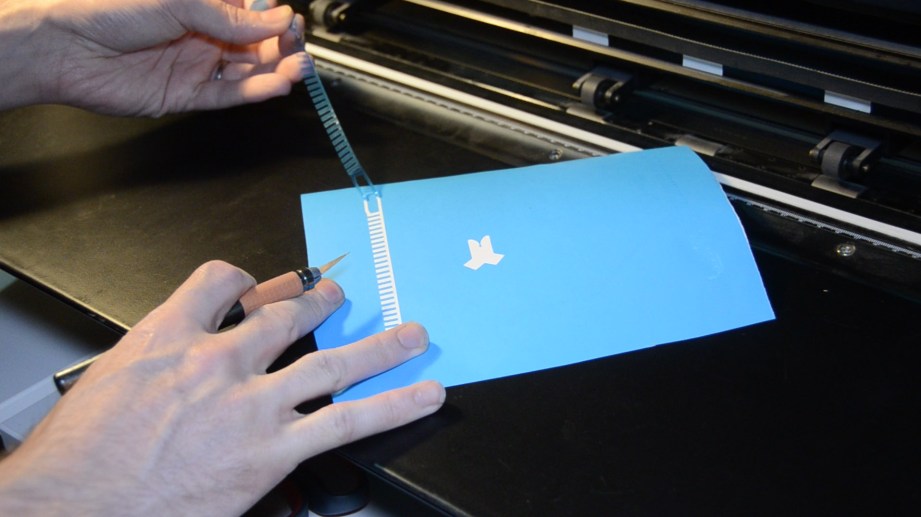
Other parts of the gun had some fairly intricate designs and logos on them, so I needed to make some stencils. This is where a vinyl cutter comes in really handy. I drew up the designs in Inkscape and cut them out in a low tac masking vinyl. The same thing can be done with masking tape, an X-Acto knife, and a steady hand.
These stencils were laid down on their respective pieces and then sprayed with some clear spray paint before spraying or brushing in the colored paint. This clear paint will clog any gaps between the stencil and the piece where color might sneak through. Once the clear paint was dry, I sprayed or brushed on my decal paint. When that layer dried, I removed the stencil to show a super crisp looking decal below. When I was happy with all of the paint, everything was shot with a good layer of matte clear spray paint to seal in our hard work.
Assembly
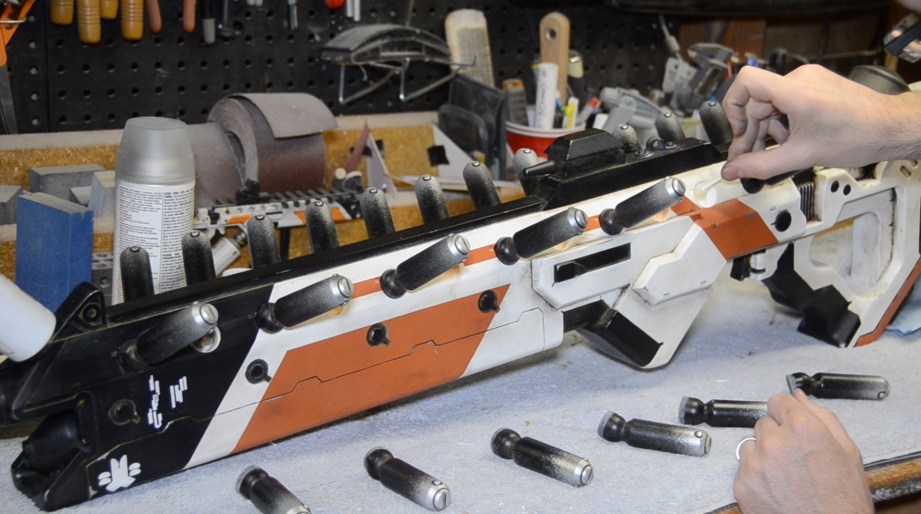
This kit has 34 pieces. That’s a lot of bits and bobs floating around the shop. Once most of the paint was applied and dry, I could finally get down to attaching them all together. Where possible, I put a metal screw or a pin in between two pieces before gluing them together. This would increase the effectiveness of the bond.
For the most part, I used super glue to attach all the resin pieces. If I needed a little bit of time to adjust the pieces, I employed a 5 minute epoxy. This was the case with all 24 of the tubes along the barrel. I wanted to make sure they were all aligned, so the extra cure time on that epoxy really helped.
I knew that hollow tube on the bottom of the gun was going to be a nuisance come shipping time, so I made it removable. A threaded rod was glued into the gun body and then I cut out a round disc from PVC plastic and sunk a t-nut into it. This disc screwed onto the gun body and also fit into that cast tube piece. I glued the disc into the tube, creating a removable part that screwed flush to the gun body.
Weathering
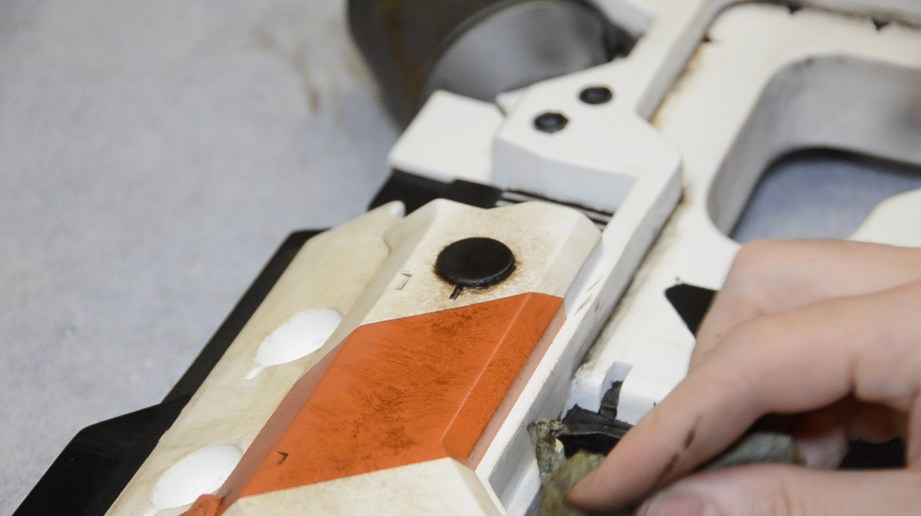
Weathering this gun was a whole lot of fun. Most of it was done with simple acrylic paints in black, brown, burnt sienna, and yellow ochre colors. Since a lot of the gun was white, it really gobbled up a lot of the color. In fact, I spent a lot of time trying to remove my weathering paint, rather than applying it. Most of it was done by cramming a bunch of paint all over a piece and then trying to clean it up with a paper towel.
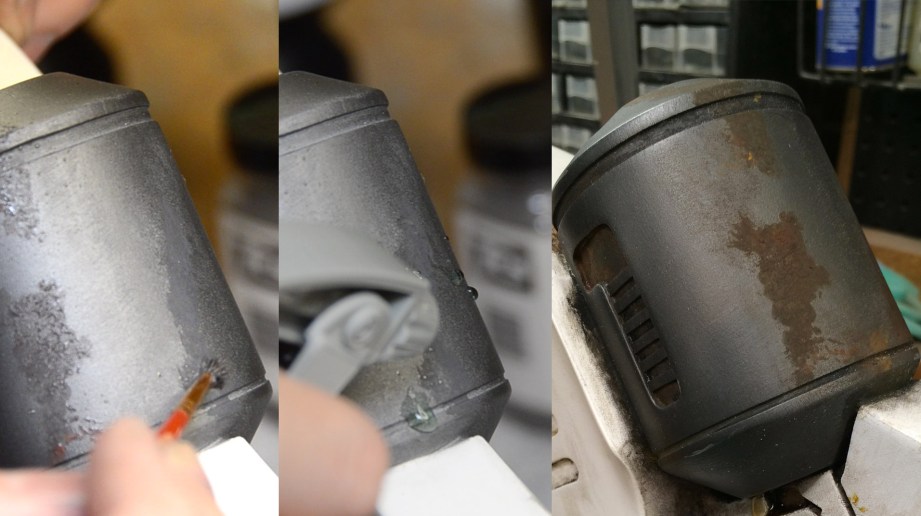
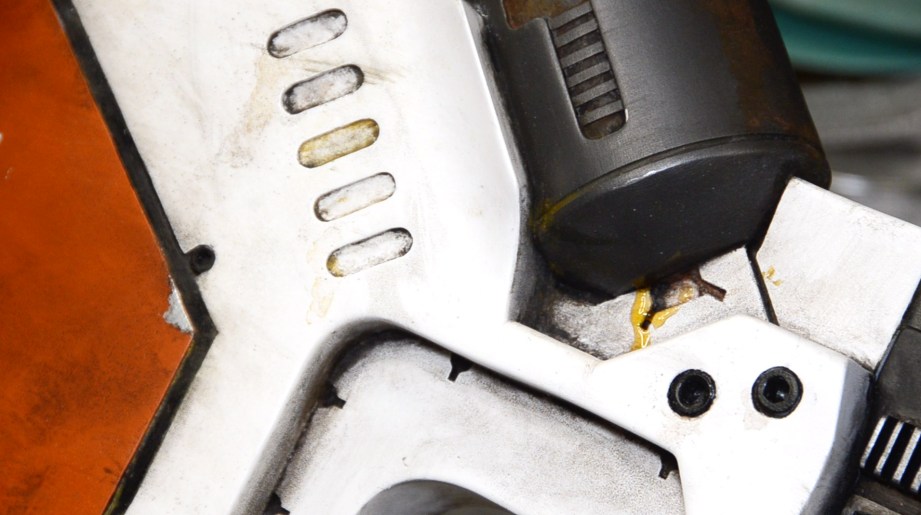
The tube on the top/rear of the gun is the only piece that looks like it’s made of exposed metal, so of course I wanted to rust the crap out of it. For this one I used real rust in the form of a system from Sculpt Nouveau. I painted on their iron colored metallic paint in areas that I wanted to be rusty. Then, before the paint could dry, I sprayed on their patina solution and waited. A few hours later we had some super legit rust.
The last little bit of grime was a puddle of tinted epoxy dribbled on part of that rusty tube. This epoxy cured solid and shiny, so that it would always look wet and gross.
Finally I did just tiny bit of edge weathering with a silver Sharpie to make it look like some of the edges had worn through the paint to the metal below. I know in the past I have way overdone this effect, so for this gun I dialed it way back and I’m pretty happy with the results.
After one more blast of matte clear primer (taking care to mask that shiny goo) and this gun was completely finished! HURRAY!
Final Thoughts
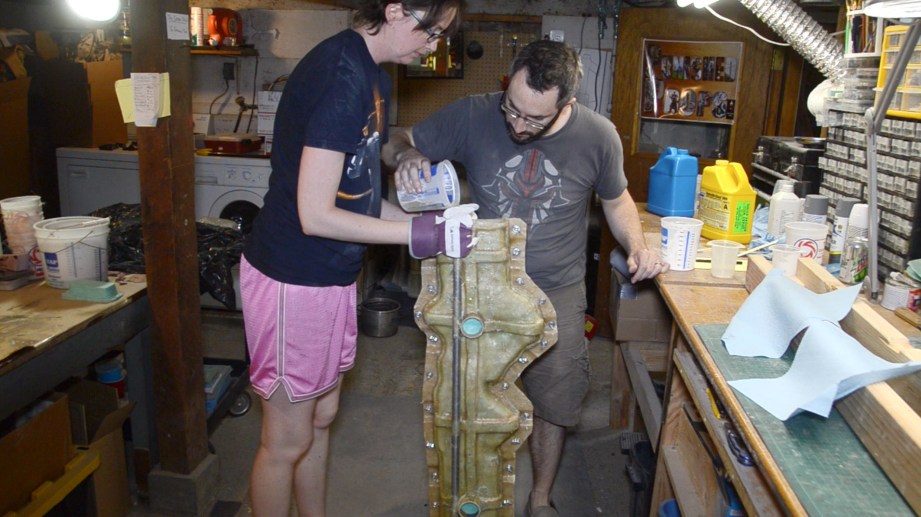
This was easily my most ambitious project to date. It was extremely challenging and I didn’t give myself much time to complete it. A massive thanks goes out to my wife Brittany who helped out a ton in the matrix molding process and did a lot of the casting and painting of all those obnoxious little bits and pieces. I couldn’t have done it without her!
Thanks to the gang at Tested for giving me the opportunity to share this project with you guys and, of course, thanks to Smooth-On for providing all of the casting and mold making materials. Let’s do this again some time!
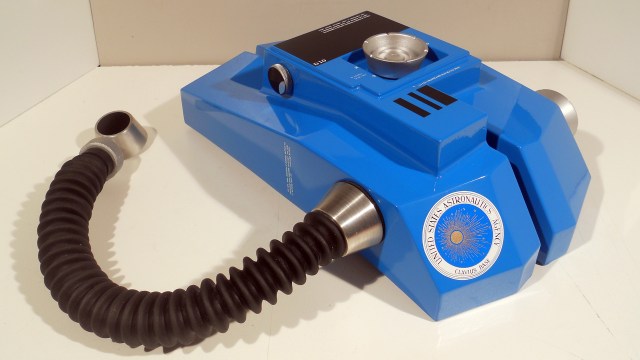
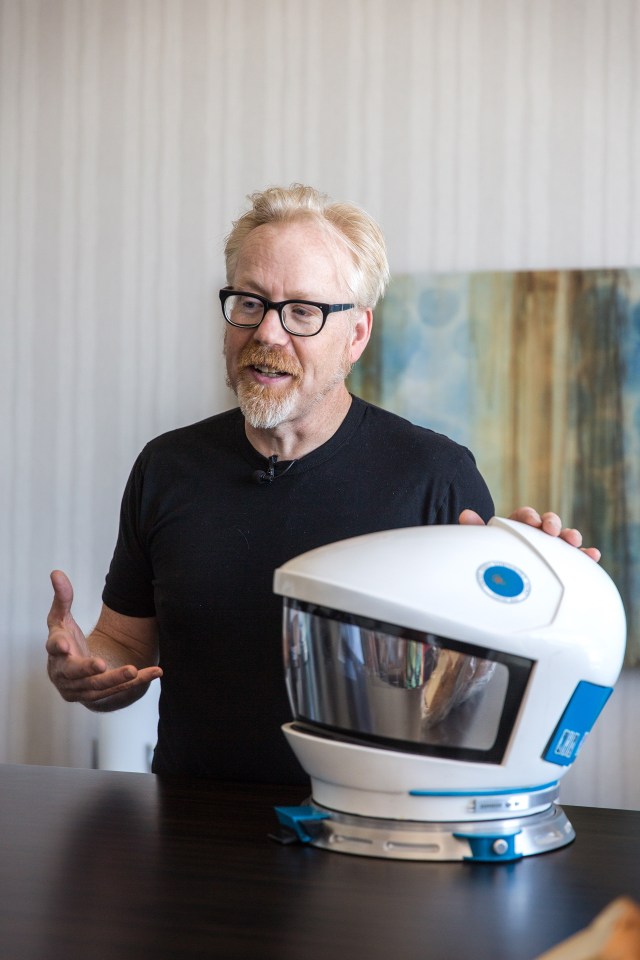
Adam’s 2001: A Space Odyssey Spacesuit Cooling System
Photo Gallery: 20140928_1483
As promised, close-up photos of the custom cooling system used in Adam’s 2001: A Space Odyssey Clavius Base spacesuits. We talked about how these worked in the most recent episode of Still Untitled!
Adam’s 2001: A Space Odyssey Spacesuit Cooling System
Photo Gallery: 20141119_3046
As promised, close-up photos of the custom cooling system used in Adam’s 2001: A Space Odyssey Clavius Base spacesuits. We talked about how these worked in the most recent episode of Still Untitled!
Adam’s 2001: A Space Odyssey Spacesuit Cooling System
Photo Gallery: 20141119_3048
As promised, close-up photos of the custom cooling system used in Adam’s 2001: A Space Odyssey Clavius Base spacesuits. We talked about how these worked in the most recent episode of Still Untitled!
Adam’s 2001: A Space Odyssey Spacesuit Cooling System
Photo Gallery: 20141119_3050
As promised, close-up photos of the custom cooling system used in Adam’s 2001: A Space Odyssey Clavius Base spacesuits. We talked about how these worked in the most recent episode of Still Untitled!
Adam’s 2001: A Space Odyssey Spacesuit Cooling System
Photo Gallery: 20150530_7177
As promised, close-up photos of the custom cooling system used in Adam’s 2001: A Space Odyssey Clavius Base spacesuits. We talked about how these worked in the most recent episode of Still Untitled!
Adam’s 2001: A Space Odyssey Spacesuit Cooling System
Photo Gallery: 20150530_7178
As promised, close-up photos of the custom cooling system used in Adam’s 2001: A Space Odyssey Clavius Base spacesuits. We talked about how these worked in the most recent episode of Still Untitled!
Adam’s 2001: A Space Odyssey Spacesuit Cooling System
Photo Gallery: 20150530_7182
As promised, close-up photos of the custom cooling system used in Adam’s 2001: A Space Odyssey Clavius Base spacesuits. We talked about how these worked in the most recent episode of Still Untitled!
Adam’s 2001: A Space Odyssey Spacesuit Cooling System
Photo Gallery: cimg1136
As promised, close-up photos of the custom cooling system used in Adam’s 2001: A Space Odyssey Clavius Base spacesuits. We talked about how these worked in the most recent episode of Still Untitled!
Adam’s 2001: A Space Odyssey Spacesuit Cooling System
Photo Gallery: clav-airh-connect
As promised, close-up photos of the custom cooling system used in Adam’s 2001: A Space Odyssey Clavius Base spacesuits. We talked about how these worked in the most recent episode of Still Untitled!
Adam’s 2001: A Space Odyssey Spacesuit Cooling System
Photo Gallery: img_0770
item
Adam’s 2001: A Space Odyssey Spacesuit Cooling System
Photo Gallery: img_4988
item
Adam’s 2001: A Space Odyssey Spacesuit Cooling System
Photo Gallery: 20141119_3048
item
Adam’s 2001: A Space Odyssey Spacesuit Cooling System
Photo Gallery: 20141119_3050
item
Adam’s 2001: A Space Odyssey Spacesuit Cooling System
Photo Gallery: air-hose-wc
item
Adam’s 2001: A Space Odyssey Spacesuit Cooling System
Photo Gallery: clav-airh-connect
item
Adam’s 2001: A Space Odyssey Spacesuit Cooling System
Photo Gallery: metal-p-02
item
Adam’s 2001: A Space Odyssey Spacesuit Cooling System
Photo Gallery: img_0771
item
Adam’s 2001: A Space Odyssey Spacesuit Cooling System
Photo Gallery: img_0772
item
Adam’s 2001: A Space Odyssey Spacesuit Cooling System
Photo Gallery: img_0773
item
Adam’s 2001: A Space Odyssey Spacesuit Cooling System
Photo Gallery: img_0774
item
Adam’s 2001: A Space Odyssey Spacesuit Cooling System
Photo Gallery: img_4989
item
Adam’s 2001: A Space Odyssey Spacesuit Cooling System
Photo Gallery: img_4990
item
Adam’s 2001: A Space Odyssey Spacesuit Cooling System
Photo Gallery: img_4993
item
Adam’s 2001: A Space Odyssey Spacesuit Cooling System
Photo Gallery: img_5349
item
Adam’s 2001: A Space Odyssey Spacesuit Cooling System
Adam, Norm, and Will put a bow on Comic-Con, talk about the construction of Adam’s Clavius suits, and talk common sense about the wrong time to fly your UAV/UAS.
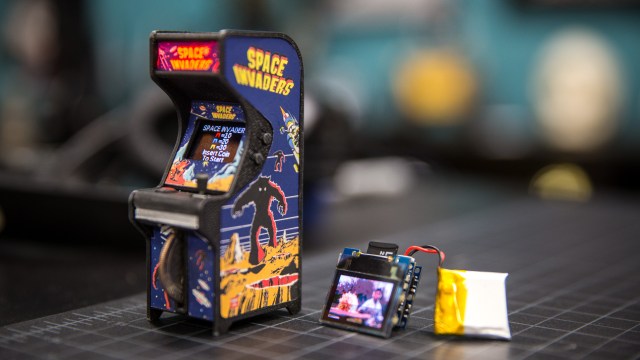
This week, Norm shares a microcontroller system that’s designed to run truly tiny electronics projects. Tinycircuits is an Arduino-compatible hardware platform with stackable expansion boards that allow you to make wearable lights, a simple smartwatch, or even a tiny arcade cabinet. It’s really neat! (Update: Tiny Circuits has launched a Kickstarter for this cabinet. Check it out!)
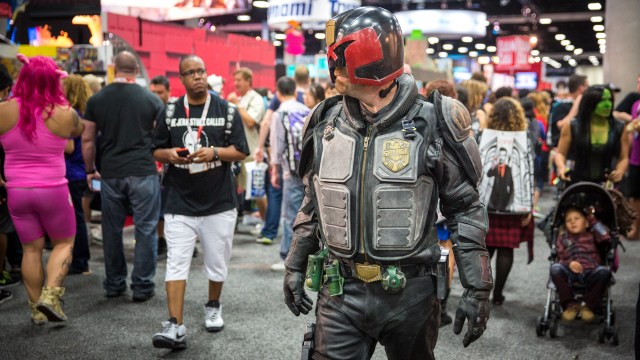
For his final cosplay incognito walk through this year’s Comic-Con, Adam suits up as a Judge from the 2012 Dredd film. His helmet, tactical vest, Lawgiver pistol, and all the other pieces of the uniform are painstaking reproductions, weathered to look like they’ve seen some combat. Watch as Judge Savage meets up with a group of other Dredd cosplayers to patrol Comic-Con!
This week, Will, Norm, Jeremy, and Patrick Norton debrief on Comic-Con, discuss the unlocking of Pluto’s secrets, the end of Moore’s Law, Flash zero-day exploits, and more. Enjoy!