


Before shooting this week’s Show and Tell, Norm assembles one of the cardboard Kinetic Creatures to display on the set. Follow along as Norm builds the Geno Giraffe kit for the first time, in real-time.
Episode 199b – Bitcoin Explained – 2/13/2014

Premium: Putting on Adam’s Mercury Spacesuit
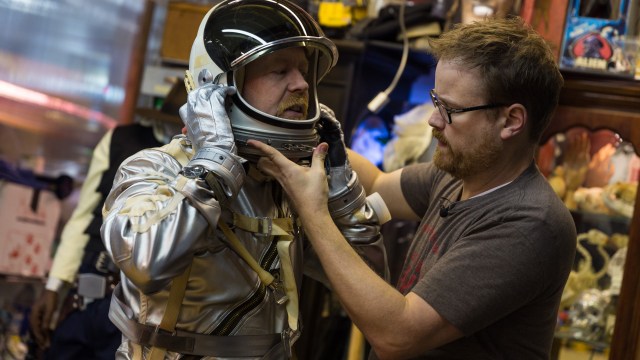
The full unedited cut of Adam putting on his new full-body Mercury spacesuit replica, with Will’s assistance. Fits over everyday clothes just fine!
Photo Gallery: Adam’s Mercury Spacesuit Replica
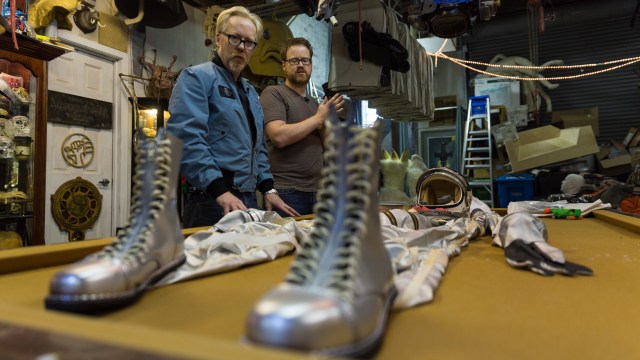


Adam Savage’s Mercury Spacesuit Replica
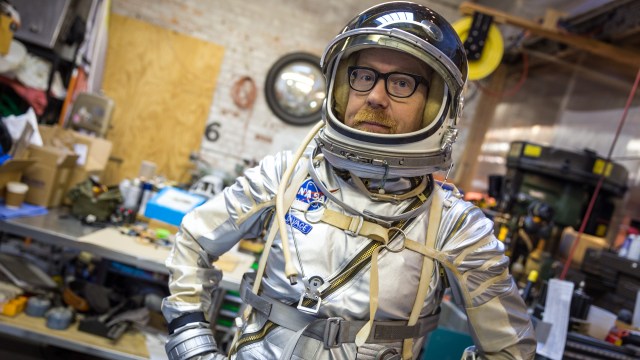
A double dose of space awesomeness! Adam shares with us two prized possessions: a perfect replica of the coveted NASA-issued blue flight jacket worn by Apollo astronauts, and a recreated silver full-body pressure suit used in NASA’s Mercury missions. Yep, it’s the iconic U.S. Navy Mark IV suit designed by B.F. Goodrich Company and worn by astronauts like John Glenn. Watch the unedited suit test here!
True Detective – 2/11/2014

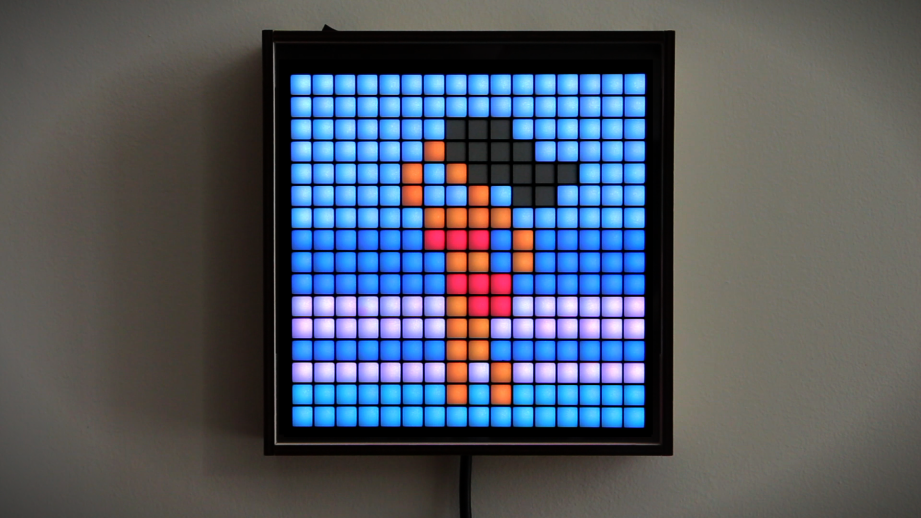
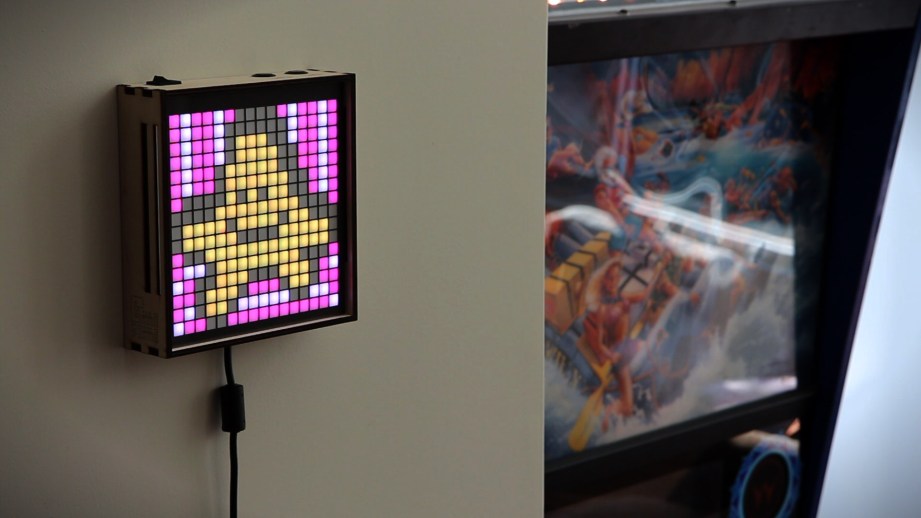
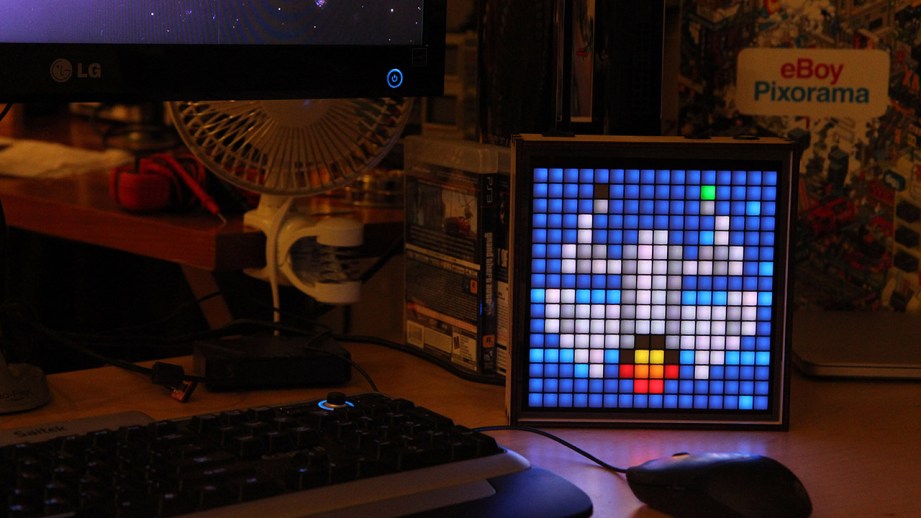
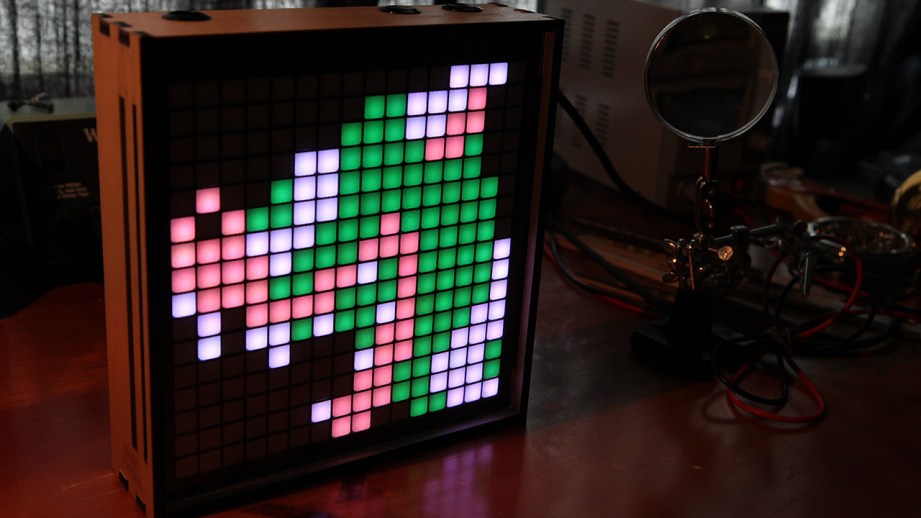
Maker Profile: Jeremy Williams’ LED Pixel Art Game Frame

For those of you who’ve been following this project since last summer, today is an awesome day: Jeremy Williams just launched his Game Frame Kickstarter. Jeremy–a friend of Tested who you may have heard on our podcast–first showed us his Game Frame prototype when it brought it to our office last year for video demo. It was just a fun personal project–Jeremy loves 8-bit pixel art and wanted to find a way to display it on his walls. And that’s what’s so great about this project; he wanted something that didn’t exist, so he made it. And taught himself more about Arduino programming and LED electronics along the way. There was no plan to make more than just the one; Jeremy’s in the making-shit-that’s-cool business, not the empire business. It was the feedback from you guys in that first Show and Tell that inspired Jeremy to keep iterating on his prototype and design a Game Frame that would be cheaper to build and easier to use. And based on our conversations with Jeremy since last summer, it was task much easier said than done.
I asked Jeremy to share the story of the new Game Frame and explain some of the technical challenges he had to tackle to make this project a reality.
Let’s start with the beginning. In conceptualizing the game frame, what were your goals and how did it inform the technologies and design you chose for it?
It’s called pixel art, so why not frame it? There are really two factors, at least for me: nostalgia and artistic merit. The earliest game sprites are powerful purely as memory triggers. Just seeing them is enough to make me smile about the “good ‘ol days,” when arcades were rotting our youth, MTV played videos, and email was something you sent on a BBS. A roll of quarters at age 10, in 1984, was worth its weight in gold — but I’d rather have the quarters. I played the hell out of Defender, Joust, Frogger, Burgertime, Tron. I can still hear the sound of an arcade. That’s just part of growing up in that generation. So I thought it would be cool to blow up some of that early art just to remind me of my youth.
But there’s also the pure artistry of it all. I’ve noticed that whenever computers are involved, people’s artistic radar gets scrambled. From video games, to the demo scene, to Pixar, computer assisted mediums just haven’t gotten their due recognition. With pixel art it’s especially frustrating because it’s so accessible. The problem with more modern computer-assisted crafts is most people can’t grok the creative process, but with pixel art you can. It’s painting with squares, and the best examples of this are an expression of sheer cleverness and minimalism. Maybe people don’t generally think of old game art as something that has inherent value outside of the game, but I do. I can watch the four frames of the Joust buzzard walk cycle any day, and always be inspired.
As for Game Frame tech, it turns out that if you want to frame early arcade sprites you need at least 16×16 resolution. That will get you comfortably to about year 1984, plus lots of NES content. Since I already had experience making an Arduino/microSD project, that was the most comfortable path, and the limitations of the Arduino chip map nicely to that number of pixels.
What were the technical or design hurdles to getting the specific look you wanted, and figuring out the electronics for the system?
“Pixel art is painting with squares, and the best examples of this are an expression of sheer cleverness and minimalism.”
Oh, man. For starters, the original prototype used LED strips that I cut and soldered into a grid. This took about four hours, and was obviously not acceptable for mass production. The Game Frame only became a serious possibility when I sourced a newly fabricated 16×16 LED grid from China. It made assembly practical, and the frame was based around its dimensions.
The original prototype ran on Raspberry Pi because code existed to display bitmaps on LED grids. Using Arduino meant writing that code myself, but I’m not a ninja coder. Thankfully code did already exist for displaying BMP files on LCD, and also separately for driving LED strips (thanks Adafruit!). I just had to connect the two techniques, and teach the code about the grid structure. By sheer luck, these particular LEDs buffer colors in nearly the same format as BMP files (a-ha!), so it really wasn’t that bad.
Early on, I couldn’t find the right diffusion material for the screen. Most plastics I tried were either too opaque or too transparent. It wasn’t until I took an LED down to San Francisco’s art mecca, Flax, that someone directed me toward various weights of vellum. That ended up being perfect.
The first prototype we saw a year ago looked great and ran on a Raspberry Pi. In designing the current version for Kickstarter, what refinements did you want to make and how did you get there?
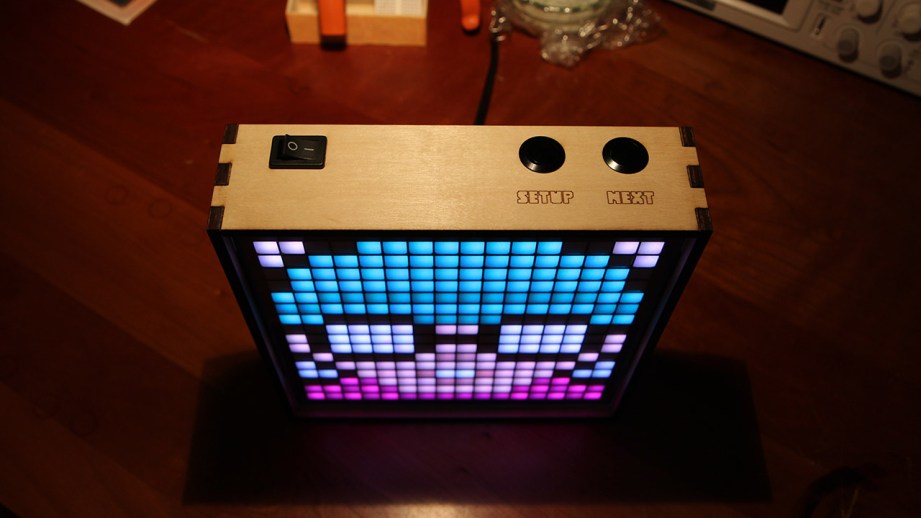
The transition from Raspberry Pi to Arduino was a big one, and it’s such an improvement. Now it boots instantly, maximizes system resources, and doesn’t need to be on stinking Wi-Fi. I hated that about the prototype. Now you just put your graphics on a microSD card, and away you go.
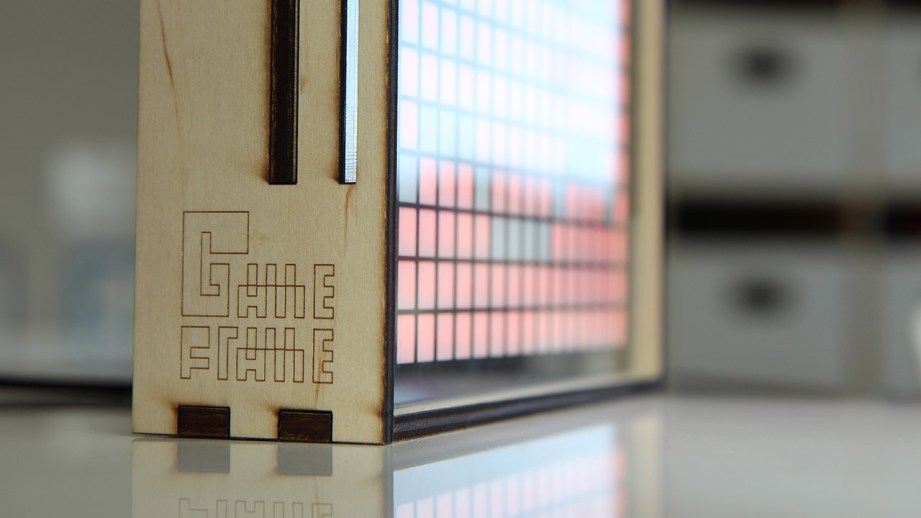
The original frame was really flimsy. It was cut from acrylic, sagged when hung up, and literally held the LEDs in place with a sheet of cardboard. It had screws all around the edges; really embarrassing. The new frame is 5mm wood, super sturdy, and is much more pleasing to handle.
“The biggest frame challenge was producing the thick interior mesh that isolates each LED light to its own pixel.”
The biggest frame challenge — easily — was producing the thick interior mesh that isolates each LED light to its own pixel. Early versions used 30 pieces of crisscrossed paper, but these were time-consuming to assemble and prone to heat problems. I tried laser cutting special model airplane Styrofoam, but it couldn’t handle the thin width of the walls between all 256 shafts. I got quotes from several CNC, laser cutting, and injection molding companies, and the ones that said it was even possible were cost prohibitive. I was about to ditch the project when I found one of those great partners that turns everything around. His innovative process produces a perfect, thin, opaque mesh from a single piece of plastic. Thank goodness for ingenuity.
Let’s talk about the art. How does the Game Frame process art, and what kind of animations can it show? Would it be possible to string several Game Frames together?
Game Frame loves 24-bit BMP files. It eats those for breakfast, lunch, and dinner. I know, it would be awesome if it supported PNG, animated GIF, or played Matroska files. That would be super sweet, but we’re talking about a 16 Mhz Arduino here. (Sorry, I’m being preemptively defensive.) The fact is, BMP is the most efficient format for this purpose, and allows for the best animation frame rates.
If you just want to show a single image, you just name your graphic 0.bmp and drop it into a folder with a name of your choosing. You’re done. If you want to create an animation, just add more files (e.g. 1.bmp, 2.bmp, etc.); thousands of frames if you want. It will loop through them until it’s time to transition to the next folder. However, the real fun comes when you add a special text file. This unlocks a bunch of animation controls that I hope people really dig into, like frame rate and moving your images across the screen. One of my favorite techniques is to make a film strip style graphic, with each frame of animation above one another in a tall, high resolution file. Then, you display it with instructions to scroll 16 pixels every frame, essentially projecting each “animation cell” like a movie projector does film. Since the SD card doesn’t have to seek for new files, you can achieve the best frame rates with this method (around 24 fps). You can literally convert video to 16×16 and show it this way.
Stringing multiple Game Frames together is enticing. Due to memory constraints, one motherboard can’t really drive more than its own pixels, and pushing enough power for multiples would be dicey at best. Out of the box, you could certainly setup the order of animations on SD and then turn on multiple Game Frames simultaneously. That would get you most of the way there, though they might fall out of sync over time. If this was a problem, you could add code to send/receive trigger signals from the expansion pins I exposed on the PCB, and use that to get perfect sync.
How can someone design their own 8-bit style art to put on the Game Frame?
Easy. Just buy a 6502 chip from eBay, learn assembly language… no, wait. Fire up an image editor and make a 16×16 image. Click around, save it out. Done. There are actually some great tools expressly made for pixel painting, including a good one I use on the iPad called Pixaki. It supports layers and outputs them as a Photoshop PSD file. There’s also the excellent “The Grix” app by my brothers at eBoy.
“Creating pixel art at this resolution is like writing a haiku. Anyone can do it in a matter of minutes, but it really makes you appreciate the good stuff.”
Creating pixel art at this resolution is like writing a haiku. Anyone can do it in a matter of minutes, but it really makes you appreciate the good stuff.
After the Kickstarter, what are your plans for the Game Frame design? Is it something that you hope users will modify and hack to iterate on the idea?
For starters, I just can’t wait to see what animations people make. I’ll have to setup a forum for that, where people can share tips and artwork. Beyond that, I’ll release the source code. It’s an interesting platform, and I’d love to see hackers transform it. There are expansion pins on the back that people can use to connect game controllers or other i/o devices. There’s even an Arduino NES controller library, so you could hook up a gamepad in about an hour with the right tools. Maybe someone will make games, an email notifier, twitter reader, or just code some abstract graphic patterns. This is all theoretical, and who knows if the Kickstarter will even succeed — let alone get into the right hacker hands — but I’m hopeful. Should someone modify the source code, it’s pretty easy for anyone else to update their Game Frame firmware as long as they have a USB FTDI adapter.
The Game Frame reward is only available for backers in the US. Any hope for people living elsewhere to get one?
This is a big point of frustration for me too! Unfortunately, distributing electronics outside the US requires both CE and RoHS certification, which is crazy expensive. Like, cancel-the-whole-project expensive. I will continue to research options, but I can’t ship Internationally until I can make it work financially. In the meantime, I suppose there’s nothing stopping someone else from shipping them overseas.
Update: Jeremy has now opened up a reward level for international backers and shipping!
Photos courtesy Jeremy Williams
Maker Profile: Alejandro Palandjoglou’s Affordable CNC Chairs

What happens when you put traditional artists in a high-tech workshop with access to the latest in CNC equipment? That’s one of the goals of Autodesk’s Artist in Residence program, and this week, we’re profiling a few of the makers given free rein in this awesome workspace.
Of all the makers I spoke to at Autodesk’s Artist In Residence program, Alejandro Palandjoglou has approached his residency with the most practical, real-world applications in mind. A 31-year-old industrial designer from Buenos Aires, Argentina, Palandjoglou hoped to use his time in Autodesk’s workshop to explore the artistic and personal side of his work.
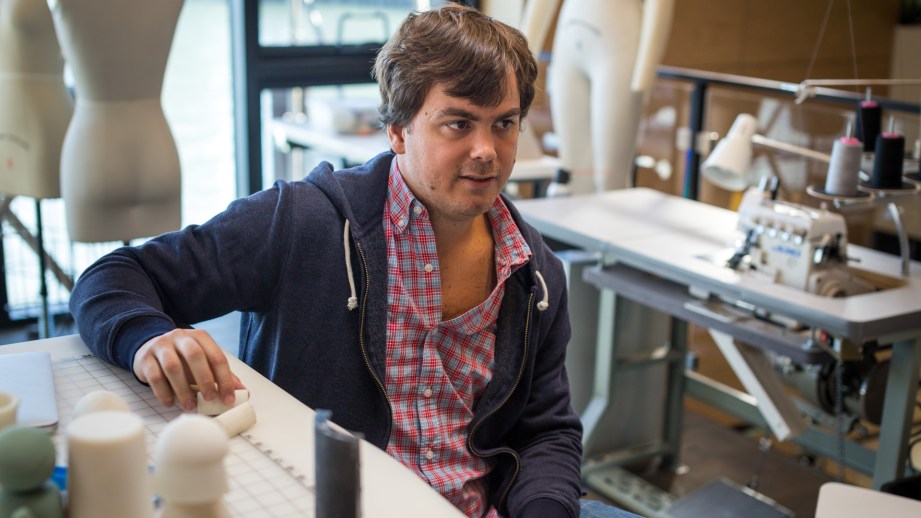
Palandjoglou’s background is in the furniture industry — he founded a furniture company in 2007 that continues to operate in Buenos Aires. He moved to the US in 2010 for a Masters in Product Design at Stanford University and has been living in the Bay Area working as an independent product designer ever since. But while he says he’s happy doing contract work, Palandjoglou laments how there is little opportunity for art exploration while dealing with the pressures of deadlines and client expectations.
“I had a bunch of side projects I wanted to work on,” Palandjoglou said, “and this seemed like a great place for that.”

Most of what Palandjoglou produces professionally is high-end furniture, so one of his goals for the residency program was to make an affordable chair. But not just any chair; Palandjoglou wanted to design a chair that could be easily made — and customized — using a CNC Router.
“I was really intrigued by the ShopBot,” Palandjoglou said, referring to one of the workshop’s computer-controlled cutting machines. “There are a lot of people that have a CNC router, so I specifically designed for that machine, using that as a limitation.”
Using Palandjoglou’s design, three chairs can be cut from a single 4′ x 8′ sheet of plywood.
In other words, his plan was to design a chair — a 3D model file, really — that would be easily accessible via the Internet, allowing anyone with access to a CNC router to cut a new seating set for themselves. Using Palandjoglou’s design, three chairs can be cut from a single 4′ x 8′ sheet of plywood. The whole process — both cutting and assembly — takes less than two hours.
Now, when Palandjoglou says that a lot of people have access to a CNC router, that’s speaking relatively, but considering the technology has been widely available for several decades longer than the burgeoning accessibility of 3D printers (not to mention a price tag in the tens- rather than the hundreds-of-thousands of dollars), he has a point. Considering that, Palandjoglou is most certainly not the first person to design a CNC chair, but he says that thus far he’s been unimpressed with the available options.
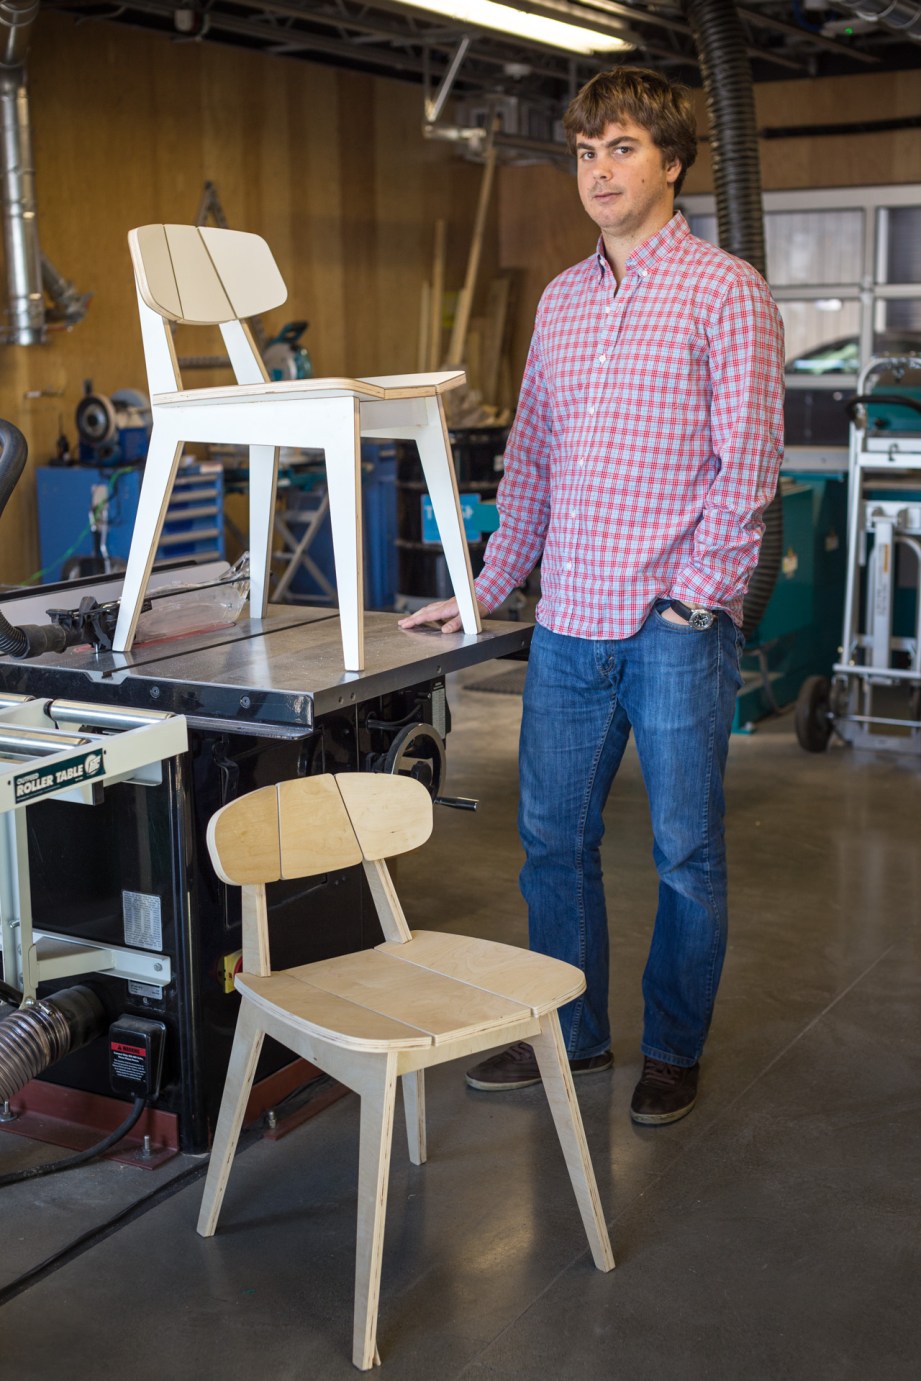
“I wanted to bring in some design aesthetics,” Palandjoglou said. “All of the ShopBot chairs that I’ve seen were kind of straight 90 degree angles, so with this I wanted to add more parts — more complexity.”
He found that complexity in how pieces of cut plywood fit together to form a chair. To Palandjoglou, most CNC chairs look somewhat cheap because they leave the joinery visible — that is, the sections where a protruding part of one piece of wood fits into the hole of another (think “insert rod A into slot B”). Thanks to the AIR program, Palandjoglou was able to learn about the Shop Bot’s different capabilities, namely the ability to cut pockets, letting him create a sleeker, more aesthetic chair.
“It took a while to design, but I’m happy with the results,” Palandjoglou said. “It still needs a little work, but it’s good enough for people now to take it to the next level.”
By releasing the design files out to the internet, Palandjoglou hopes the chair will change and evolve, taking all manner of form as people add their own personal touches. For example: one person might want to raise the back, while another could lengthen the legs and turn it into a stool. “I think there’s a lot of potential,” Palandjoglou said. “It’s not just about giving them the file, but incentivising people to customize the design.”
Another of Palandjoglou’s projects draws on his background in Industrial Design. In working with architects, he says they often mention having to adapt their designs to the availability of different fixtures. Thus far, people are limited when designing their homes by what they can pick out of a catalog — “why not design it themselves?” he asks.
In response, Palandjoglou is creating a line of 3D-printable door handles, faucets, and other fixtures (even toys). Like the chair, he hopes the designs will evolve over time and, especially as desktop 3D printers become more and more accessible and ubiquitous, be able to provide a cheap and easy way to customize and truly personalize a home.
Episode 199a – Woodworking Today – 2/6/2014

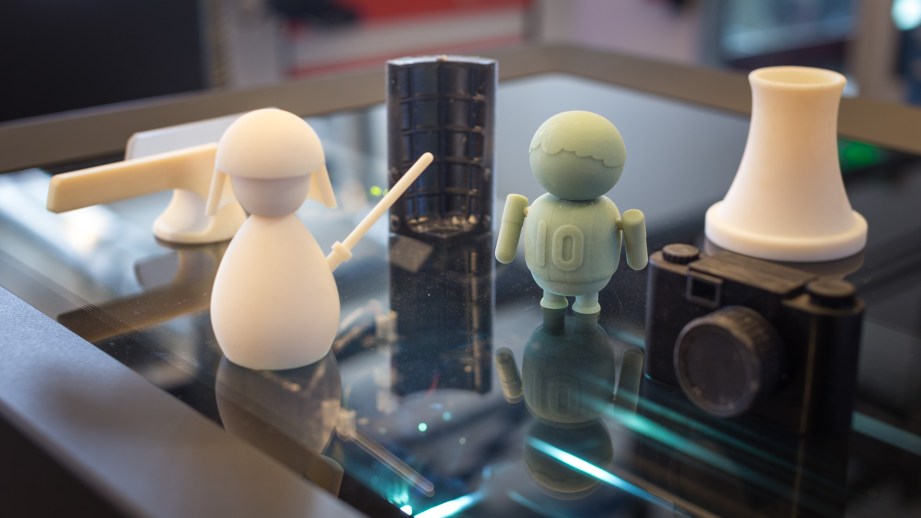
Maker Profile: Taylor Wolf’s 3D-Printed Paper Sculptures

What happens when you put traditional artists in a high-tech workshop with access to the latest in CNC equipment? That’s one of the goals of Autodesk’s Artist in Residence program, and this week, we’re profiling a few of the makers given free rein in this awesome workspace.
At 24, Taylor Wolf is one of the youngest participants in the Autodesk AIR program. Both an artist and a chef, he has worked in everything from the mediums of collage and sculpture to the kitchens of a catering company, food truck, and myriad restaurants. But while these two areas of interest have seemingly little to do with one another, here at Autodesk, Wolf hopes his two worlds might collide.
“In my mind they come from the same place,” Wolf said, “but part of what I’m trying to do here is think of ways that they can be presented together, so the experience of eating is a similar aesthetic experience to viewing a sculptural work.”
On the more traditional artistic side, Wolf’s background is in 2D collage and 3D sculpture, or as he prefers to think of it, “three-dimensional collage.” Before moving to San Francisco in late 2013, Wolf lived in New Orleans, drawing inspiration from the raw materials and beautiful old wood salvaged from torn down houses.
His standard approach to a project is to begin with a material — maybe a chunk of salvaged wood — and little to no plan in mind, simply working with the form and seeing what might happen. Before joining the AIR program, Wolf had never done any work using 3D modeling or computer-aided design, so it was a struggle at first adjusting to having those kinds of tools at his disposal.
“At first it seemed counter-intuitive,” he said, referring to the idea of starting a project with a clear plan in mind — namely a 3D model — and the whole process being the problem-solving you go through in order to bring that idea into the material world. “At first I saw it as at-odds with what I was doing, but now I’ve started just going for it.”
To that end, Taylor’s artistic approach has evolved into one where he will scan or design and 3D-print an object, then take the machine’s output and do to it many of the same things he would have done to a piece of found wood. “I can cut it up or subject it to various mutilations — that kind of thing,” he said.
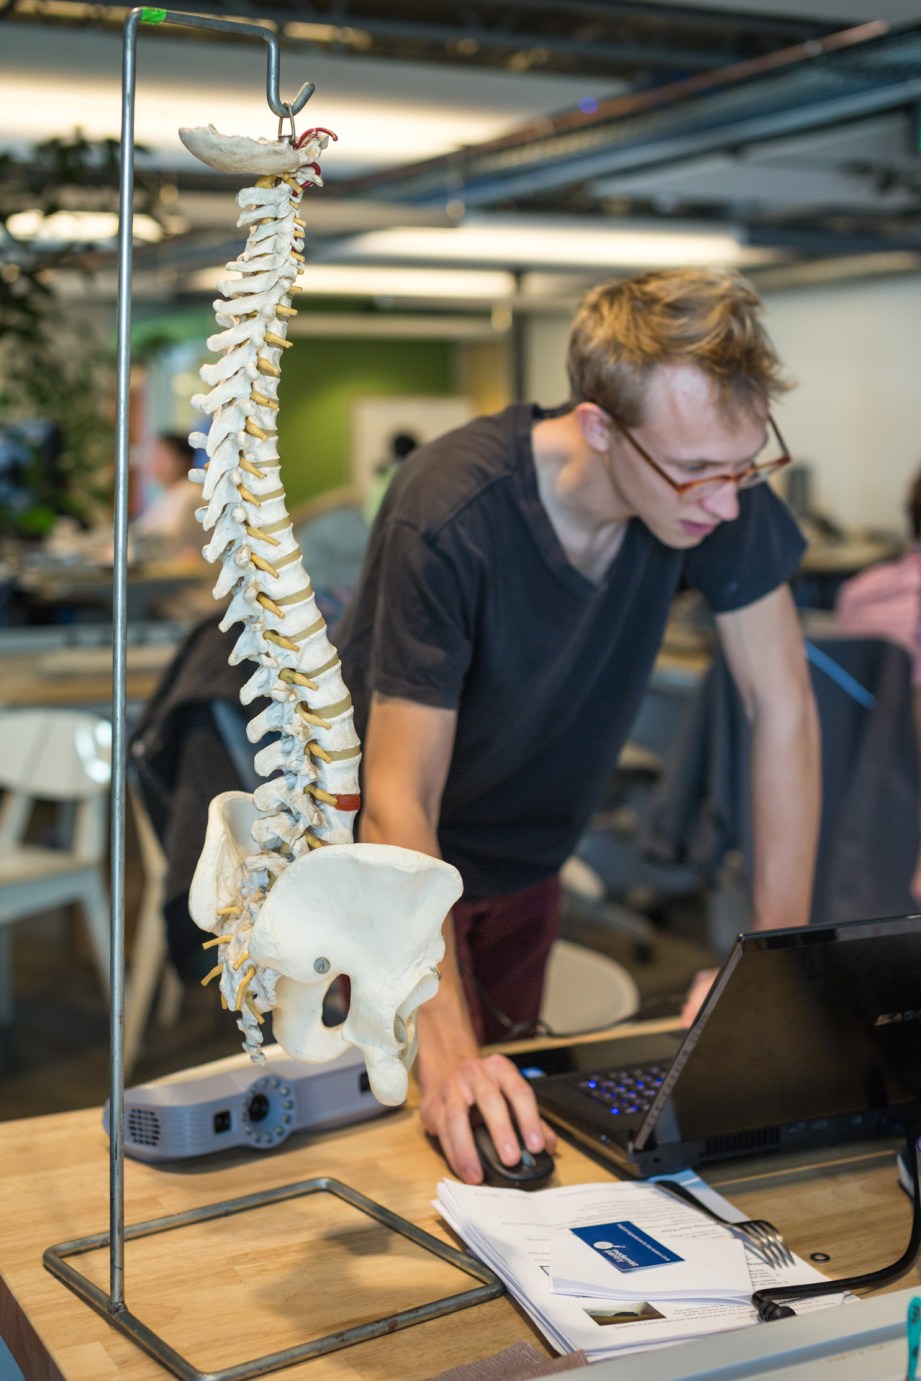
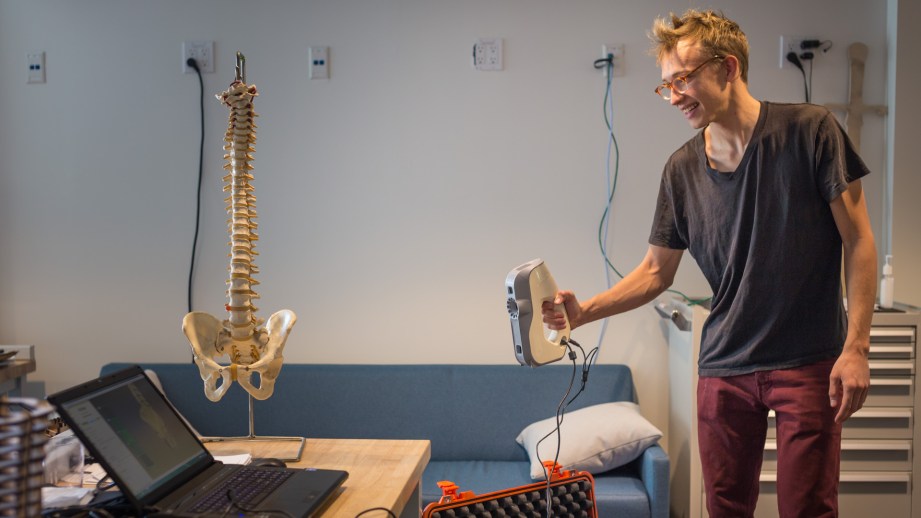
An example is one of Wolf’s projects — a relatively large pelvis and spine that he scanned from a skeletal model using an Artec Eva-M — a photogrammetric scanner that creates a 3D model by stitching together thousands of individual photographs.
“I still like having my hands on the material,” Wolf said, “which is also why the 3D scanner is really interesting for me — it feels like I’m painting a 3D model.”
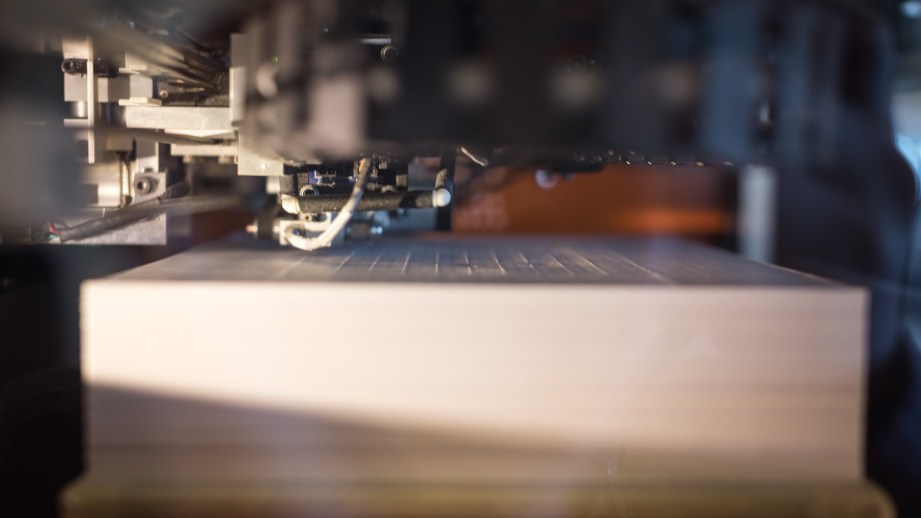
Once the 3D model file was complete, Wolf used it to print a sort of papercraft skeleton using a new kind of 3D printer that uses a ream of paper as material. The Mcor Iris printer glues sheets of paper together one by one, each time scoring the current top sheet with tiny holes so that — upon completion — the chunks of paper can be broken apart to reveal the desired object inside.
“I like the idea of putting something from bone into paper — having something really strong made out of a really weak material,” he said. And without the workshop’s technological and mechanical capabilities, a project of such nature would have been significantly more difficult.
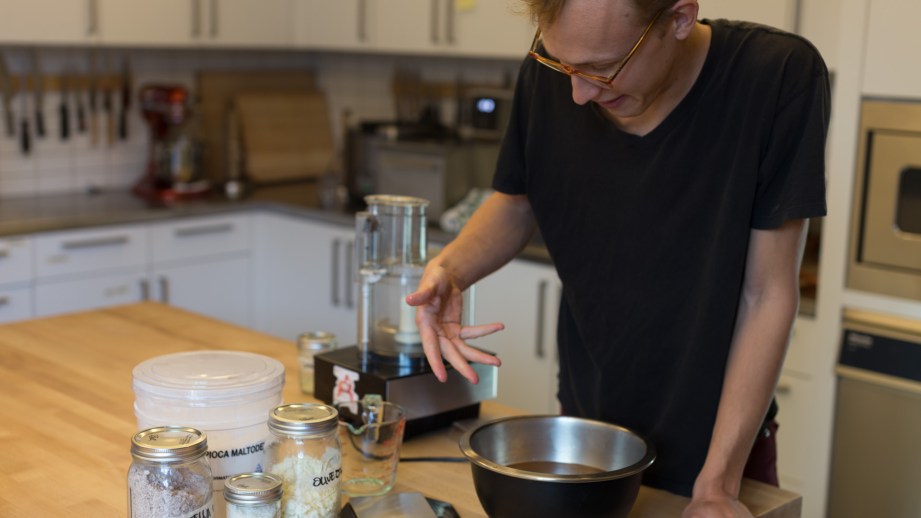
On the culinary side of things, Wolf is excited to explore a non-conventional approach to cooking. “Food is restricted by this utilitarian, restaurant model,” Wolf said. “Someone’s always paying for the product and they expect a certain level of quality — but that can restrict creativity in the kitchen.” But here in the Autodesk’s test kitchen, Wolf faces no such restrictions. He is free to let his imagination run wild, experimenting with new and nontraditional ways for a meal to be presented
One idea is to present a dish in the form of a shard of “glass,” a spoonful of powder, and a small glass filled with a clear liquid. The shard is not actual glass, of course, but rather a thin almost candy-like flavored wafer. He’s still working on getting the taste and texture just right, but the process involves mixing a flavor, such as juiced apples, with a substance called kuzu root starch — a kind of mountain potato that functions as an intense binding agent — then dehydrating a thinly spread layer of the mixture for around 24 hours.
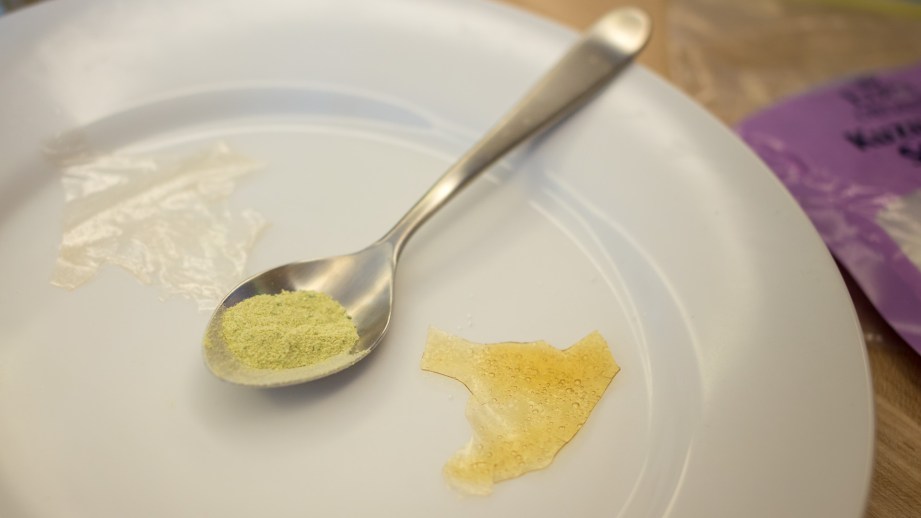
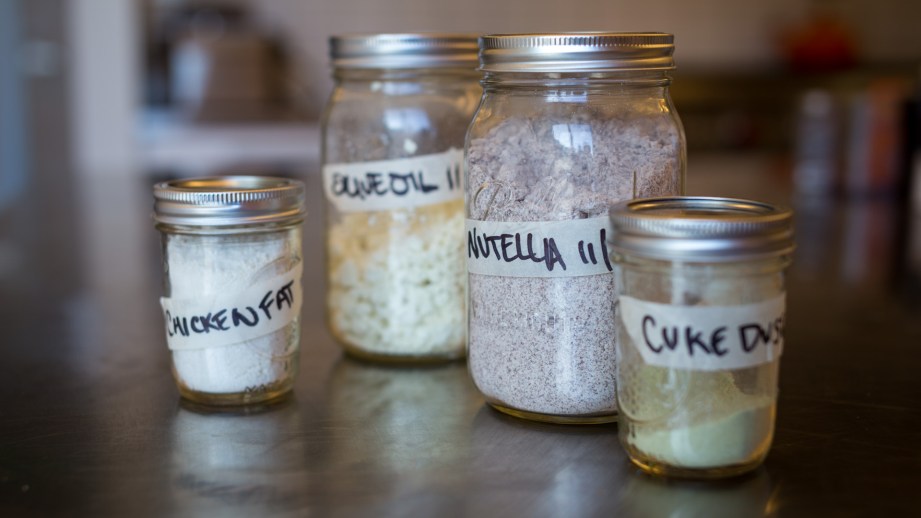
For the powders, Wolf has two primary methods. One involves mixing tapioca maltodextrin — a fat-absorbing powder — with various liquids to produce substances such as powdered egg yolks, powdered chicken fat, powdered olive oil, or even powdered nutella. Meanwhile, for fruit- and vegetable-based dusts, he simply dehydrates and then blends the fruit or veggie in question, resulting in powdered pomegranate or cucumber (his jar of which is affectionately labeled “cuke dust”).
Finally, Wolf has been experimenting with methods of clarifying liquids using natural chemicals. For example, he will cook a juice with agar agar powder — a kind of gelatin dried from seaweed — then straining the result through a cheesecloth in order to remove the coloring without affecting the flavor. His goal then being to serve a series of these totally informationless glass-powder-liquid dishes.
“I like the idea of totally subverting what you expect from the visual when you eat something,” he said, describing how this format hopes to change the eating experience experience so that a dish happens in your mouth rather than on the plate.
The projects Wolf and the other residents produce are innovative, exciting, and creative, but at the end of the day, it’s is less about what they end up doing, and more about what they could do. If not for the residency, an artist like Wolf might never have even thought to incorporate 3D scanning and printing into his sculpture work — let alone had access to the equipment it would require — or had the opportunity to experiment in a restaurant-level kitchen without restaurant-model constraints. Ultimately, the AIR program is about allowing your mind to run wild, unfettered by neither societal conceptions nor technological limitations. In a word, the program is about freedom.