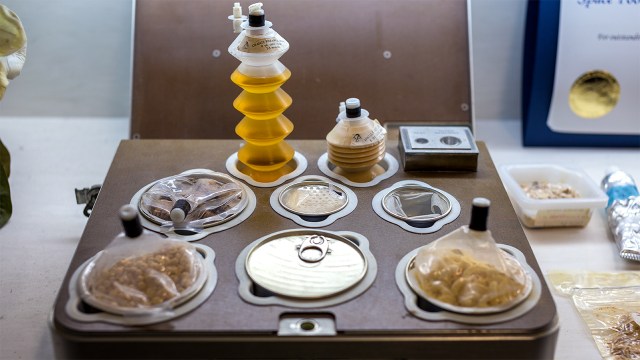
How does the dining experience in space compare to that on Earth? We visited NASA’s Space Food Systems Laboratory at the Johnson Space Center in Houston to learn about the history of space food and sample some of the same food that the astronauts on the International Space Station eat every day. Photos of the food here!
Chris Hadfield is a Space Oddity

After five months aboard the International Space Station, astronaut Chris Hadfield completes Expedition 35 and returns to Earth tomorrow in a Soyuz spacecraft. One of his final acts aboard: recording this amazing cover of David Bowie’s Space Oddity–the first music video filmed almost entirely in space. Have a safe trip back, Commander Hadfield.
Episode 169 – Jar Jar Binks Super Happy Facebook Adventure – 5/9/2013

This week, Loyd Case joins Will and Norm to discuss Ray Harryhausen, the Windows 8.1 Start Button, 3D printed pistols, the end of Adobe Creative Suite, Intel’s Haswell CPUs, and a whole mess of EA news. All that, plus what we’re testing and questions from the readers. Enjoy!
Tasting Astronaut Coffee with David Chang and Traci Des Jardins
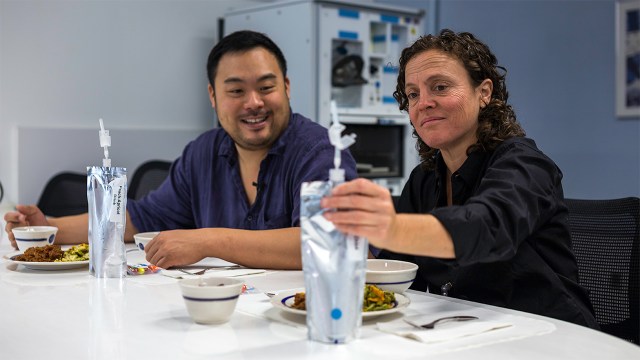
How do astronauts drink coffee in space? It comes in a pouch like a Capri Sun, and they drink it through a straw! Renowned chefs Traci Des Jardins and David Chang join us at NASA to taste the coffee that astronauts drink on the International Space Station. More from our trip to NASA all week!
The Volpin Project, Part 8: More Complex Moldmaking

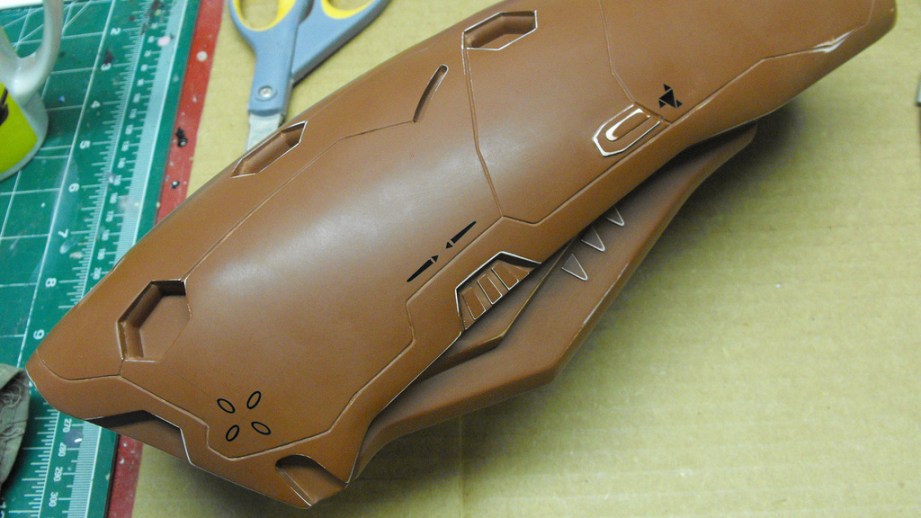
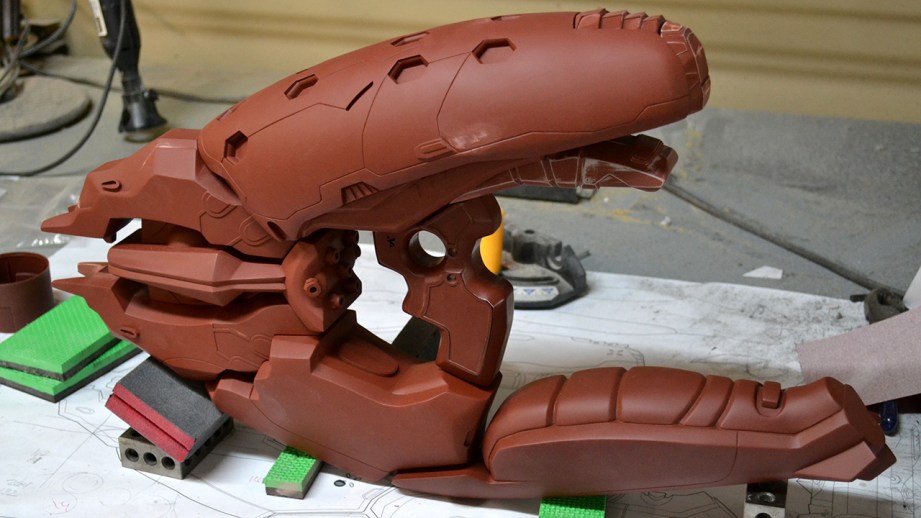
Last time, we covered the basics of simple block-style moldmaking. While this technique is versatile and can produce very good results, it’s often not the best solution for molding complex or larger parts. The Halo Needler prop has many parts both complex and large, so we’ll need to look into other methods. But first, a little show off of the completed master sculpts all sitting pretty. Now I just need to make copies of everything!
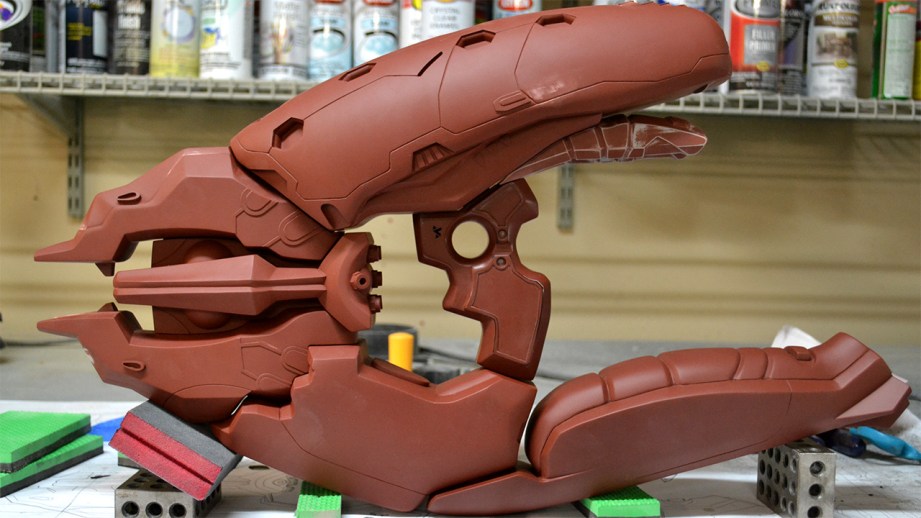
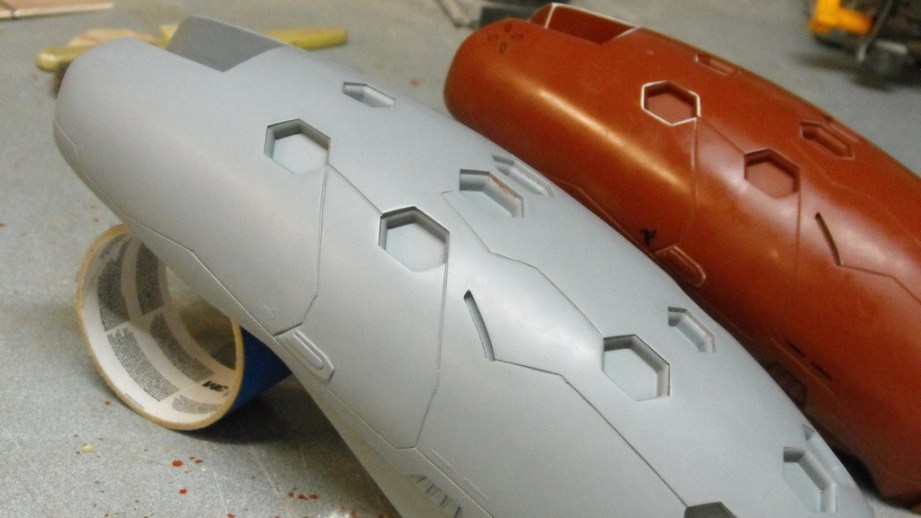
I’m going to use the upper casing as the test mule here for showcasing a technique called “brush-on” moldmaking. The basic premise is gradually building up layers of silicone onto a part until the desired mold thickness is achieved. It’s a bit more complicated than just slathering some rubber on though, so let’s take a look at the individual steps.
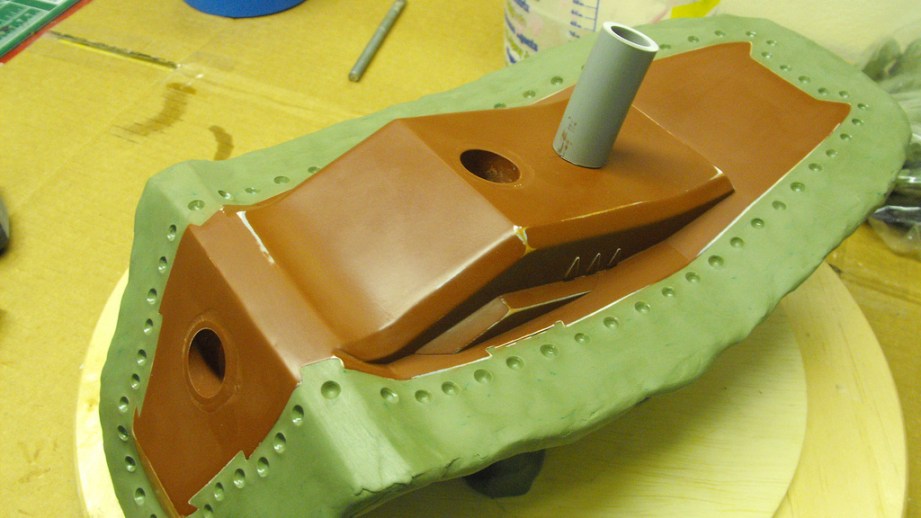
First off, you need to determine if your master part will need to be molded in sections; and if so, where should the seam line be positioned. There is a significant amount of spatial organization to consider – most notably where will seam lines be the easiest to conceal and clean up later – but also things like how easily the parts will be to de-mold and how the mold will be disassembled and reassembled after use. For this upper casing, I chose to follow the lower seam line around the base of the part, then follow this hard edge line up the front. Any seam lines will be easy to sand off in these areas, and the resulting silicone mold parts will be easy to remove from the cast part. I also added a section of ¾” PVC conduit to act as a pour spout. This area will be covered up by another part after assembly, so we don’t have to worry about losing any detail here. Non-sulfur clay is used to create the parting seam, and small indentations (registration keys, as we learned last time!) are marked into the clay.
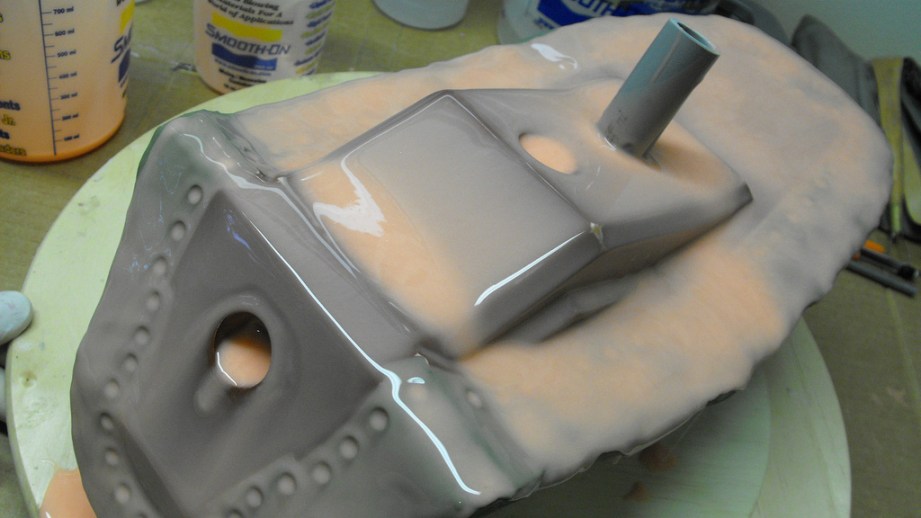
Brush-on moldmaking goes in stages, and arguably the most important step is the first coat. This is often referred to as a print coat and it is imperative that this layer be as bubble-free as possible. I start off by mixing a small amount of rubber (in this case I’m using Smooth-On’s “Rebound 25”) and adding a silicone thinner to lower the viscosity of the silicone and make it easier for air to escape. Contrary to the term, this layer isn’t “brushed” on, as that process would introduce more air into the rubber. Instead, a stippling motion is used with a small nylon brush to apply the rubber.
This is a very messy process, as thinned silicone tends to run off and drip over the sides of a molded part pretty frequently. Lay some paper down on your workspace and don’t wear your Sunday best. Of course, if you’re this far into the project and still sporting fancy clothes, you’ve likely ruined that outfit already.
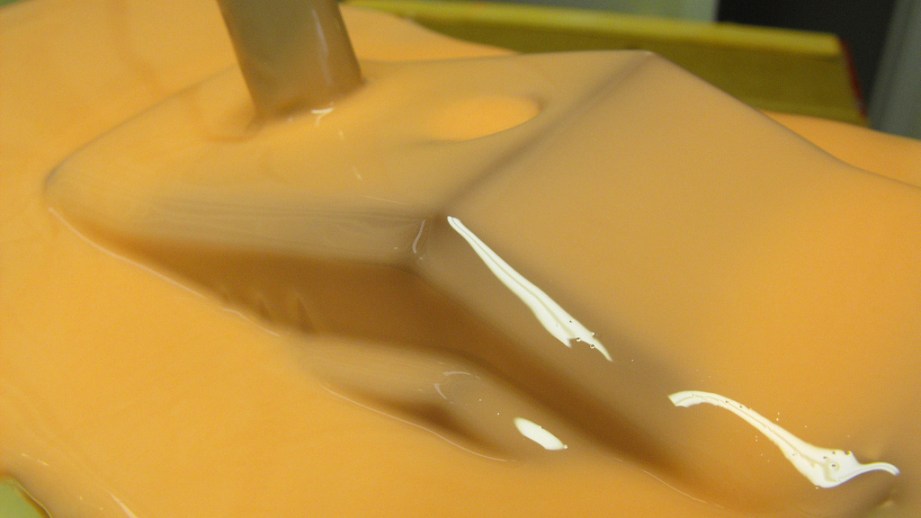
I typically add two coats of thinned silicone to build the print coat up to about 1/16″ or so. Make sure to brush the silicone out from the edges of your part at least an inch over the clay wall; don’t be stingy with the rubber here or you might end up losing a lot of time for nothing. The higher parts of the master sculpt will invariably have a thinner amount of silicone covering them, but that’s the nature of gravity. We’ll attend to this later.
Depending on the thickness desired, there are many steps one can do at this point. Typically my process is to do two thinned coats followed by one normal coat, then a thickened coat. Just as silicone can be thinned, a thixotropic agent can be added to make it thicker as well. Be careful with this stuff; adding too much to a batch of silicone will inhibit its curing and you’ll end up with a sticky mess that will never cure.
Thickened silicone will trap a lot of air bubbles, as it tends to have the consistency of cake icing, making it impossible to air to rise out of the liquid and escape. You should only start using thickened silicone once you’ve built up a print coat of about ⅛” to ¼”. In order to reduce bubbling, add the thickened rubber in thin passes to push out as much trapped air as possible.
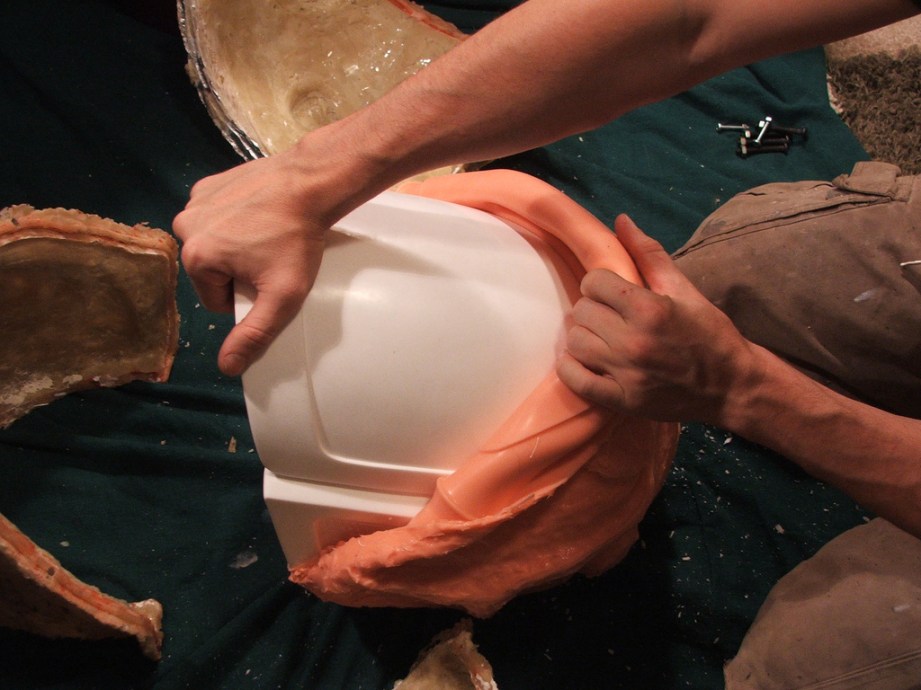
I’m going to take an aside here from the process define some more terminology. Since the end result of all this brushing is a coating of silicone about ½” thick, the mold will not be able to support itself. With the block molding technique covered last time, the final mold has enough rigidity due to it’s thickness to stand more or less on its own. Once we remove the brushed-on silicone however, the finished rubber will posses all the structural integrity of a deflated balloon. Pictured below is a helmet being removed from a brush-on mold, and you can see how much the silicone can deform when not being held in place.
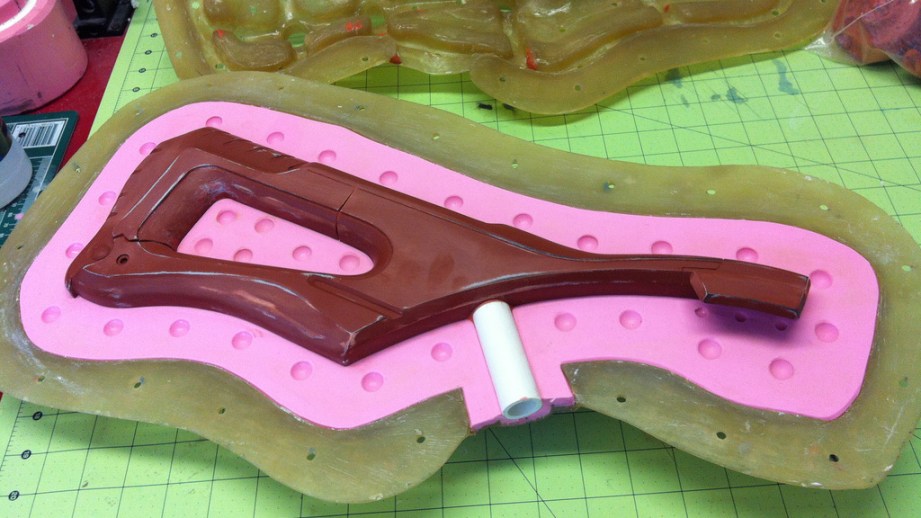
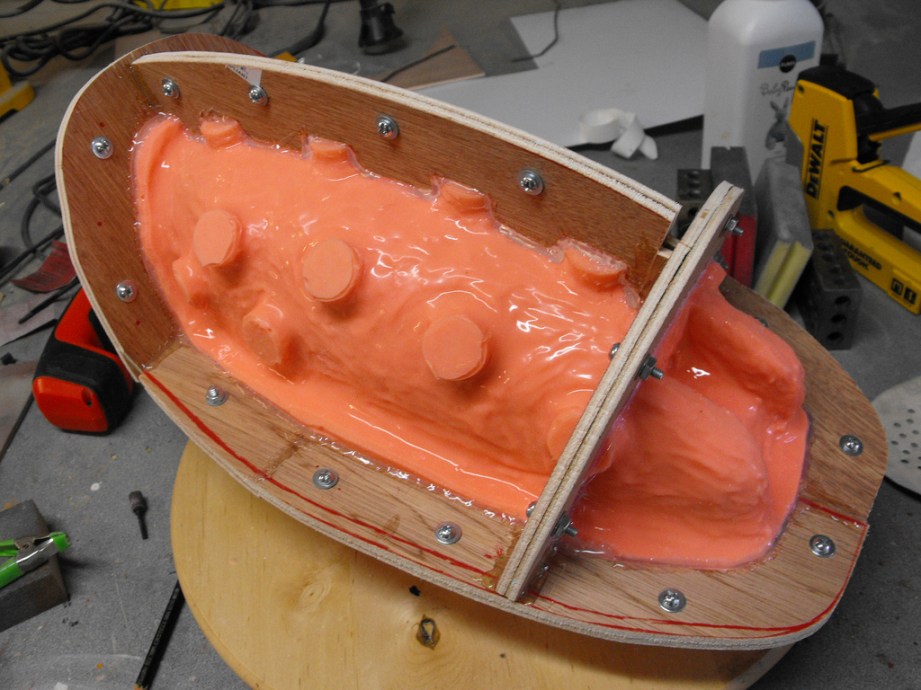
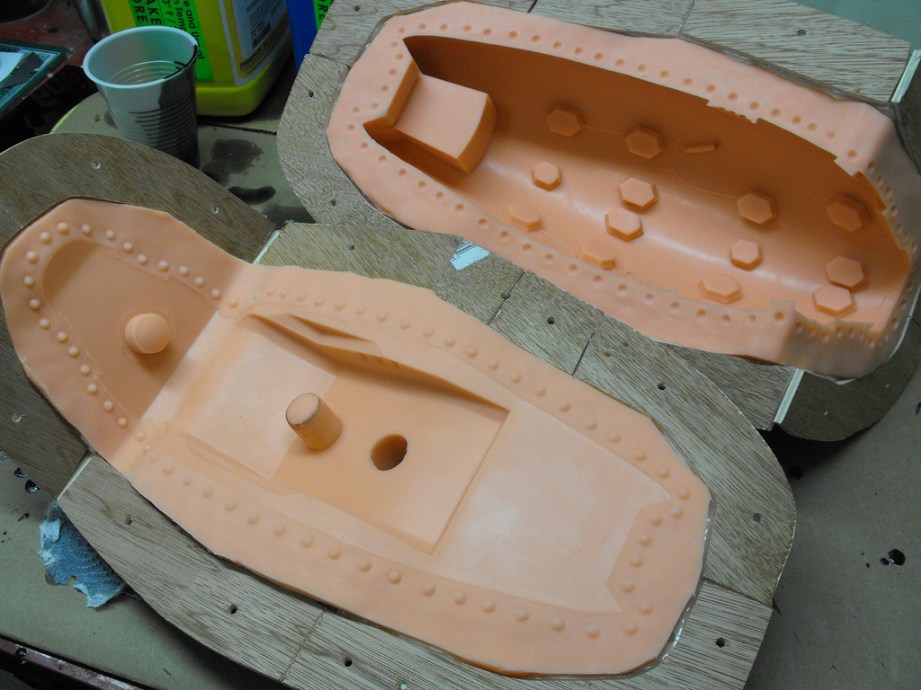
The solution to this is to make a mold jacket (sometimes referred to as a mother mold) which is a rigid shell that will hold the flexible silicone in place while the mold cavity is filled with your casting material. In the photo below, you can see the main elements of a mold being constructed in this manner. The red inner part is the master sculpt, the pink center material is the flexible silicone, and the outer shell is a polyester resin and fiberglass mold jacket.
Mold jackets can be made from a myriad of different materials, but the main property they must posses is rigidity. I’ve used polyester resin as well as plaster bandages and a Smooth-On material called “Plasti-Paste” with success. I have a friend that used an old pair of pants soaked in urethane resin. I can’t recommend that last one, but it worked for him.
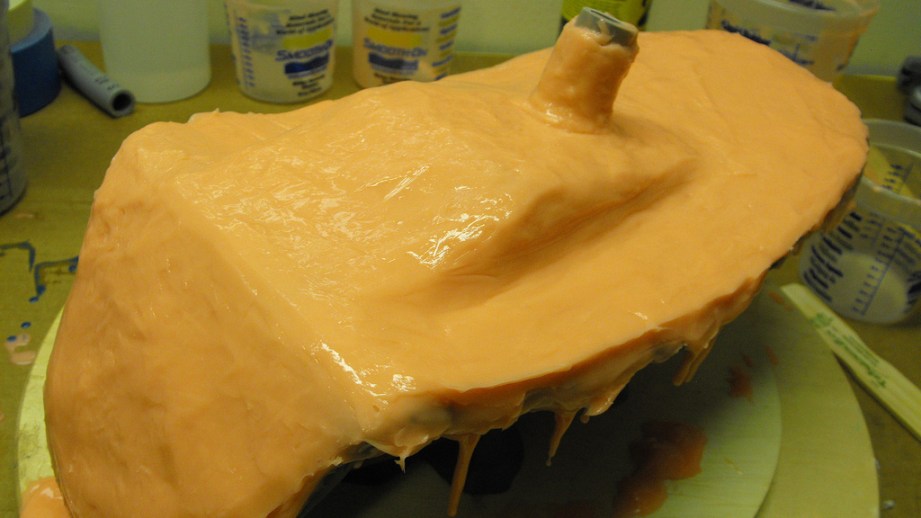
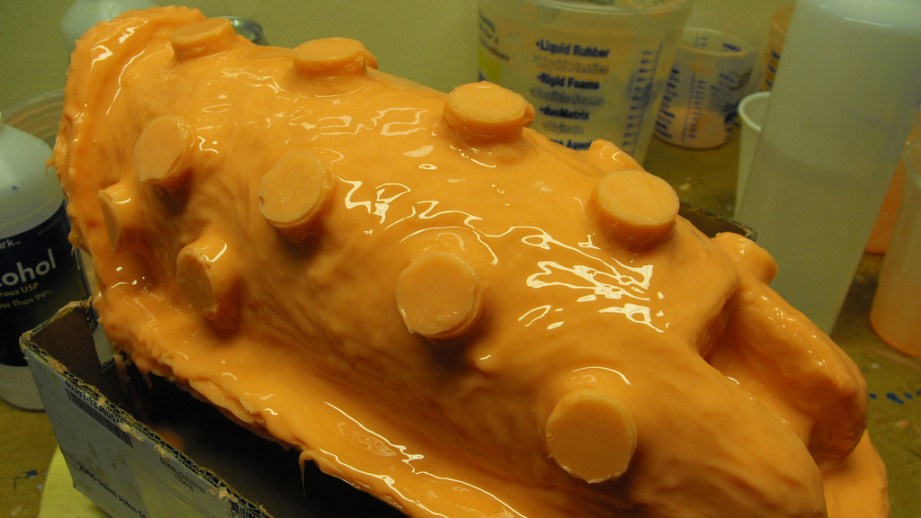
Just like our mold itself, the mold jacket needs a set of registration keys that will situate the flexible mold against the rigid outer shell. This ensures that the mold is positioned correctly in the mold jacket every time it is re-assembled. My personal trick with this is to cast a bunch of silicone plugs in some chopped up PVC pipe, then “glue” them to the mold with some thickened silicone once the last coat of rubber has gone on. Pictures might tell this story a bit better:
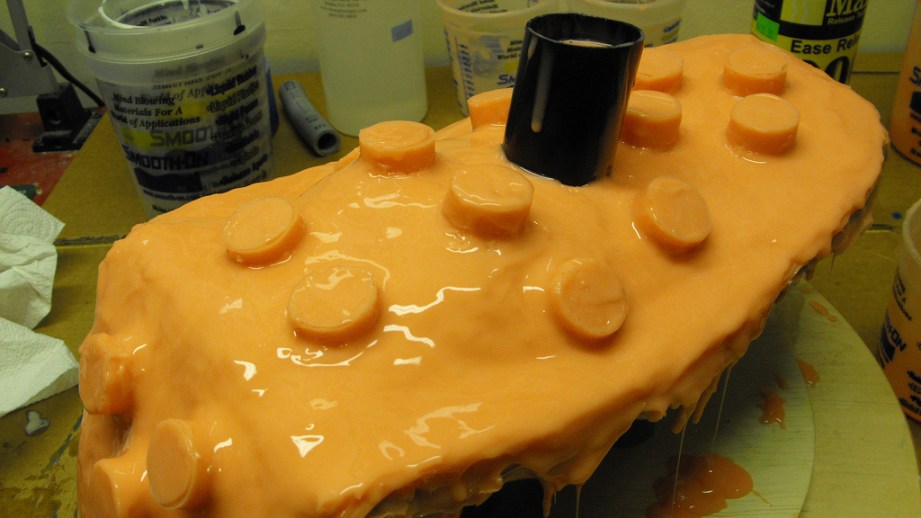
In the above image, the black pipe is there just to help build up silicone around the pour spout. The mold has been given one last coat of thinned rubber in order to make the surface smoother.
After this gooey mess has cured (between 6 and 24 hours, depending on the type of rubber you’ve used) you’ll need to flip your part over and repeat the process on the other side. Like the block molds, make sure to spray the seam line with mold release before applying more silicone to avoid encasing your part for all time. Additionally, pay very close attention to any small bits of clay that have stayed behind in the seam. These are easy to pick away now but will be frustrating artifacts to sand off of each casting.
Two thinned coats, one regular, one thickened, glue on registration keys, then another thinned coat. Allow to cure for 6 hours, then hit it with a blast from your spice weasel. That last part is optional.
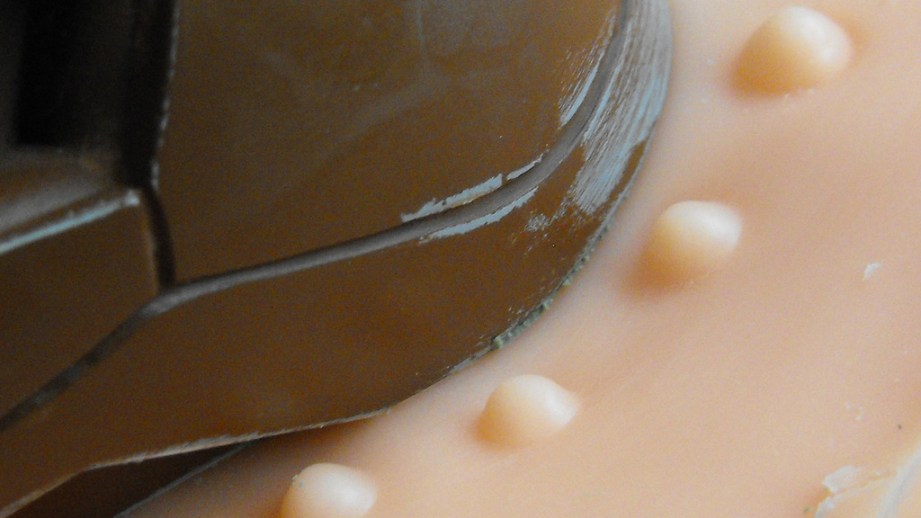
The seam line might look like a huge mess with all the stalactites of silicone dripping off, but a quick pass with an exacto will clean up the edge nicely. Building the mold jacket will be the next step in this process and having a clean even edge to work from will make the following stems far easier.
Mold jackets come in many different materials, but in creating them you’ll also need to understand how they’ll come apart. A term that comes up a lot in moldmaking (and vacuum forming) is an undercut – this is a recessed area that will lock the molded part or mold jacket into place. For example, if you poured a rigid material over a doorknob it would be impossible to extract the knob due to the undercuts on the part. A seam line on both halves will make it possible to remove the knob.
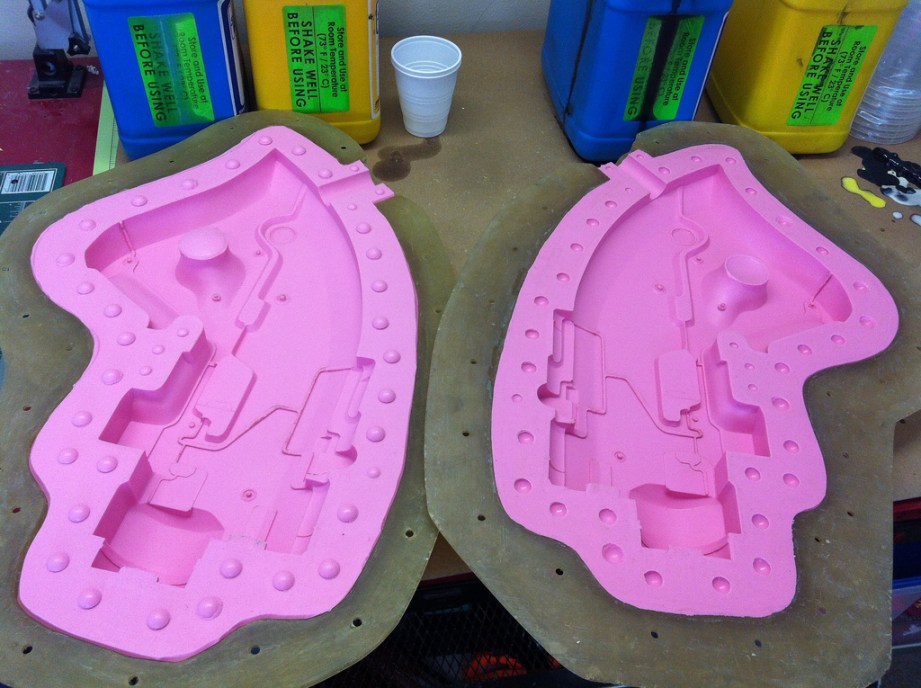
Similarly, mold jackets shouldn’t be a large rigid block poured directly over your mold. Some mold jackets, like the pink rifle mold below, can be 2-parts with a seam following the mold’s own seam. For more complex shapes like the helmet mold below that, more complex jackets are necessary in order to remove the rigid shell from the cured part. Remember that while the silicone itself might be flexible, the part underneath it will be quite rigid, and there’s only so much give you’ll be able to count on for removing your mold jacket.
I’m going to apologize now though, because I probably should have started off with a simpler part to cast so as not to muddy the waters a bit with overly complicated elements. The unfortunate result though is that the upper casing needed a six-part mold jacket in order to be properly demolded and reassembled. The pour spout, number of registration keys, and orientation of the seam line of the mold all played parts in making this decision. Here’s my preferred method of creating those parts.
To start off, templates of the seams are created with some scrap heavy weight paper and masking tape.
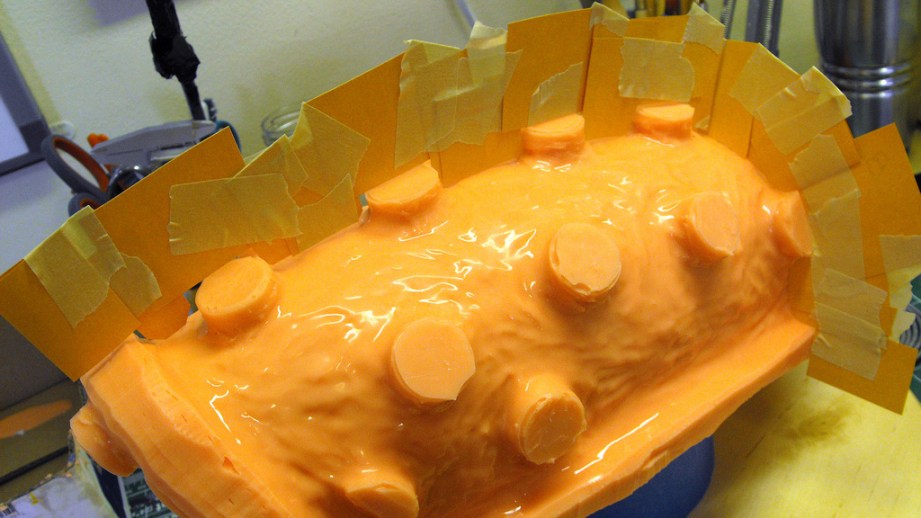
These are then traced onto thin plywood. I use double sided masking tape to cut two pieces of plywood at once in order to make sure the profiles are identical. Holes are drilled at this point as well and all the parts are bolted together and placed onto the mold.
At this point the seam walls are also hot glued to one another as well as the mold itself. Hot glue won’t stick to silicone (not for very long, anyway) but that’s fine as the point here isn’t to adhere parts in place. The glue will act as a barrier for the mold jacket material, preventing it from being pushed up underneath the seam line and permanently gluing the two halves to one another.
My jacket material of choice these days is Smooth-On’s “Plasti Paste” – a 3:1 mix ratio urethane that sets up in about 90 minutes. It’s kind of finicky to get the hang of, but has yielded great results for me once I got used to it. I’ve found the best way to apply it is to add a big hulking glob to the section where you want to make your mold jacket, then use a disposable chip brush dipped in isopropyl alcohol to push the material around the mold and distribute it evenly. This has the added benefit of smoothing out the jacket surface, as Plasti Paste can cure very jagged otherwise.

It is very tempting to crack this sucker open after the listed 90-minute demold time, but patience will pay off in the end! I typically let my mold jackets cure overnight at the very least. Any flex or distortion imparted onto the jacket while it isn’t completely cured will transfer directly to the mold and then to your castings, and you’ll have wasted more than a couple days of work and some significant monetary resources as well. I’m sure you’ve got other parts to mold in the meantime anyway!
So, it’s the next day, and time to open it up. Remove all the screws, pry apart the mold jacket (this will be a bit difficult the first time as the jacket material will have a small tendency to adhere to the silicone) then set the parts aside. If you have a multi-part jacket it’s a good idea to re-assemble the necessary halves before demolding so you have a place for the silicone to rest undistorted.
If all went to plan, you should be relieved. Push the silicone back into the mold jacket, and take special care to make sure all registration keys are pushed completely into their associated cavities so the flexible mold isn’t distorted at all.
That’s brush-on mold making! Next up will be casting in both the block molds and these larger cavernous brush-on guys as well. I’ve already pulled a copy of the upper casing (the mold works, woohoo!) and I’ll be covering the how and what of the casting process in the next article.
Thanks for reading, see you in two weeks!
The Volpin Project, Part 1: Introductions
The Volpin Project, Part 2: References and Blueprinting
The Volpin Project, Part 3: Selecting Materials
The Volpin Project, Part 4: Taking Shapes
The Volpin Project, Part 5: Bondo Strikes Back
The Volpin Project, Part 6: Details, Accents, Refinements, and Mockups
The Volpin Project, Part 7: Introduction to Moldmaking
Completely Off Topic – 5/7/2013

The show goes off the rails in the first moment, completely skipping the planned topic in favor of a conversation about Adam, Norm, and Will’s favorite director’s commentaries, bonus features, and other DVD and Blu-ray extras. Post your favorite commentaries in the comments!