


Will, Norm, and Joey take to the road as they drive to Comic-Con 2013. Ride along with the guys as they sample road delicacies, and reminisce about Comic-Cons past, while they realize the horrible truth about the Con.
The Volpin Project, Part 13: Weathering the Needler
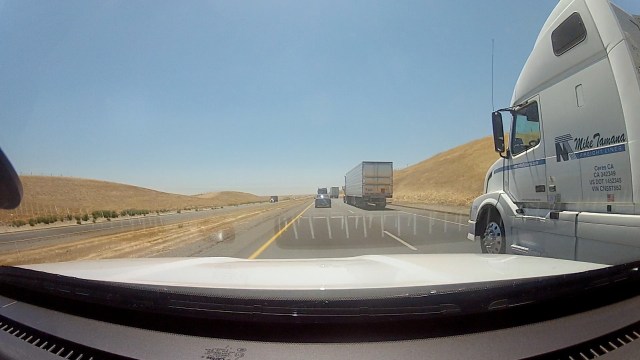
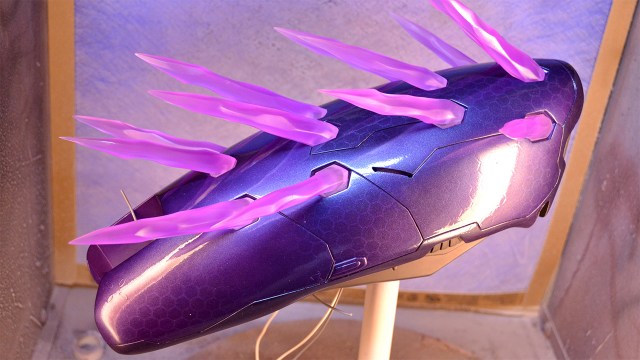
Ladies and gentlemen, we are at the home stretch! All the Halo Needler prop parts are basecoated, shiny and new, and they just require a little bit of faux history infused into them to complete the transformation from plastic to replica. One part storytelling and one part fakery, this is the process known as weathering.
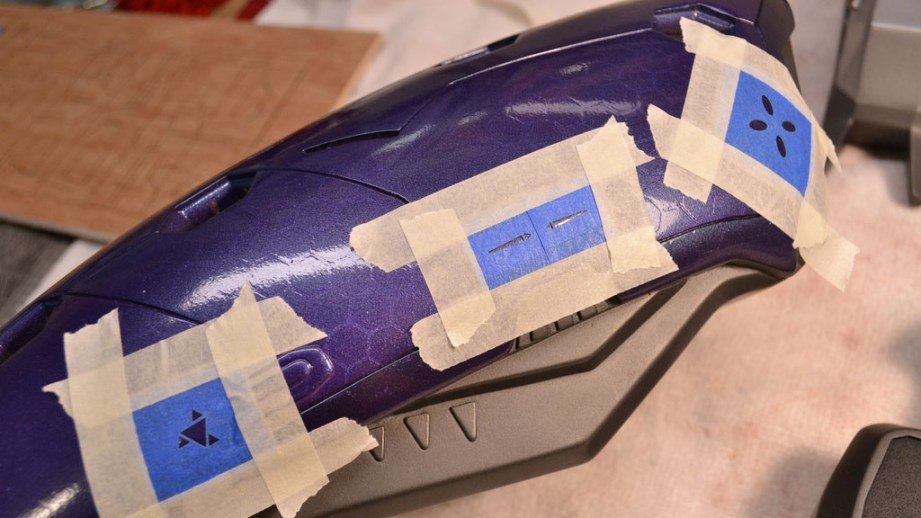
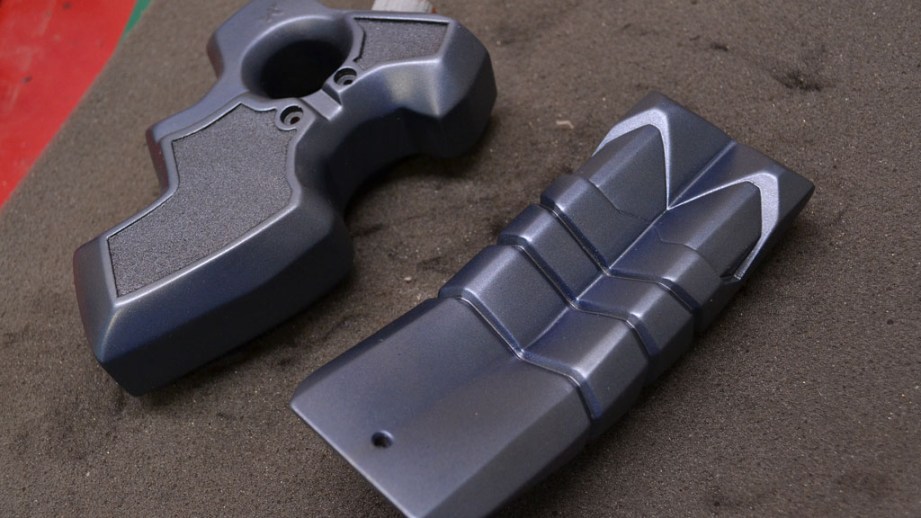
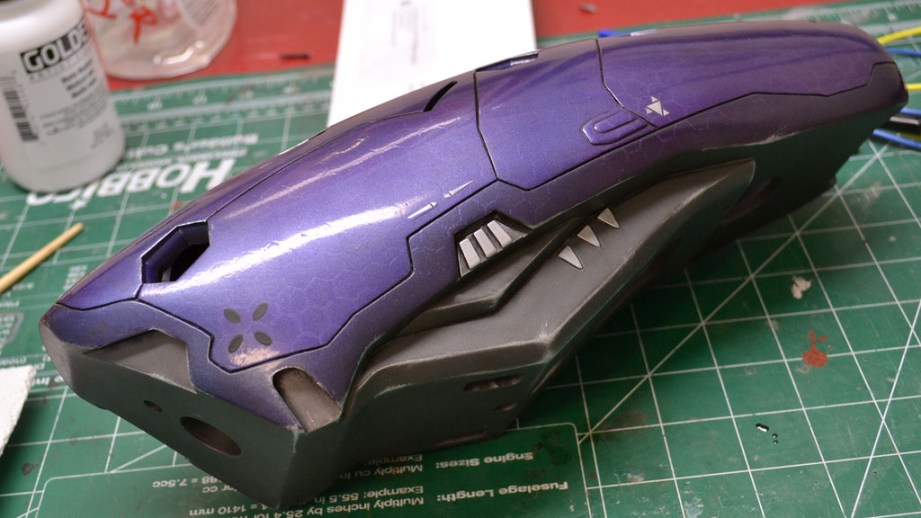
If you’ve got any decals or smaller detail paintwork to complete, this is the time to do it. The Needler has a few highlight areas scattered here and there across its surface; you might recall I used tiny pieces of vinyl on the master sculpts before molding. These need to be painted silver, so I made up a few paint masks (laser cut masking tape!) and airbrushed the details.
The handle and lower detail prong are a slightly blue tint in the official artwork, so these needed another quick pass with the airbrush as well to give them their proper color. Testor’s metallic blue was used, mixed 50/50 with satin enamel clearcoat in order to get a semi transparent layer.
Back when I first started making props, the weathering process mostly involved smearing black and brown paint over the surface of something. While I still do that, there are a few steps and refinements I’ve learned along the way which have made my final paintjobs more realistic.
Weathering Tip #1: Dirt isn’t brown, and don’t use black straight form the tube. People who do more traditional art will be better versed in the nuances of color theory, but the general jist is that dirt and grime have values of blue, red, green, and yellow mixed throughout. A close look at rust reveals similar attributes; lots of dark purples mixed with bright oranges and yellows. For the “dirt and grime” segments of weathering, my preference is to use acrylic paints.

The best way to duplicate a realistic shade of brown is to mix your own to suit the piece you’re making. HALO takes place over a variety of environments, but for this prop I wanted the Needler to look like it had lived aboard a ship for the greater part of its life, then been deployed to one of the more forested areas of the ring. The brown areas should be dark to imitate mud or fine rich soil that had been cleaned away over time. When weathering a piece, consider where grime and gunk will build up over time. Most typically, in the creases and recessed areas.
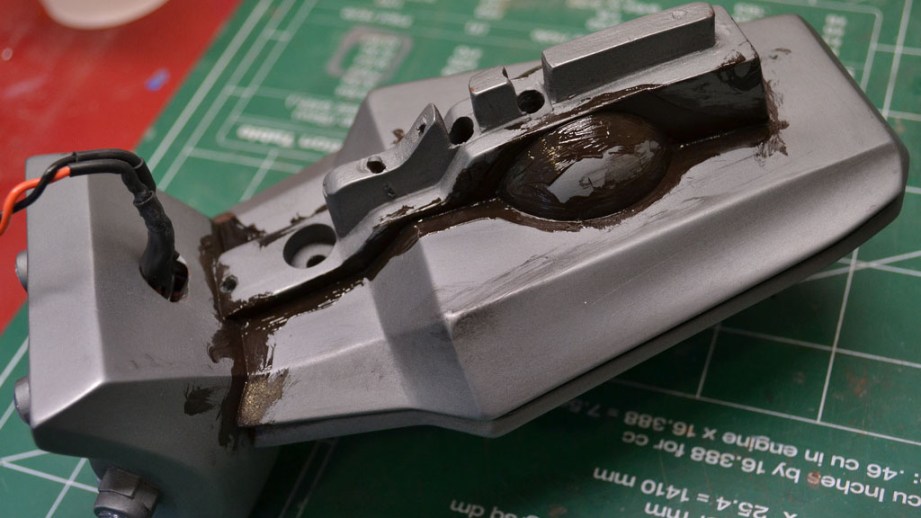
Starting off I brush a very heavy coat of paint into seam lines and intersecting planes. In reality, these areas would be the hardest to clean in the field and would collect the most grit and mud.
Weathering Tip #2: Consider the history of the piece and the actions of its owner. If you’re a HALO fan, you might be saying now “Hey, Master Chief is, like, the perfect soldier, man! He wouldn’t let his weapon be so dirty!” and you’d be right, but the Needlers belong to the Covenant, and I doubt a Grunt would spend the time to properly strip down and clean a sidearm. These are ground troop items and they’d be scattered about haphazardly, scuffed and dirty.
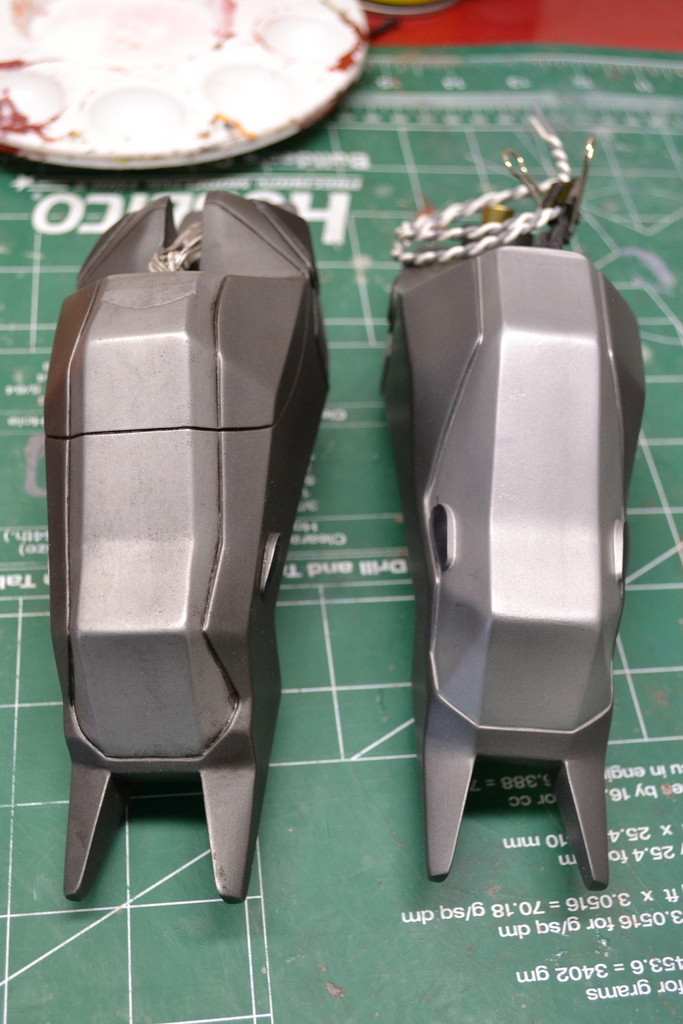
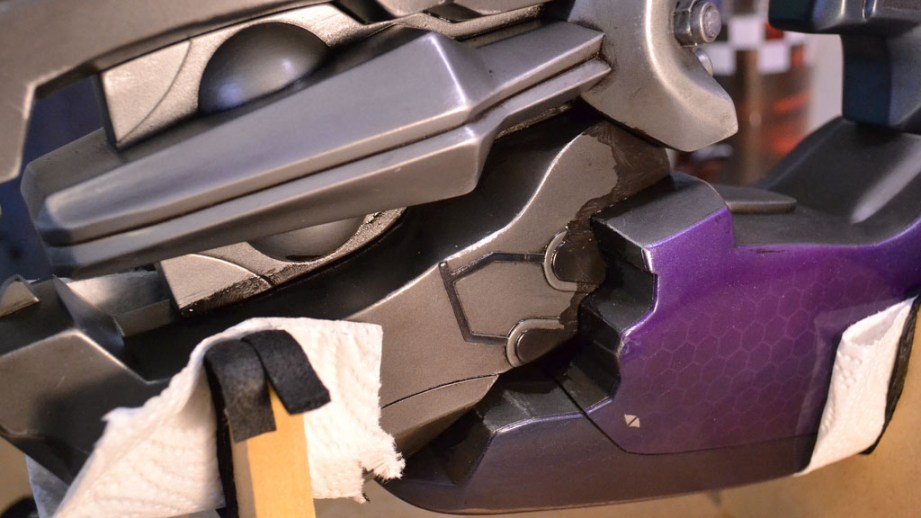
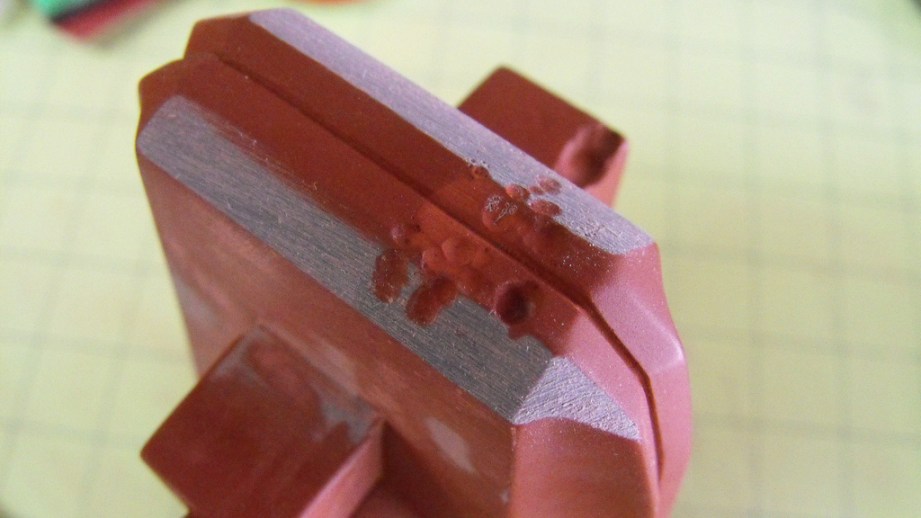
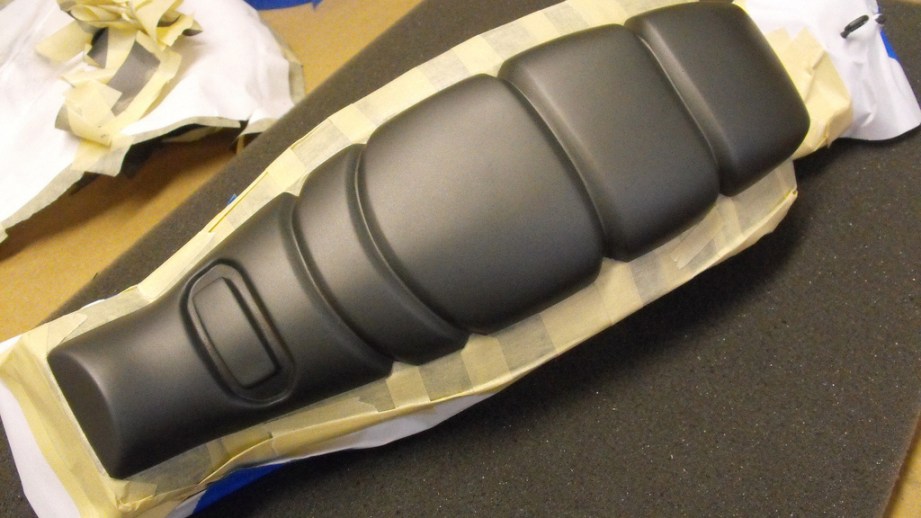
We can all agree that a big swipe of paint across the surface of a part isn’t terribly realistic, and after letting these big globs dry for a minute or two, I use (Weathering Tip #3!) a wet paper towel to wipe away excess paint from raised areas. This has two benefits – the paper towel will not press easily into recessed areas and will leave residual paint behind, and a wadded up paper towel gives any blotting motion a nice random texture. The image image shows a comparison shot between fresh paint and one pass of grit.
I actually did a little time lapse video of this with an older project a few years back. While a bit of my technique has changed, the basic steps are still relevant.
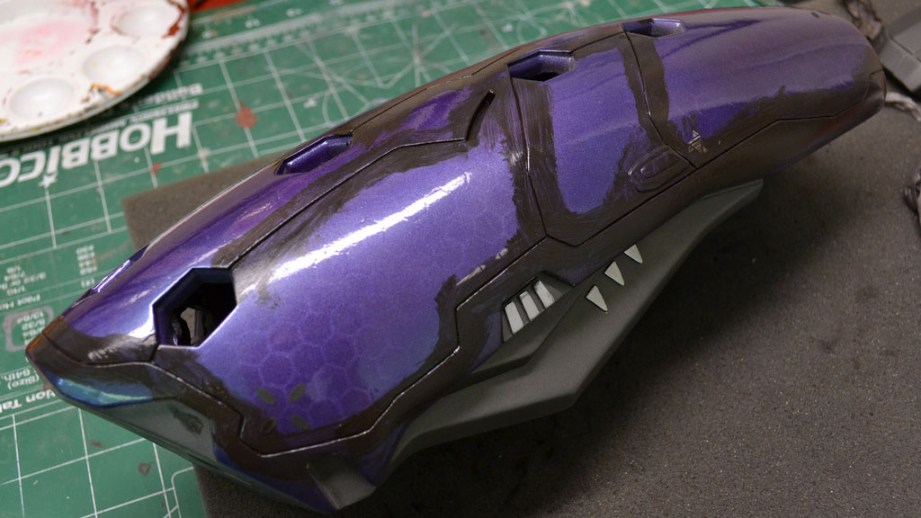
You may need to add many layers of dirt and grime to get the proper amount of crud on your prop. Varying the hue and tone across passes will add more realism, so don’t just use a single pass of brown. Situationally you might choose to seal in the weathering with a clearcoat–acrylic paint is more fragile than the enamel and lacquer used on the basecoats, and lots of handling will eventually wipe it away. The higher traffic areas on the Needler were clear coated with matte acrylic.

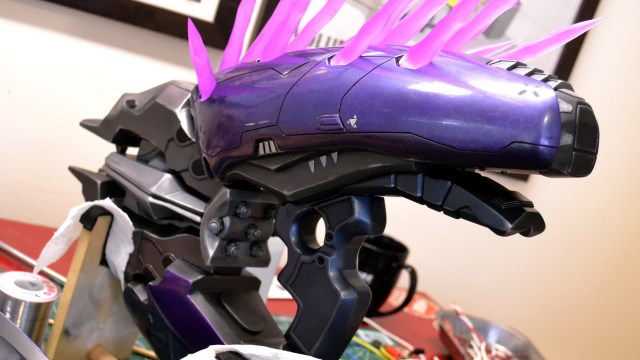
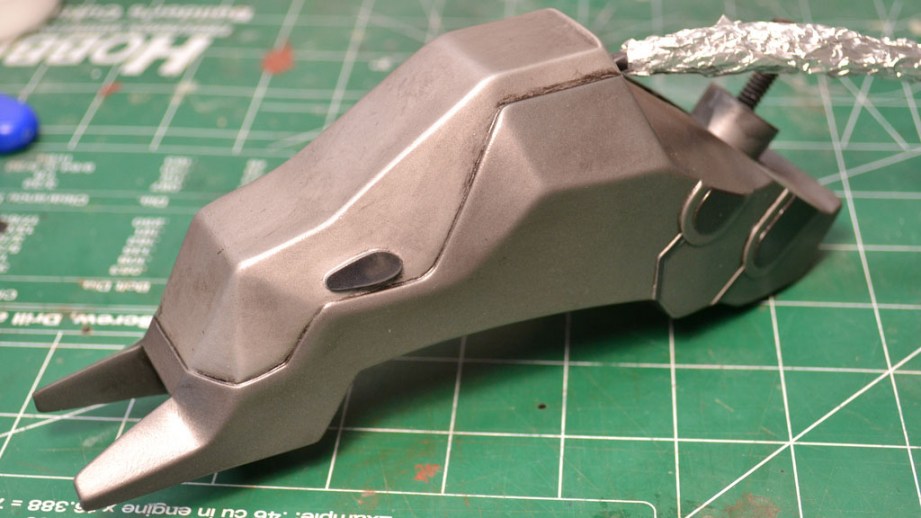
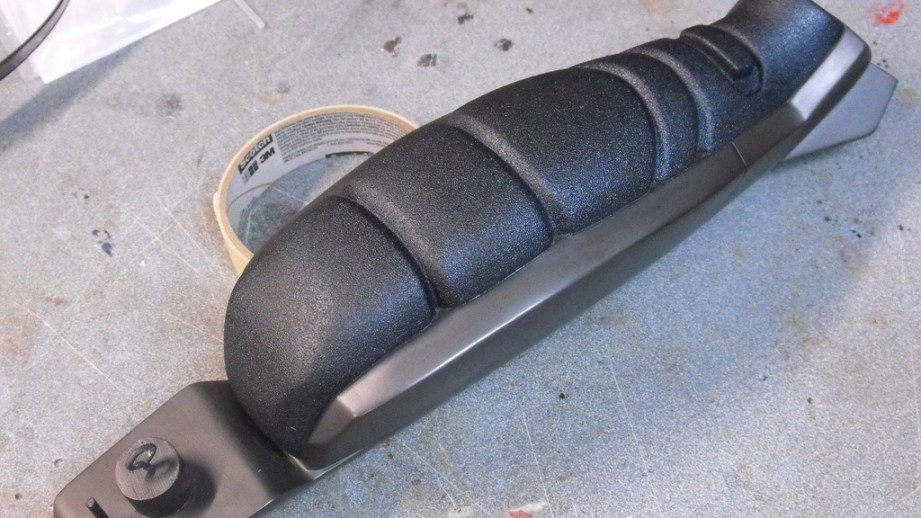
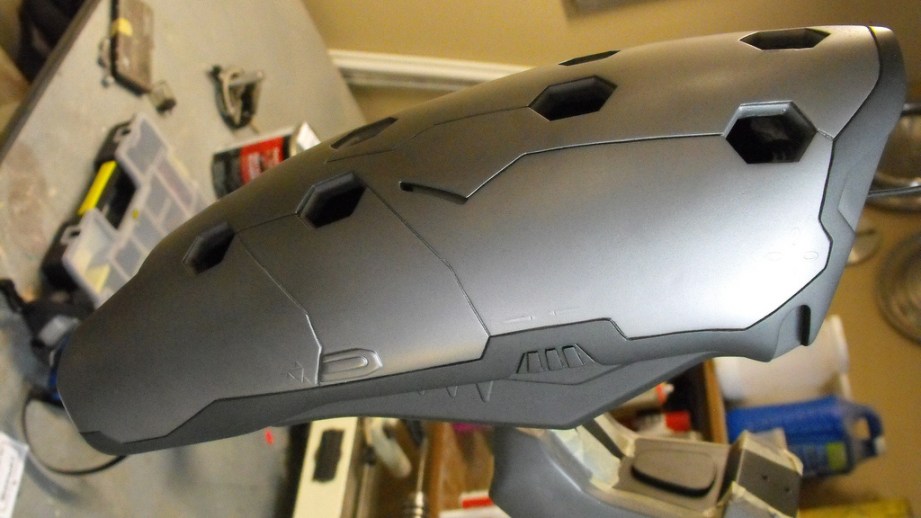
Once the base weathering is complete, the final step (and my personal favorite) is drybrushing. Drybrushing in this case is the process of using silver paint on higher edges of a prop to simulate scuffed paint and the metal areas beneath. This is another process where you’ll need to consider the life and utility of the item you’re creating; a pistol would have a lot of scuffs around the trigger, trigger guard, magazine well, safety, ejection port, etc. Areas that would be handled often or would be in danger of contacting an abrasive surface when the weapon is set down should show signs of wear and tear.
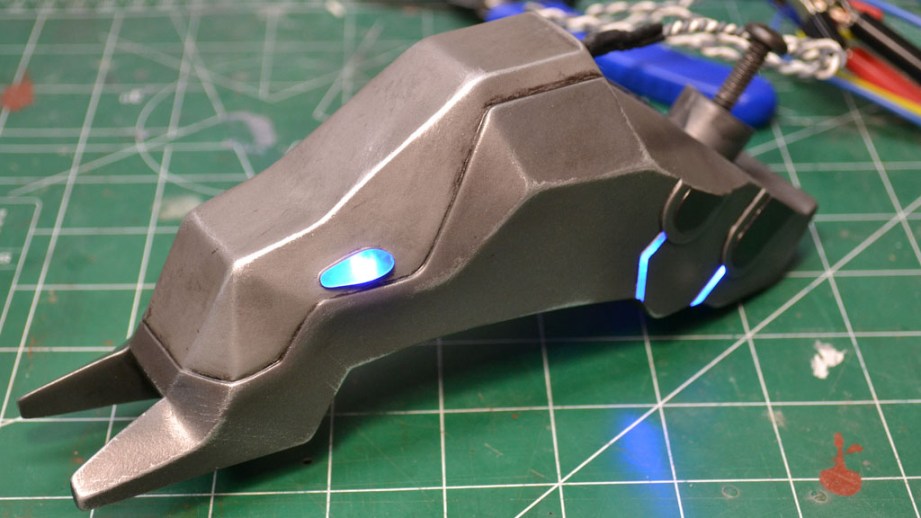
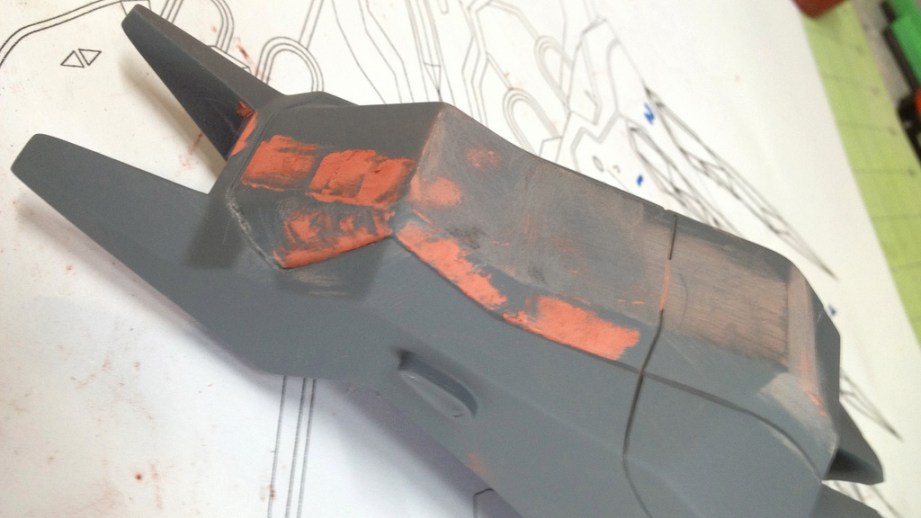
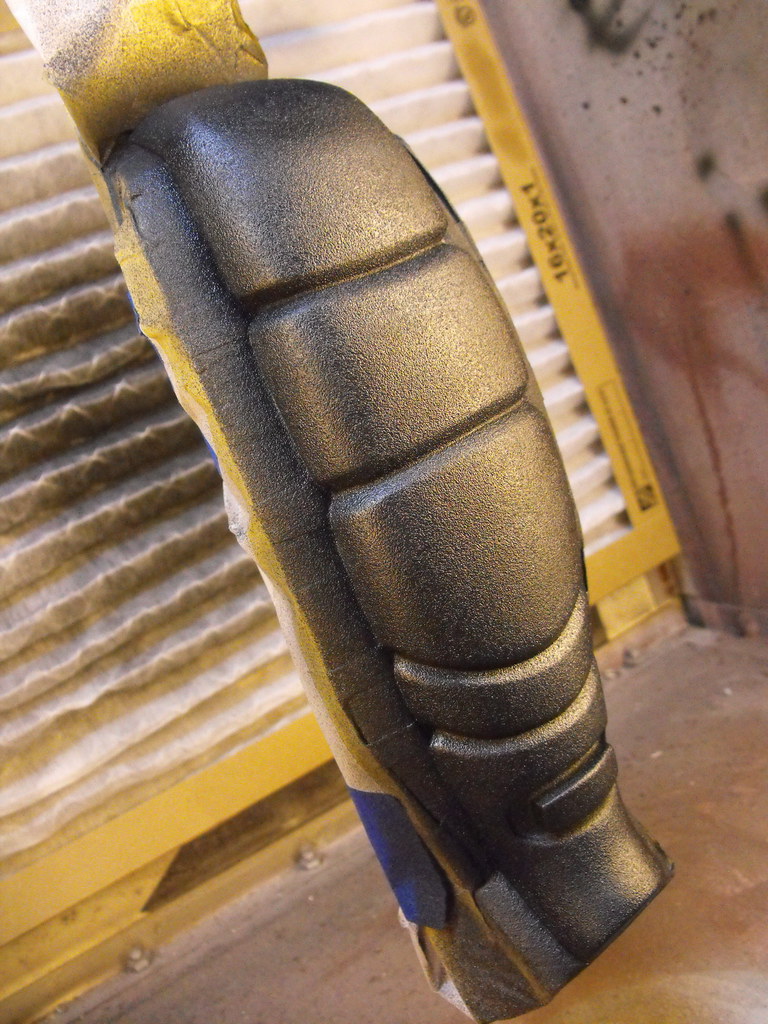
Shown above is the upper emitter – silver enamel has been used on the protruding edges to simulate scuffs and abrasion in the metal. Parts that stick out further–like the forward prongs–would have more damage and are given a heavier treatment of silver.
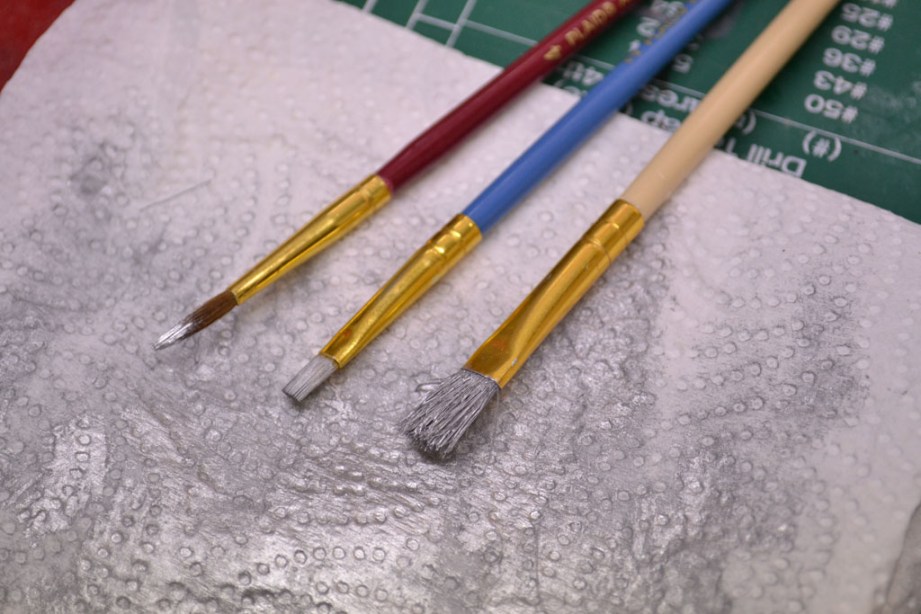
WeatheringTip #4: Drybrushing requires very little paint to work properly and, in my experience, is best done with a rougher brush. After dipping your paintbrush into the silver, the lion’s share of the paint should be sponged out of the brush with a paper towel. What you’re after is a very light coating that will just slightly dust the corners of your prop when the brush is dragged against it. Too much paint will produce thicker chunky streaks of silver and end up looking very fake.
Keen-eyed observers will notice that all of these parts are being weathered before assembly, and that process has benefits and detriments. You’ll be able to more easily reach the entire piece you’re weathering without having to worry about missing any recessed areas, but you also need to be aware of how the parts will fit together later on to make sure the weathering makes sense. Drybrushing a high point on one piece may make sense when it’s separate, but that part might not actually protrude once assembled. For example, the upper casing of the Needler wouldn’t really have many metallic scuffs on its upper side, since the protruding needles would keep it from touching the ground.
Weathering should continue after you’ve assembled your prop. Intersections between components will need another pass of dirt and grime, and you might notice certain protrusions that need a bit of drybrushing as well.
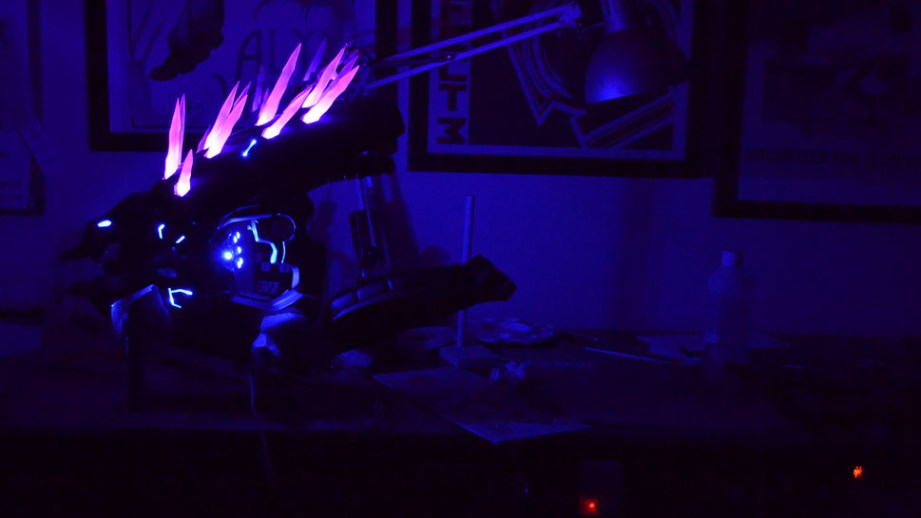
Assembly is another topic altogether, and the Needler will need many hours of bolting, screwing, gluing and clamping before it’s ready to be wielded. Now, I may have gotten a bit excited and already completed all of those steps. I may even have the completed Needler sitting right next to me as I type this, happily illuminating my entire workshop. You’ll see the fruits of my crazed building frenzy in the next installment: final assembly!
The Volpin Project, Part 1: Introductions
The Volpin Project, Part 2: References and Blueprinting
The Volpin Project, Part 3: Selecting Materials
The Volpin Project, Part 4: Taking Shapes
The Volpin Project, Part 5: Bondo Strikes Back
The Volpin Project, Part 6: Details, Accents, Refinements, and Mockups
The Volpin Project, Part 7: Introduction to Moldmaking
The Volpin Project, Part 8: More Complex Moldmaking
The Volpin Project, Part 9: The Casting Process
The Volpin Project, Part 10: Illumination and Audio
The Volpin Project, Part 11: Prepping for Paint
The Volpin Project, Part 12: Finally Time to Paint
Episode 176 – Baller Time – 7/11/2013
One Day Builds: Han Solo’s DL-44 Blaster from Star Wars

Adam has constructed a Blade Runner pistol and Indiana Jones’ revolver, but not Han Solo’s blaster from Star Wars A New Hope. Fortunately, the makers at the Replica Prop Forum have thoroughly researched the details of this prop and have faithfully recreated the components needed to build it. Adam and Norm run through the blaster’s signature details and then work together to assemble this iconic space gun.
Inside Adam Savage’s Cave: Geeking Out Over Woodworking Saws
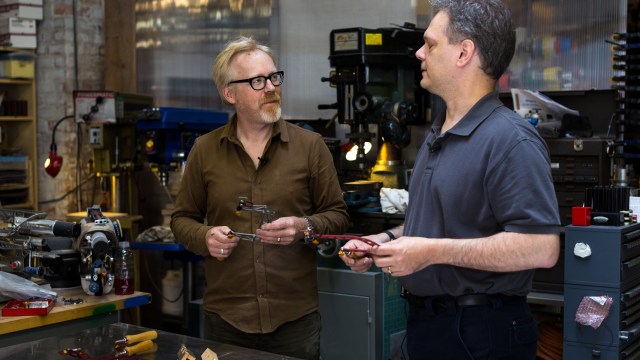
Adam geeks out over beautiful coping saws with Brian Meek of Knew Concepts. We learn about the design of these woodworking and jewelry saws and see some new saws built with a titanium truss for an extremely rigid and solid frame. These are the kinds of tools that woodworkers get excited about!
Episode 175 – Independence Day – 7/4/2013
Photo Gallery: Up Close with NASA’s EMU Space Suit
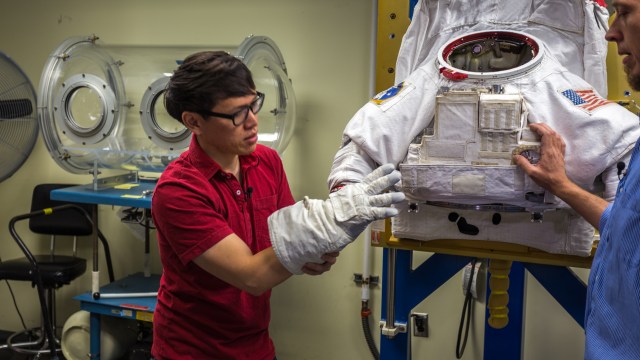
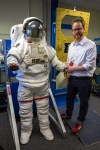


Tested at NASA: How Astronauts Put on Space Suits

We’ve all seen NASA’s white space suit that astronauts have been wearing since the Apollo missions. But what does an astronaut wear underneath that iconic suit’s shell? We visit NASA to learn about all the essentials of extravehicular space wear, all the way down to the emergency diapers. Check out our photos of the suit components here.
Tested at NASA: How Astronauts Train Underwater at The Neutral Buoyancy Lab
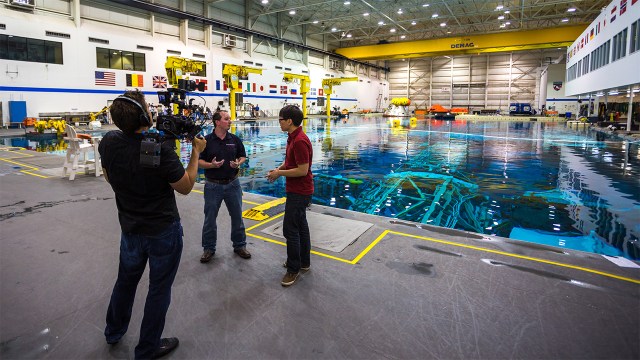
Remember that scene in Armageddon where Bruce Willis trains for space travel underwater? Turns out that’s something astronauts really do. We visit NASA’s Neutral Buoyancy Lab at the Johnson Space Center to learn about this massive swimming pool where Astronauts-in-training learn how to work in micro-gravity when outside the International Space Station.
The Volpin Project, Part 12: Finally Time to Paint!
After more hours of sanding, priming, filling, sculpting, molding casting, cutting and drilling than I care to count, it’s finally time to get some color onto the Halo Needler Prop. Parts are trimmed, mounting points are sorted out, and electronics are done. Let’s break out the airbrush!
Haha, whoa now! You didn’t think it would be off to the races just like that, did you? Unfortunately, there’s still just a bit more prep to go. While your parts are in primer, you might see some things that weren’t apparent on the raw castings. Some seam lines may need a bit of filler, and there may be a small divot or a bubble leftover from the casting process which will need to be filled. We’ve covered bondo and spot putty before waaay back in articles 5 and 6. The process is the same here for any low spots or damaged areas: fill, sand, smooth, and primer. The filler I’m using here is a lighter weight than standard Bondo – it sands more easily and is slightly finer, allowing it to fill small pinholes like this more easily.
More subtle areas, like the slight texturing I had on one section of the lower emitter, can be blended into shape with the lightweight spot putty used before.
Once these areas are filled and sanded, make sure to cover them with primer to match the rest of the part being painted. A different surface will pick up paint differently (unsealed filler versus primer) and you want a consistent finish across your entire piece.
Before going to paint, my preferred method to smooth the primer coat is a few passes with various fine grit sanding sponges. You can sometimes find these in hardware or auto parts stores, but more likely you’ll need to order them online. Make sure whatever primer you’re using can be wet sanded! Those that can’t will absorb moisture like a sponge and completely ruin your eventual paintjob. I add a bit of dish soap to the water I use when sanding, as it helps lubricate the surface so the sponge doesn’t get clogged. When you’re finished sanding, wash the part with clean water and let it dry.

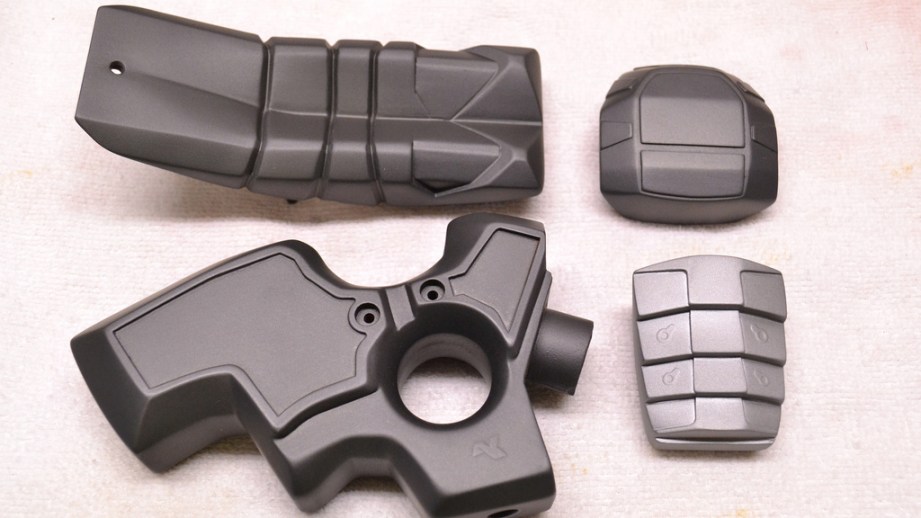
Some parts of the Needler were very easy to paint and only required the application of a single color. The grip, rear vents, lower handle attachment, and “barrel” (for lack of a better term) are mostly single color with a few accents here and there. The base coat of paint was done with Testor’s Buffable Metalizer lacquer, in magnesium (the lighter silver) and gunmetal (the darker). Accents and highlights to these parts will be done later on with brush paints, which I’ll cover in the weathering article next time.
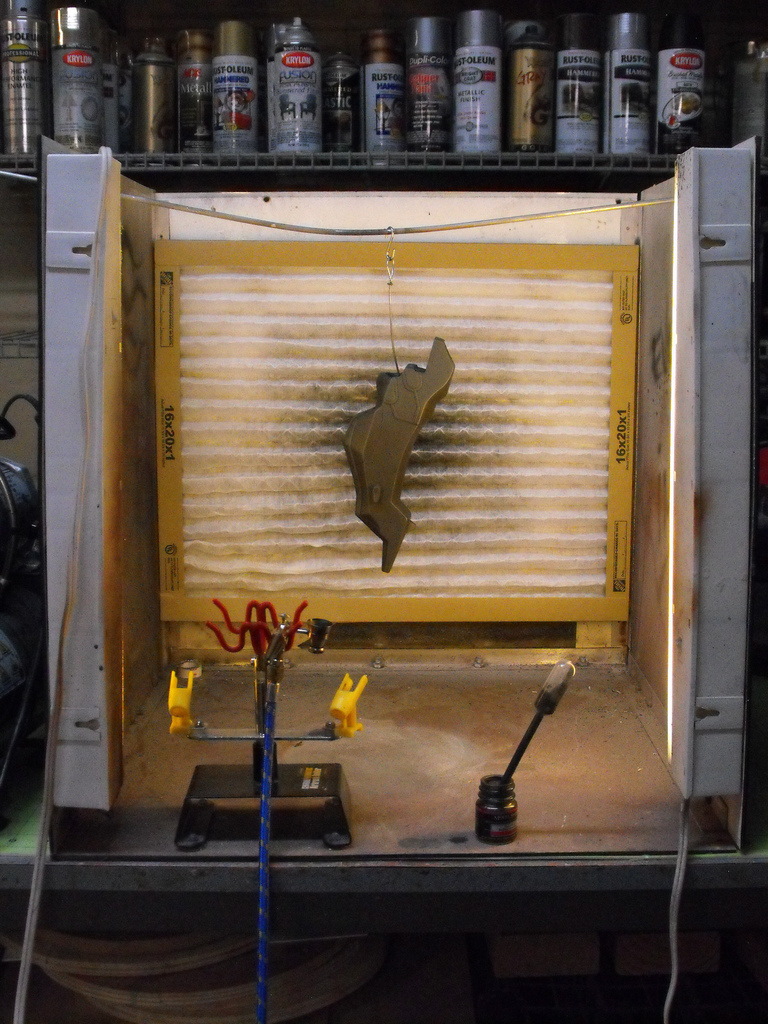
If you happen to live in an area where mother nature can be somewhat unpredictable or the conditions aren’t always great for painting, it might be worthwhile to build or look into buying a small spray booth. All the parts here were painted in my small booth which isn’t much more than a 4 sided open box hooked up to an exhaust fan through a rear vent. I also added two small fluorescent lights to make seeing what I’m doing a little easier.
A Few Tips for Painting
The “dries in 10 minutes” claims on hardware store spray cans is pure garbage. You may be able to gently brush against paint in 10 minutes, but true full cure can take days depending on the paint. There’s more to paint than I can cover in one article, but I’ll be using two kinds here: Lacquer and Enamel. Lacquer dries faster and is a harder paint than most enamels, while enamel paints are easier to get in a wider variety of colors but take several days to fully cure. Enamel can be painted over lacquer, but you cannot paint lacquer over enamel! While there are exceptions to every rule, it’s best to stick by this one.
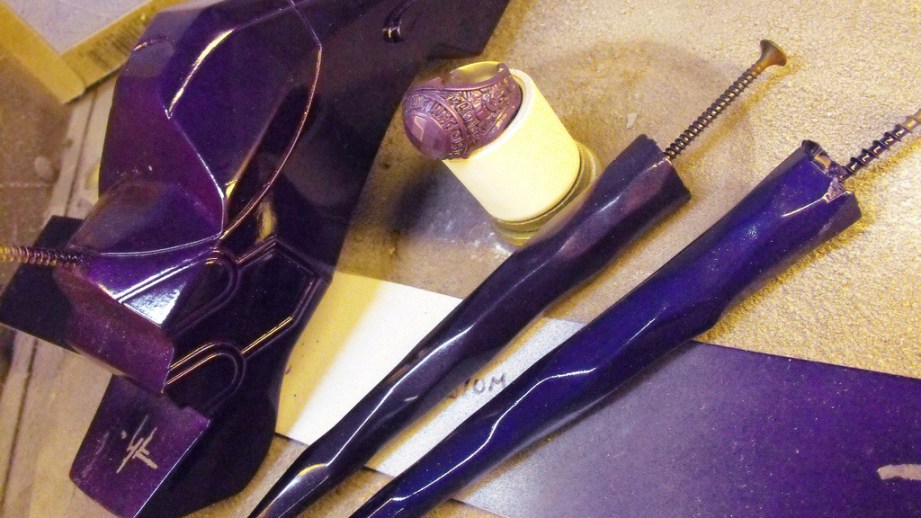
If you’re in doubt (and despite the hundreds of cans of paint I’ve gone through in my career, I still am!) use test pieces. Not only will you be sure all your hard work doesn’t disintegrate in a wrinkly mess, but you can test different mixtures and layering techniques on parts that you haven’t put dozens of hours into preparing… like a casting of your class ring, for instance.
The rest of the pieces not shown above all have some amount of layering that will need to be done to get the correct effect. Generally its best to paint lighter colors first, then mask off areas for coats of darker paint. The bulk of the upper casing will need to be a brighter purple, and in order to get that correct (stay with me here…) I started by painting it silver.
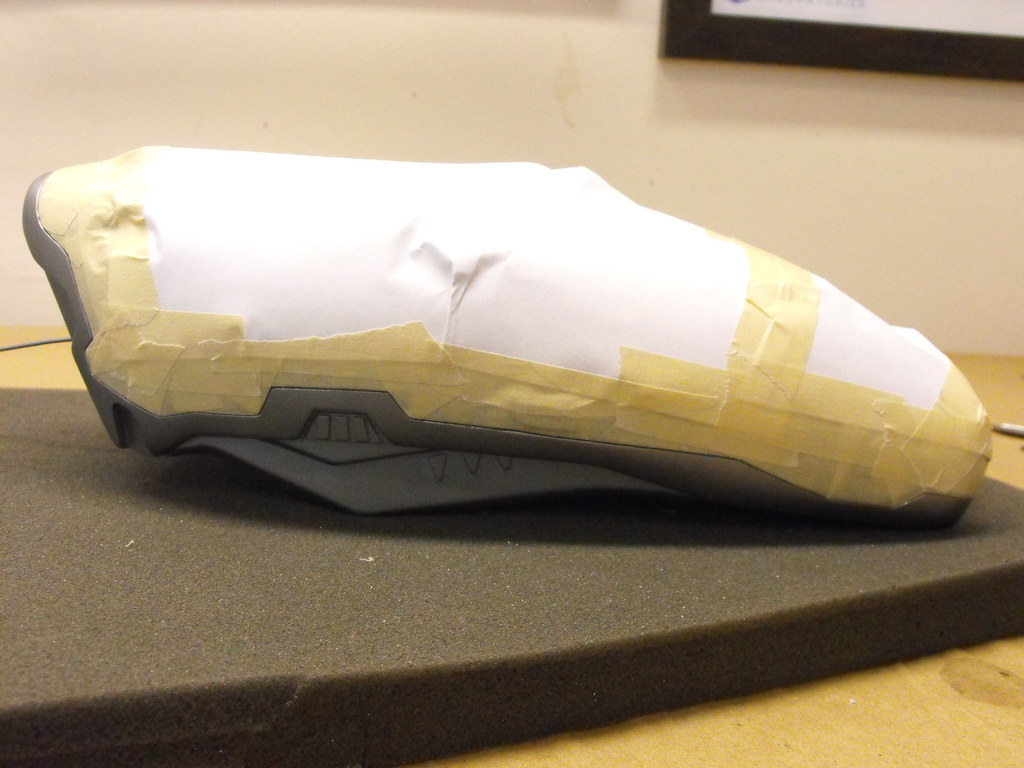
Before I jump into the shiny purple paint, here’s a little trick I learned a while ago when playing with textured paint. The lower casing on the Needler has a padded-looking grip with a dark blue pebbled texture covering its surface. If you ever need a good grip-texture-simulation, this is something worth remembering. First off, the piece gets masked off so it looks like some weird grub thing.
The textured paint I use for this process is Rustoleum “Multicolored Textured” spraypaint. The multicolored part is important because they do sell a monochromatic version, and the texture isn’t as apparent. A few notes: this stuff comes out fast and it is very easy to put way too much paint on, so test it out on some scrap first. Additionally if you ever plan on molding a part with this paint on it, the petroleum that creates the texture will inhibit platinum silicone from curing. I learned that the hard way…

You don’t need to wait for this to fully cure before topcoating it, and painting within a couple hours will actually help your color coat bond to the texture more easily. I started by airbrushing flat black enamel over the surface, then followed it up with a pass of thinned translucent blue. The paint will dull out the sharper edges of the texture and leave a slightly rubbery feeling grip texture once it’s fully cured.
The reference images I have for the Needler show that the purple color on the upper casing is split into a lighter and darker area around the long seam line that circles the base of the part. After letting the lighter silver cure for 48 hours, I masked off this part of the casting and covered the exposed area with gunmetal silver lacquer.
Not all masking tapes are created equally. Just as with your paint testing, you might want to test out if your masking tape will peel off your basecoat or leave residue behind. It’s a crummy lesson to learn when you’re on your third pass of masking tape and peel it back to find exposed primer.
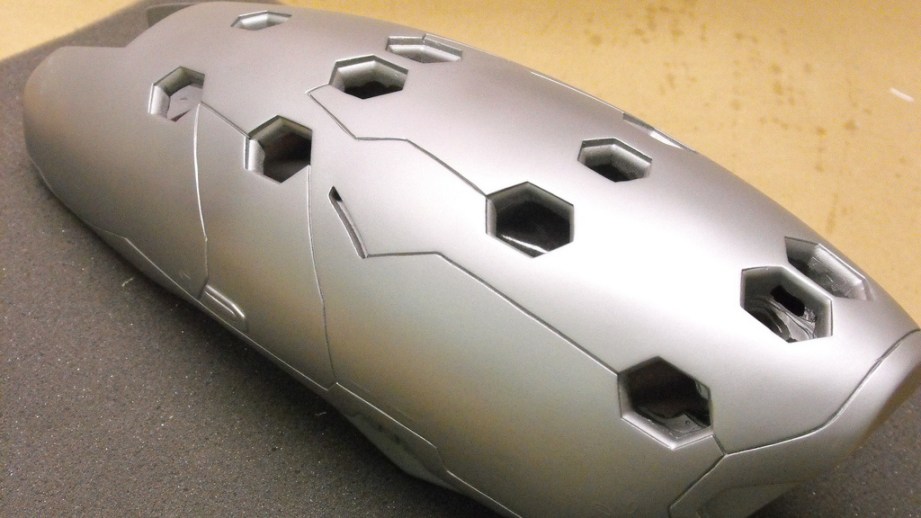
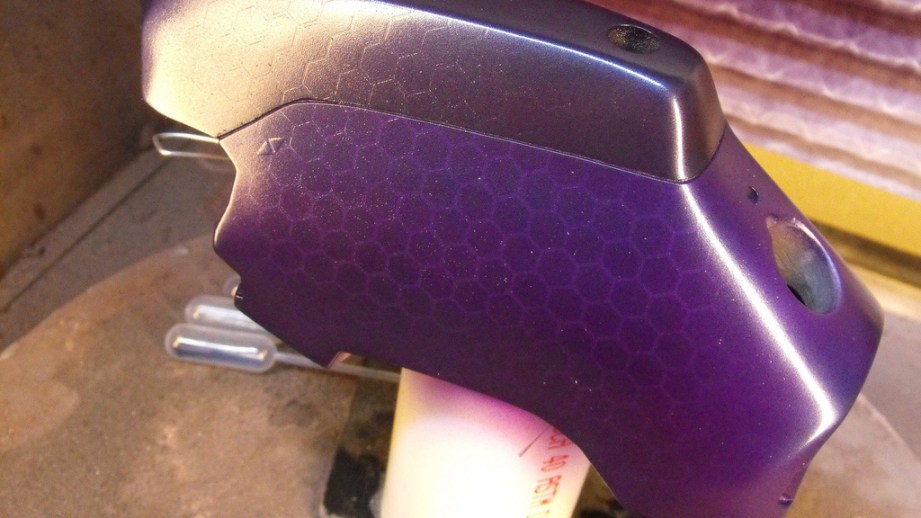
So why did I paint this silver and not purple? Good question! The technique I settled on for creating the subtle hexagon pattern on the surface of the purple parts required a lot of thin passes of translucent paint to get a color-shift effect, and I found the best way to do this was over a coat of bright silver. After the two base coats had fully cured, I set up my laser cutter to trim out a large hexagon paint mask out of stencil vinyl.
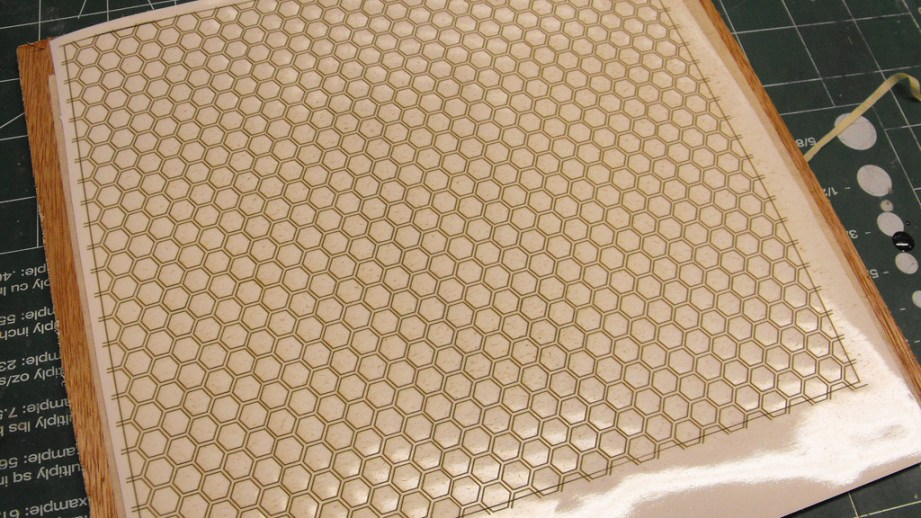
Since the large surface area and compound curve of the purple sections meant getting the pattern to cover the entire surface seamlessly would be nigh impossible, the pattern was simulated by cutting various shapes of hexagon mask and applying them across the surface of the gun in the same facing direction.
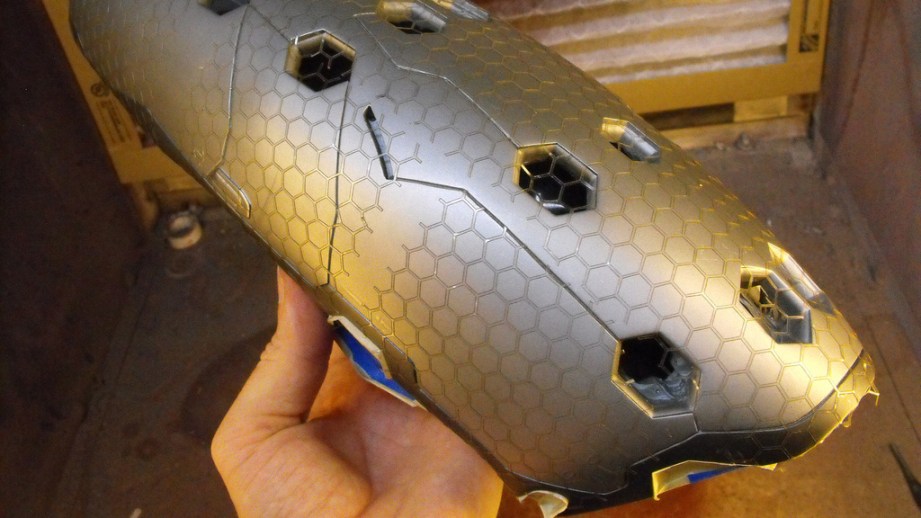
When these areas were painted, I feathered out the purple color at the edges of the paint masks so the seams wouldn’t be apparent. The purple used here is an enamel pearlescent clearcoat.
When the rest of the part is painted with the purple clear, the areas of the casings without hex patterns blend into one another, while the masked off areas appear darker, leaving the negative space brighter due to the silver basecoat. Cool!
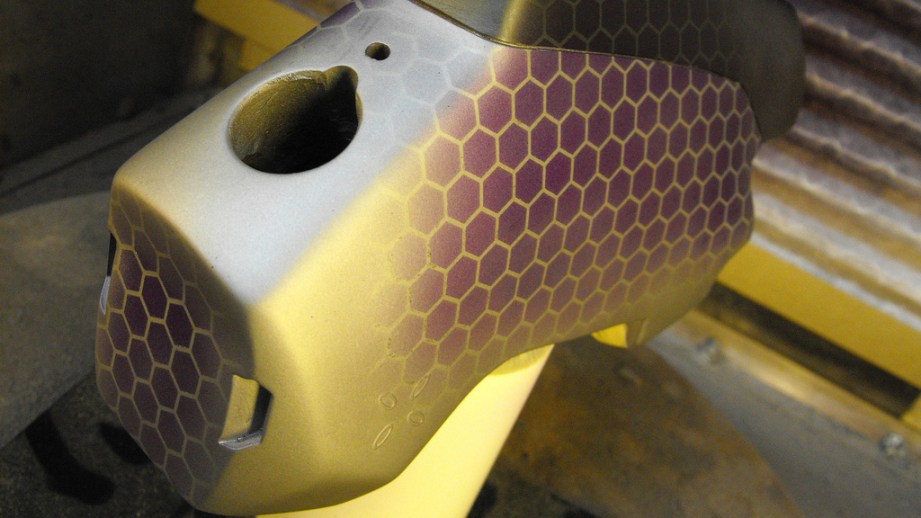
I also used a little bit of a metallic dark blue, thinned out with some enamel clearcoat, to give the purple a bit of a color shift around the sharper edges and corners. This isn’t true “color shifting” paint, but the gradient of purple and blue across the surface does mimic the effect pretty well. If the initial pass of color looks a bit pebbly, this is due to the spray density of my airbrush and the very light coats of paint I was using.
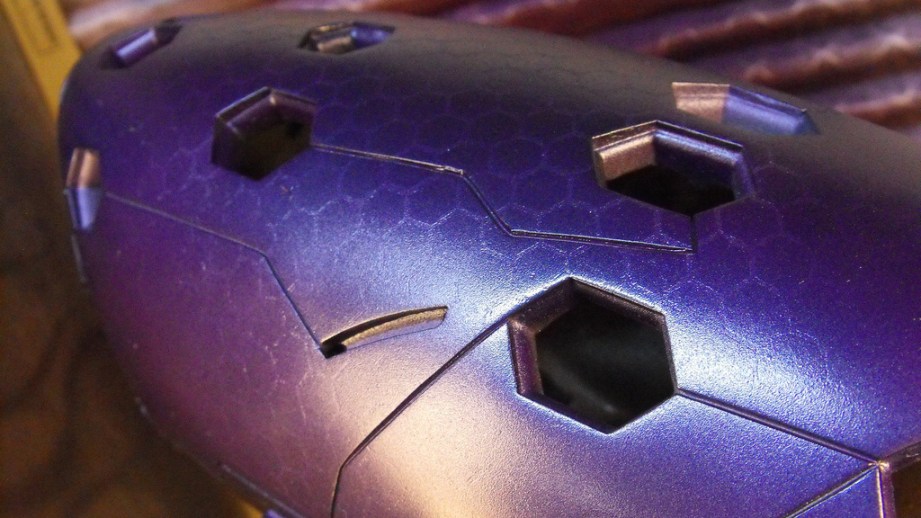
Thankfully, we have a wonderful thing called “clear coat” to remedy this! Again, test first if you’re not certain! Enamels don’t like to be painted over while they’re curing, so it’s best to wait at least 48 hours before applying an enamel clear to your surface. Once these parts set up for two days, I treated them with four coats of enamel clear–thin passes, five minutes between each coat. Shiny.

Oh, also, lighting is everything when it comes to a paint job like this. Here’s the same paint but with the lights of the spray booth turned off. I’m quite happy with how varied the finish can be in different lighting conditions.
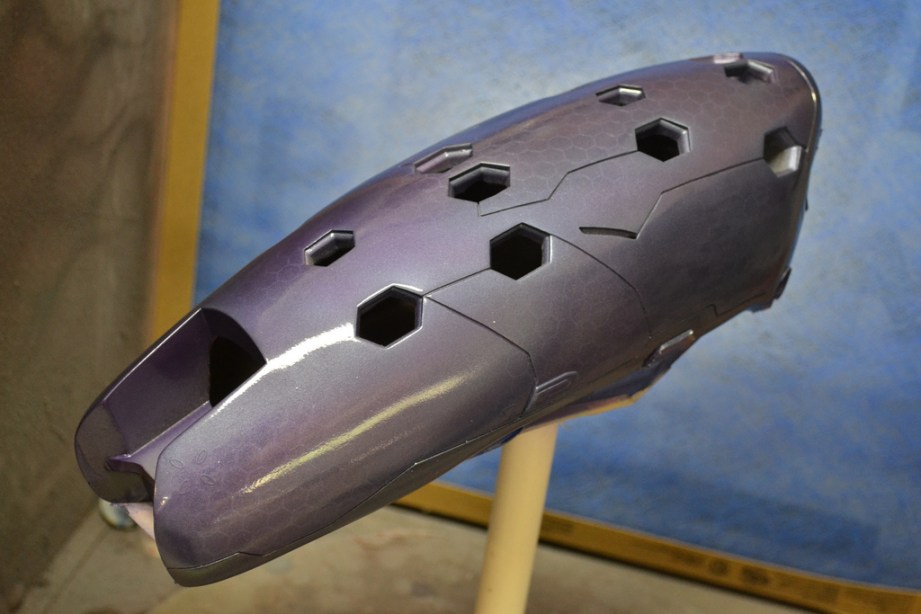
Nothing is glued in place here yet, but I couldn’t resist seeing how everything looked all together (after letting the clearcoat dry fully, of course!)
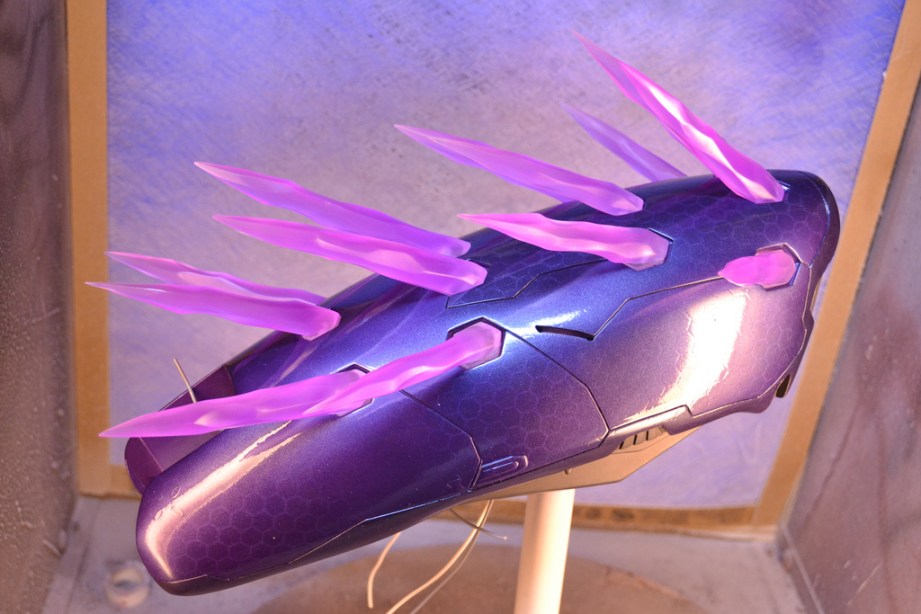
We’ve got some very shiny Needler parts now that will need a few battle scars before anyone believes this is a weapon of space combat and not something found next to a junior sized burger and fries. The next installment of the series will be all about getting paint to tell the story of the life of this gun: weathering.
The Volpin Project, Part 1: Introductions
The Volpin Project, Part 2: References and Blueprinting
The Volpin Project, Part 3: Selecting Materials
The Volpin Project, Part 4: Taking Shapes
The Volpin Project, Part 5: Bondo Strikes Back
The Volpin Project, Part 6: Details, Accents, Refinements, and Mockups
The Volpin Project, Part 7: Introduction to Moldmaking
The Volpin Project, Part 8: More Complex Moldmaking
The Volpin Project, Part 9: The Casting Process
The Volpin Project, Part 10: Illumination and Audio
The Volpin Project, Part 11: Prepping for Paint