


Over a week into our trip, and Norm starts suffering some problems launching the DJ Inspire One. It’s time to problem solve. Back on the ship, we chat with Tom Scott about his adventures exploring the city of Qaanaaq.
Tested in the High Arctic, Day 6
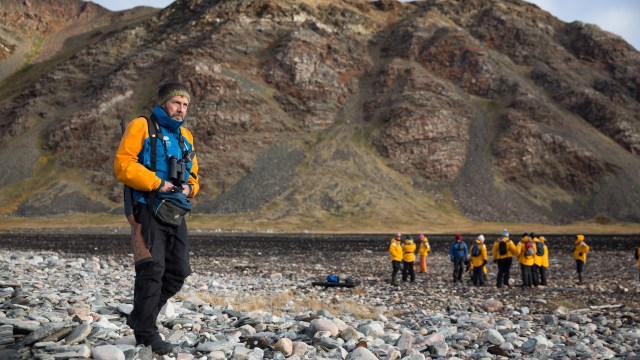
We take you on one of our hikes up Parker Snow Bay in northwest Greenland. As we approach a glacier, Norm suffers some issues with the DJI Inspire One drone refusing to take off. Heading back to the ship, we also examine the survival suit kept in our quarters.
Norm of the North – Still Untitled: The Adam Savage Project – 9/20/16
Watch BattleBots Matches in 360 Video
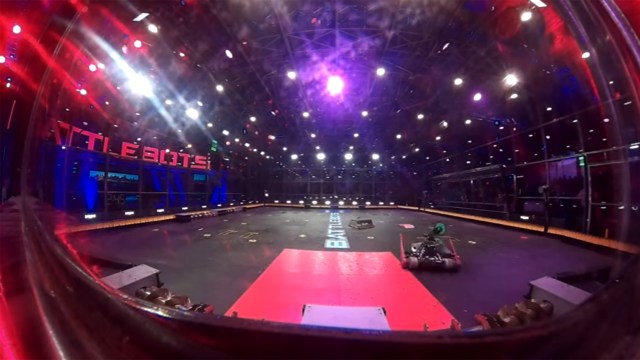
We chat with the behind-the-scenes team at BattleBots, who set up Kodak PixPro SP360 cameras around the arena and in the competition pit area to capture the action from a unique perspective. Here’s how they used those cameras, and links to the resulting behind-the-scenes and rumble battle footage.
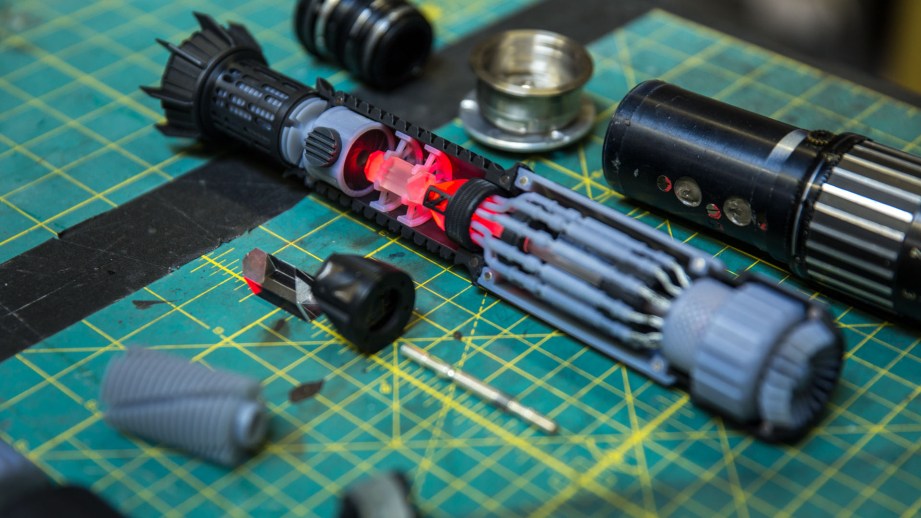
Bits to Atoms: Printing My Custom Cutaway Lightsaber

With all the design work done for my Custom Cutaway Lightsaber, it’s time to 3D print everything on the Form 2 SLA printer. We were lucky enough to get a pre-production Form 2 from FormLabs and had been printing a ton of projects before the official release. We were very pleased with all the prints as Formlabs had upgraded all of the items (and then some) on my wishlist from my time with the Form 1+. The Form 2 had been living up to my expectations but I designed some of the lightsaber parts to torture test it further.
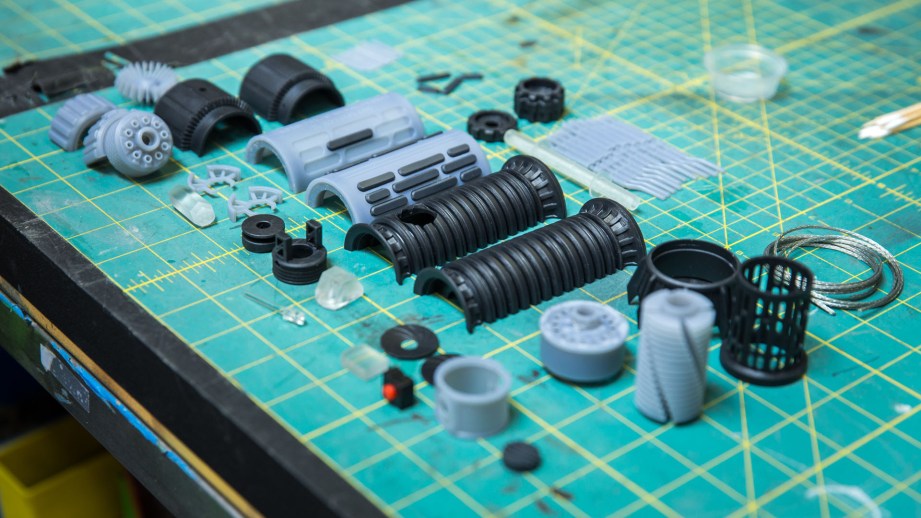
While the Form 2 was more than capable of printing out an entire half of the saber in one piece, I broke it up into many parts for a few reasons. First, I wanted to show off various resins and designed the saber to make use of the black, grey, clear and flexible materials, most of which had just had formulation upgrades. Second, I wanted to see what the tolerances and fit quality were like for assemblies. Third, as we have talked about before, prints tend to look better when all the parts aren’t globbed together but instead printed as individual pieces. Plus, the quality of parts can sometimes be affected by orientation and printing everything as one piece is not always optimal.
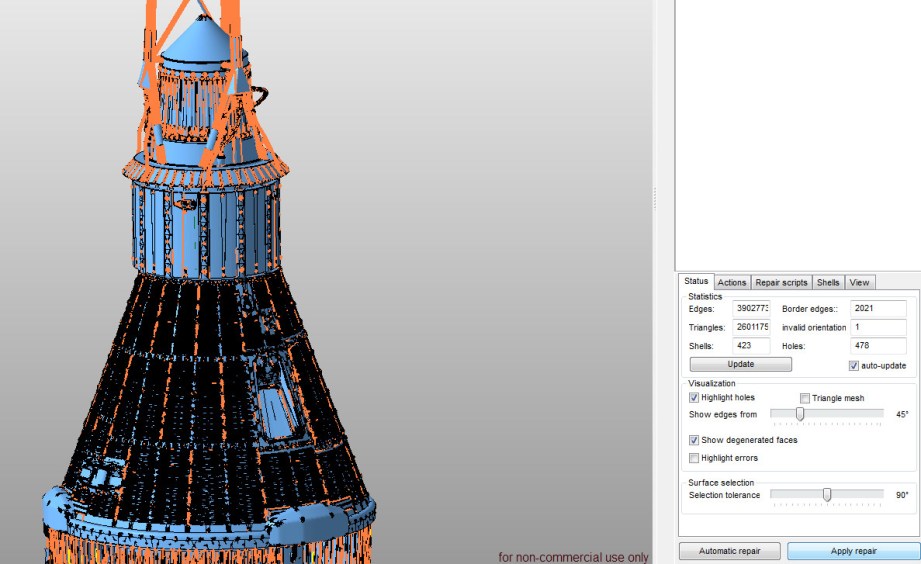
Once modeling was finished, the next step was to export all the parts as STL files – generally the standard for 3D printing. The grips and pommel were exported as a whole piece and then cut in half using Netfabb – this was a case of using the right tool for the job. Netfabb (recently acquired by Autodesk) is also my goto program for mesh repair which is a vital part of 3D printing. Any holes, flipped polygon faces or other irregularities can cause a print to fail. Formlabs PreForm software has Netfabb repair functionality built in and will warn you and offer to fix possible issues upon model import.
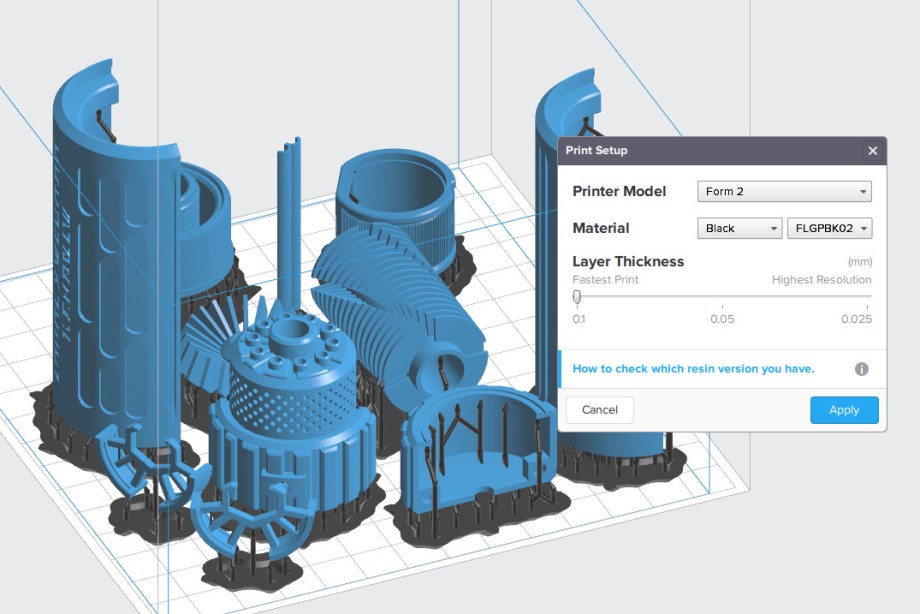
With the mesh repair done, the STL files were brought into the Formlabs software, PreForm to prepare for printing. When launched, PreForm will ask for the resin type and resolution being used – this can also be changed later. Typically I will fill the platform with as many parts as possible, so I would print all the black, grey, etc parts at one time. The only time I separated out parts of the same resin type was if they needed to be printed at different resolutions. You can’t print models at different resolutions in the same print job, which is typical of most 3D printers. Most of the prints I have done on the Form 2 have been at the lowest layer height setting of .1mm and the parts have turned out great. I did print the spiked top of the saber at .05mm due to its sloping sides – with an angled surface you may start to see a stepping effect due to the thickness of each layer.
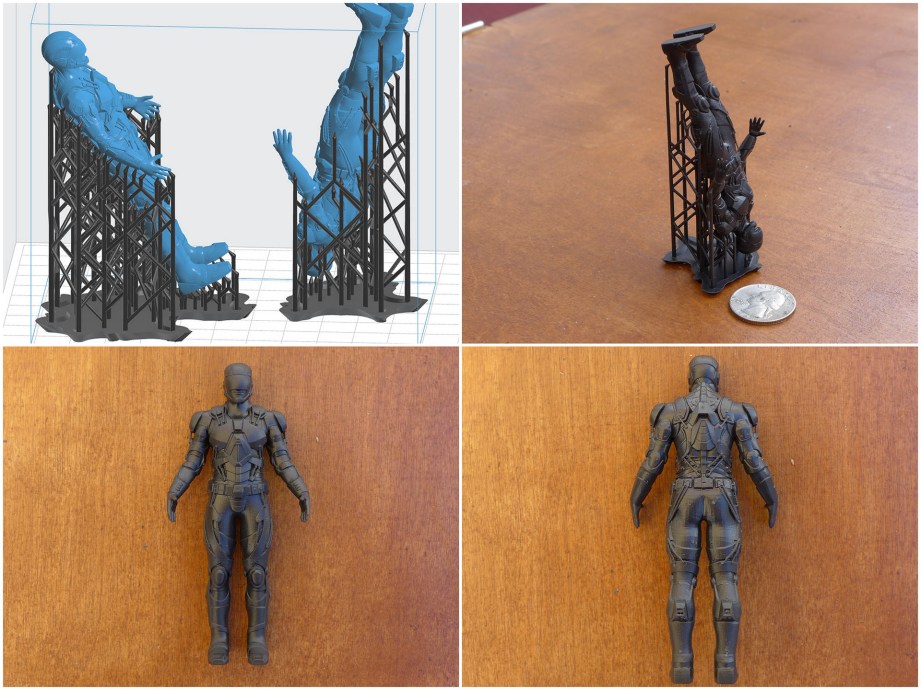
Next, all of the parts need to be oriented and supported for optimal printing. Most parts will require some type of support structure which not only anchors it to the print platform, but supports holes, angled surfaces and delicate features. PreForm can automatically do this and will arrange parts and place supports for the best chance of a successful print and generally does a fine job. However, the software doesn’t know what side may be visible and which may be hidden on the finished product. Ideally you want the support structures to attach to hidden or less noticeable surfaces since they do leave a small mark and require cleanup. More often than not I find that parts get oriented in such a way that supports will be placed on surfaces that I would like perfectly clean right out of the printer.
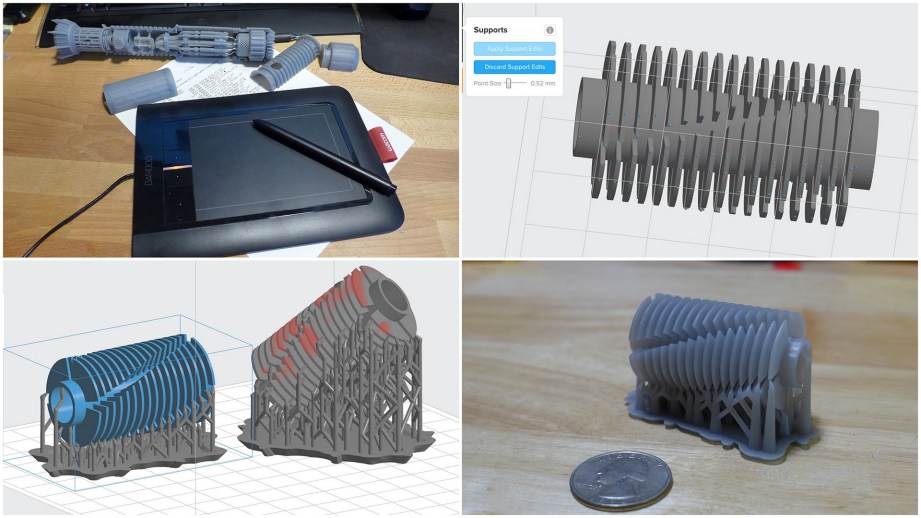
For the lightsaber I ended up doing custom supports for all the parts. PreForm gives you a lot of control over this by allowing you to simply click on an existing support point to delete it and then click on any surface to add a new one. With the quantity of supports I had to do, I found using a graphics tablet with pen worked very well and made things go faster. I used a standard Wacom tablet – nothing fancy. A computer with a touchscreen and pen would also work great for this. I also attempted something a little unusual by placing most parts complete vertical.
Typically, a part should be oriented at a slight incline. This makes the beginning layers smaller and less likely to fail during the peel process where the resin tray moves back and forth in order to break free the layer that was just printed. In the vertical position, most parts will have a larger surface area that needs to be peeled and the strain may break it loose from the supports and cause a print failure.
With a large bottom surface area you may also get some initial turbulence in the liquid resin which may cause some mushiness or pitting on the bottom layers. Most of my parts had a reasonable vertical surface area so I tried printing that way and it worked fine for most everything, although I did get some pitting on parts with a larger bottom area. Once you get a feel for the printer I have found that you can get away with much smaller and fewer supports than what is generated automatically as long as you understand your model and how the Form 2 will print it.
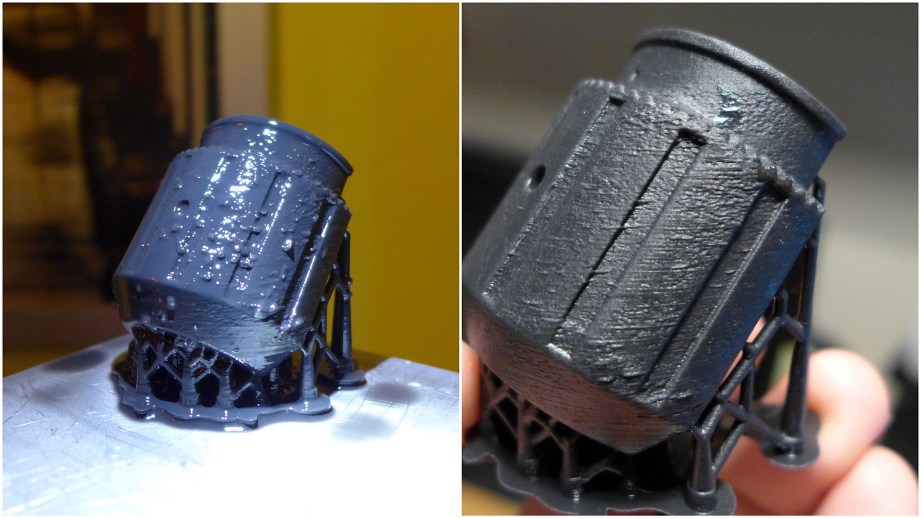
Once the print is finished, the entire print platform is removed and the print is popped off by using flush cutters underneath the angled support base. Into the first vat of isopropyl alcohol to soak for 10 minutes to loosen up any liquid resin still on the print. The inner mesh basket can be used to agitate the print to wash off resin. My personal routine is to then use a super-soft toothbrush to lightly scrub the print as I have found agitation often does not remove all the resin. Use gloves and don’t use a stiff brush as it may mar the surface. Next it’s into the second, cleaner, vat of alcohol for the final rinse.
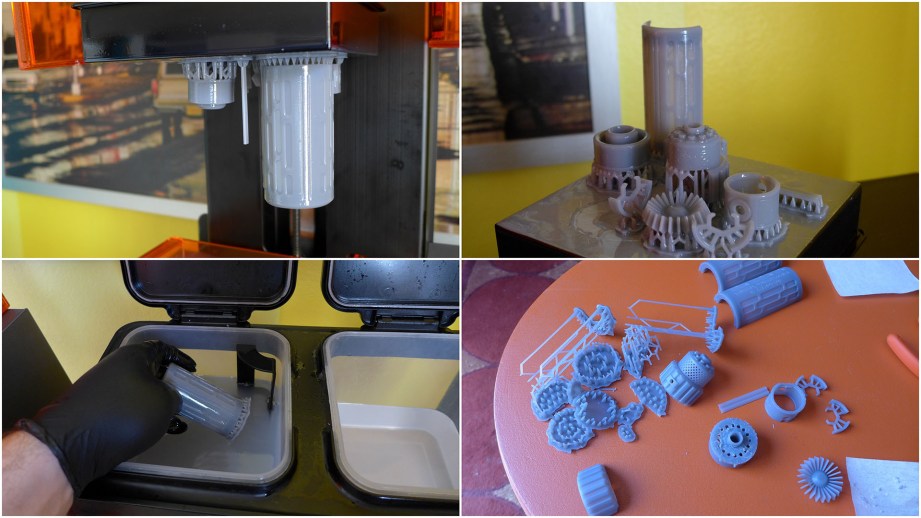
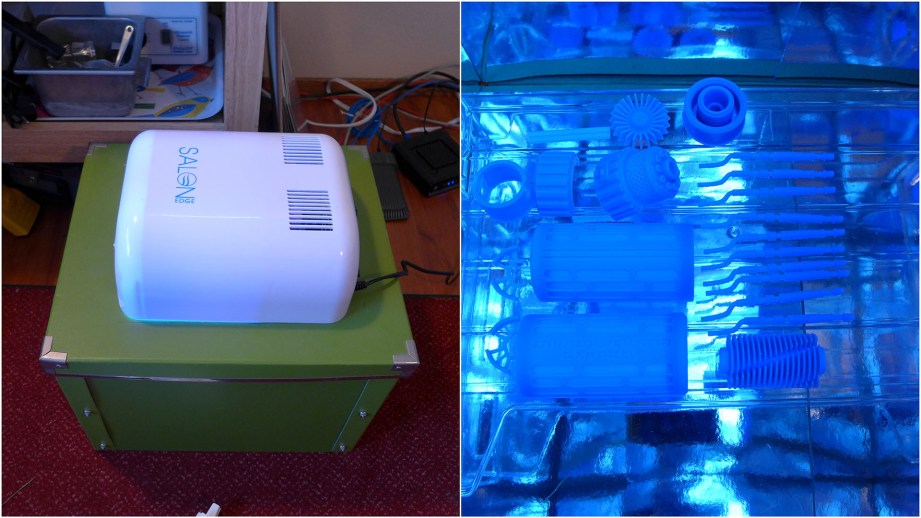
After drying, it’s time for the final cure in a UV ‘oven’ which you can build yourself. UV curing is recommended but not necessarily needed if you are printing with the standard resins and don’t plan on any sanding, painting, etc. Some of the other resins such as Tough and Flexible really need to be post-cured. When prints come out of the Form 2 they are almost fully cured and fine for display as-is, but if they need to be sanded, etc, they really need a bit more UV to harden completely. I do not recommend setting parts in sunlight to cure as it’s not controlled and intense sunlight can even warp thin parts. Formlabs has a guide for building your own UV oven – mine cost under $50 by using an Ikea storage box, UV nail salon lamp, mirror board and a letter tray. I lined the box with the mirror board as a reflector and the clear letter tray is flipped upside down to raise the print and allow light to hit the bottom. I cure the print for 1 hour, flip it to the other side and do another hour.
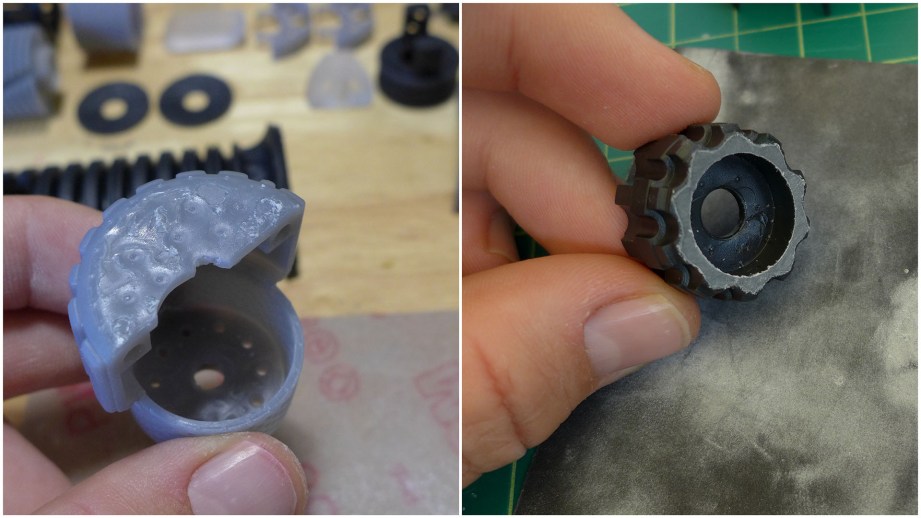
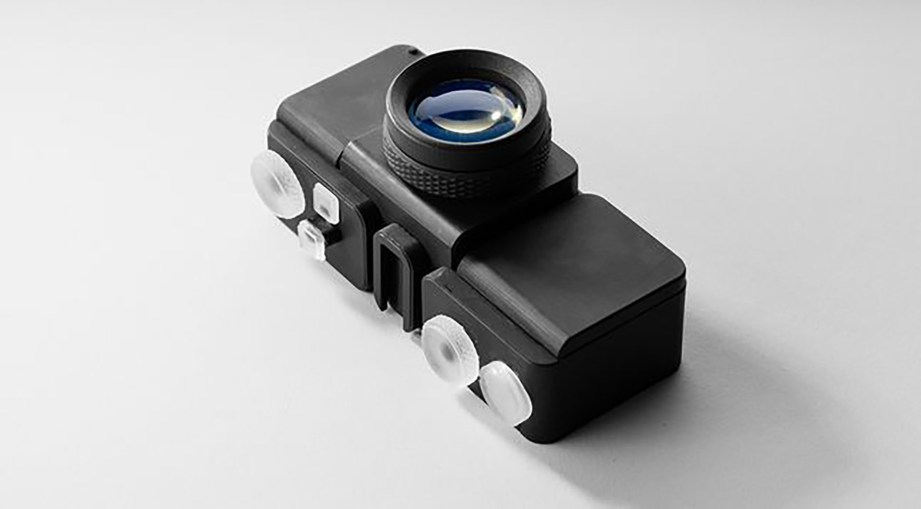
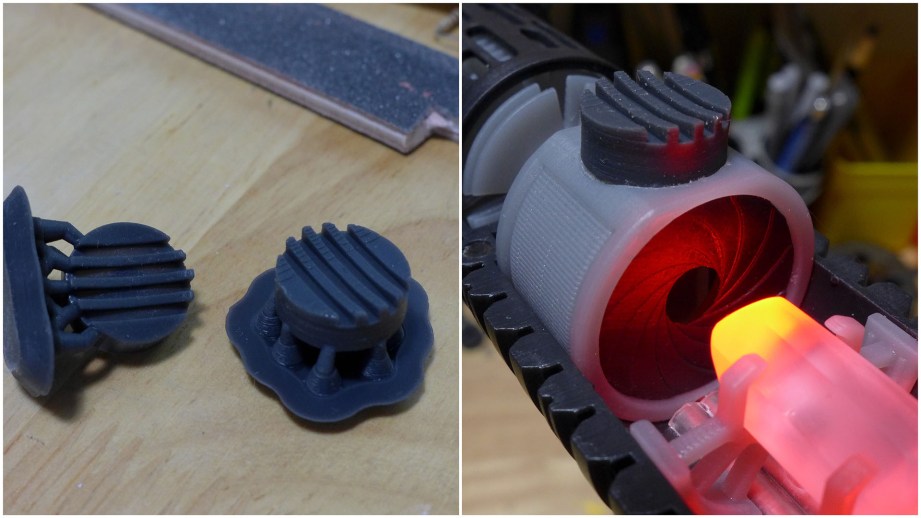
Now it’s time to remove all the support structures. Depending on the model and support point size, this can be done by simply tearing them off. This tends to leave more marks to clean up so I typically use flush cutters and an x-acto to remove them. I also tend to remove the supports BEFORE the UV cure as the resin is slightly softer and I feel the supports are easier to remove. I have also found that removing supports on delicate parts, such as the saber cooling fins can sometimes chip the model as the resin is more brittle after curing. Any further support marks can easily be sanded and if the model is not going to be painted, mineral oil can be used to clean up any finishing marks. For more clarity, clear parts such as the crystals, can be wet-sanded with fine grit sandpaper and acrylic polish. If you have enough patience, clear parts can be made almost transparent – like the lens on the 3D printed camera. The newest clear resin formulation also resists yellowing which the previous version would tend to do when exposed to UV light for an extended period.
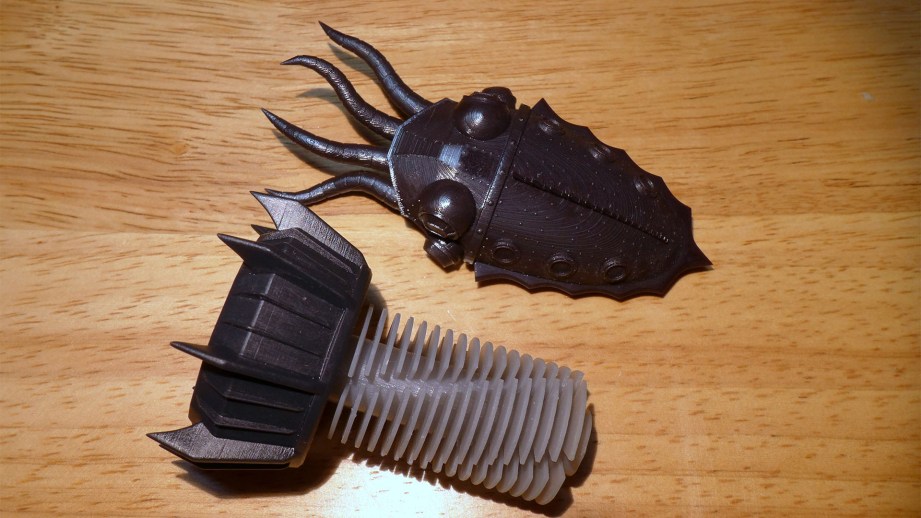
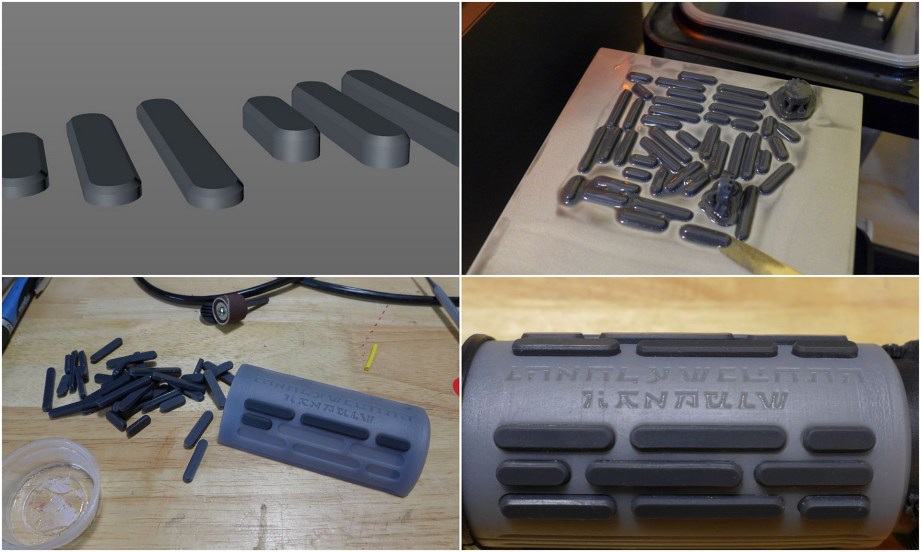
The lightsaber was my first attempt at using the Flexible material and I was very pleased with the results. Flexible has a Shore hardness of approximately 80 which is about the hardness of a shoe heel. It was perfect for the handle grip pads and even worked for the on/off button which needed to flex. The flexible material takes longer to print than the other resins – I believe this is because it needs to be ‘baked’ more by the laser. The initial bases for supports in particular take a long time to print. Partly due to time constraints and partly because I wanted to see if it could be done, I printed all the grip pads directly on the platform rather than use any supports. This cut down on how long the print took and post-processing clean up. It worked perfectly but this is not a technique to use for all prints, especially if dimensions need to be exact. The Form 2 needs to really bake and compress the first few layers of a print to ensure it sticks to the print platform. So a print that is 1mm thick, may turn out .5 – .75mm thick if printed directly on the bed. The grip pads were very simple, so I added an extra .25mm to the thickness and they came out at exactly the size I needed.
I used supports for the button which need to be much thicker than normal due to the flexible nature of the material. As discussed last time, I had to try a few different versions of the button to get the wall thickness just right so it was strong but still flexed. In the end it worked perfectly and survived being handled all weekend at Maker Faire. The Flexible material is great and I would love to see a softer version added to the resin line up.
While the Form 2 has been a workhorse with very few failed prints, I did have a rough patch when I started the final saber parts. All of my prototypes had turned out great, but with only a few days to finish the final version for Maker Faire, I started getting prints that looked like the Elephant Man. Lots of little boogers everywhere, uneven print lines, mushy details – what was up? At first I thought it was the new resin formulations as these weird prints coincided with switching to the new resin. Turns out the laser on my pre-production Form 2 went out of adjustment – but an overnight shipment later and I had a new production model Form 2 and the prints were beautiful. The new printer has been going a few months now and the only failed prints were due to some attempts at using minimal custom supports. My original printer has since been rehabilitated and is printing away.
All of the parts I designed as torture tests turned out beautifully. All the pinholes, knurls, fins and precision parts turned out great. Hardware such as the switch and the few screws I used fit perfectly, although care should be taken when threading parts as the standard resin is acrylic-like and can be brittle. You can watch how the lightsaber goes together and read about how it was designed in my previous entries. I used super glue to assemble all the parts – it worked great on the resin, including the flexible parts. If you end up with any hazing from the glue, it can easily be hidden using some acrylic polish. My intention was to show off the different resins, so no finishing work was done other than sanding support marks. If desired the parts can easily be painted and weathered just like any model kit.
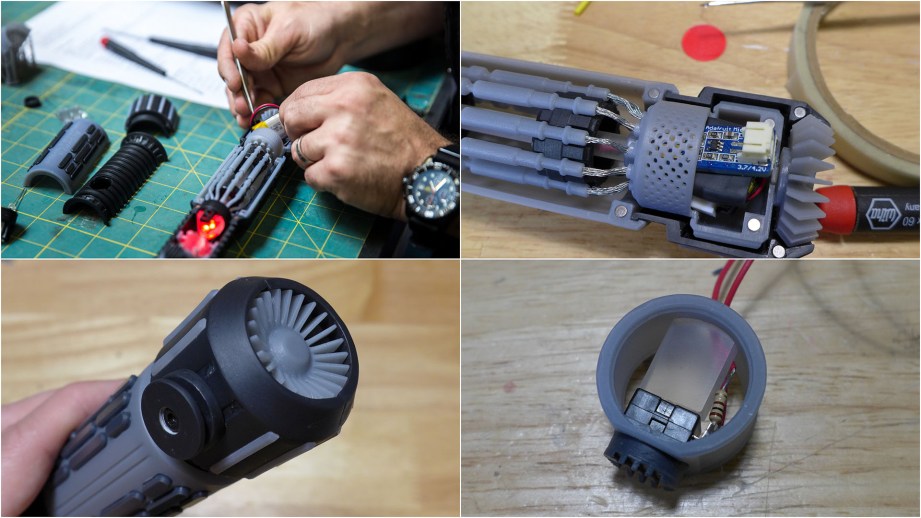
I am very pleased with how all the parts printed and the flexible material was a nice option to have. My particular favorite is the black resin as it really shows off details well. Even my ‘torture test’ pieces such as the cooling fins turned out great although I do feel custom supports were a must on this particular part. I was also pleased with how well the clear part lit up and transmitted light – I would like to do some further polishing on them for even better clarity.
Finally, I will answer the question I get asked most often about the Form 2 – “how much do the prints cost?’. This was difficult to answer until I crunched a bunch of numbers and came up with my own formula for print costs. I felt that just calculating just cost per mL of resin was not enough, as the resin trays are also a consumable. Here’s how I broke it down –

Most of the resins cost $149 per 1000mL cartridge, then there’s shipping ($13 to San Francisco) and tax ($12 CA tax). A resin tray is rated to last approximately 2 cartridges of resin (2000mL) before it should be replaced. I calculated half the cost of a resin tray which is what would be ‘used’ per 1000mL resin cartridge and I added shipping and tax ($72/2 = $36). So with the cost of resin, half the cost of a tray per cartridge, shipping and tax I came up with a cost of approximately $210 per liter or 21¢ per mL. I also figured I should calculate something for print time as prints can take many hours. I arbitrarily picked $1/hour as I have no idea how much power the printer uses – eventually I will get a outlet meter reader to figure it out. To put this all in perspective, the lightsaber prints use approximately 223mL of resin, take 26.25 hours and cost $75 to print (according to my formula). This means you should be able to print approximately 4.5 lightsabers per 1000mL cartridge of resin. In the end, I tend to react on a gut-level – for example after using up a roll of filament for my FDM printer I feel satisfied that I got a lot of prints – it was a good value. I have felt the same with the Form 2 resin cartridges – when it comes time to order a new one I feel like I got a lot of quality prints for the money.
I’ve also been asked how much does it really cost to get setup with the Form 2. Generally my answer is $4000 – 4500. The printer itself is $3499, which includes the cleaning station, one cartridge of resin and a resin tray. You’ll probably want to add additional resins and a dedicated tray for each – let’s say 2 more ($420). You need to buy isopropyl alcohol to fill the cleaning tanks ($40) and it tends to last for quite a while. You will want to put together a UV oven for curing the prints ($100 or less). You can also add an annual service contract for $500/year.
So ends the epic journey of crafting our own lightsaber! You can download and print your own saber from my Pinshape account, print settings, hardware list and assembly guide are included. A link for my custom PreForm support layouts is located on the project page and may save you some setup time. Also be sure to read about how it was designed, check out the original reveal video and watch how to assemble your own. Yub yub!
Tested in the High Arctic, Day 5
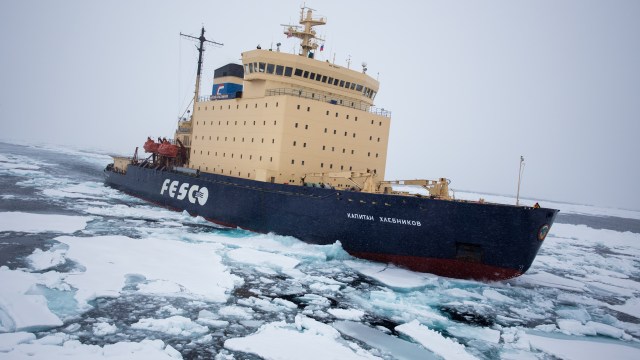
On a day of travel from Greenland to Canada, Norm gives you a tour of our home on the high seas, the Kapitan Khlebnikov. From our rooms to the dining areas to the ship’s gym, here’s what life is like living on the ship!
Tested in the High Arctic: Drone Footage

And now, a brief interlude from our daily video journals. Norm shares a selection of raw drone footage we filmed during our time in Greenland. Keep an eye out for a little surprise at the end of the final clip!
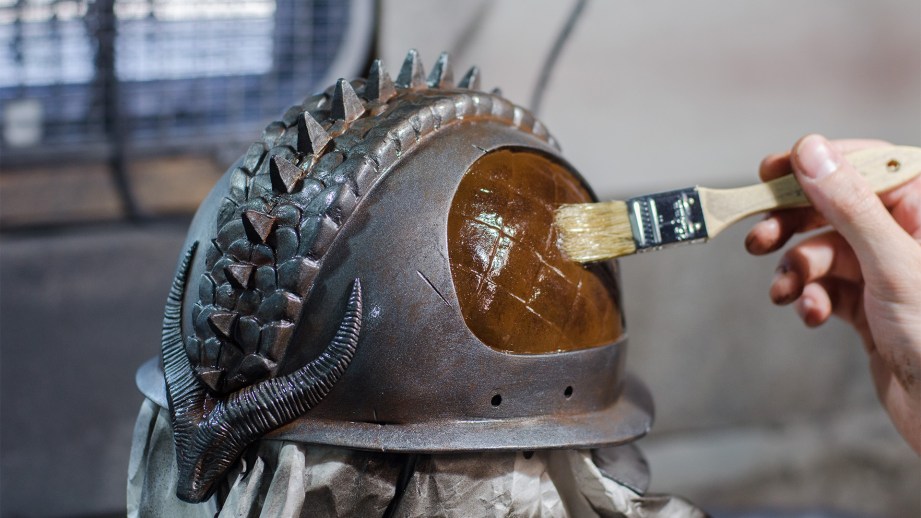
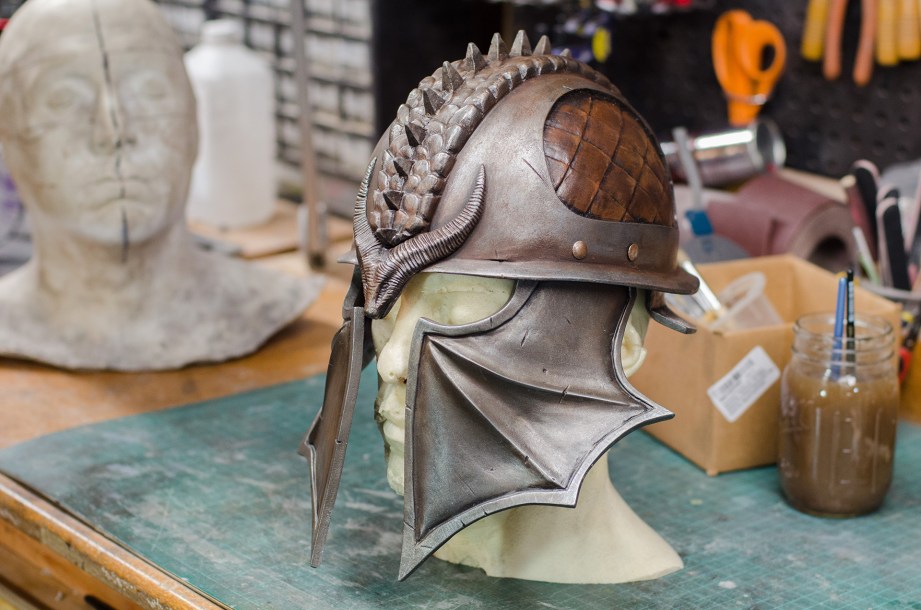
How To Paint a Realistic Rusty, Metal Helmet
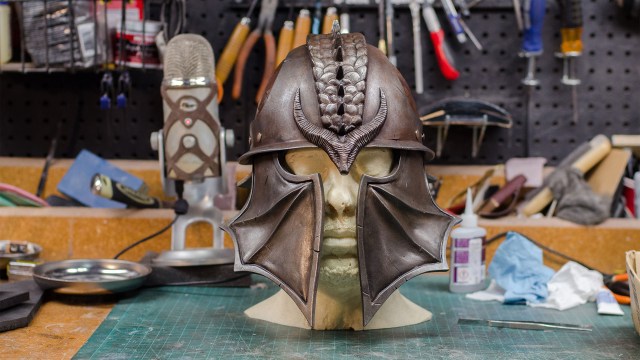
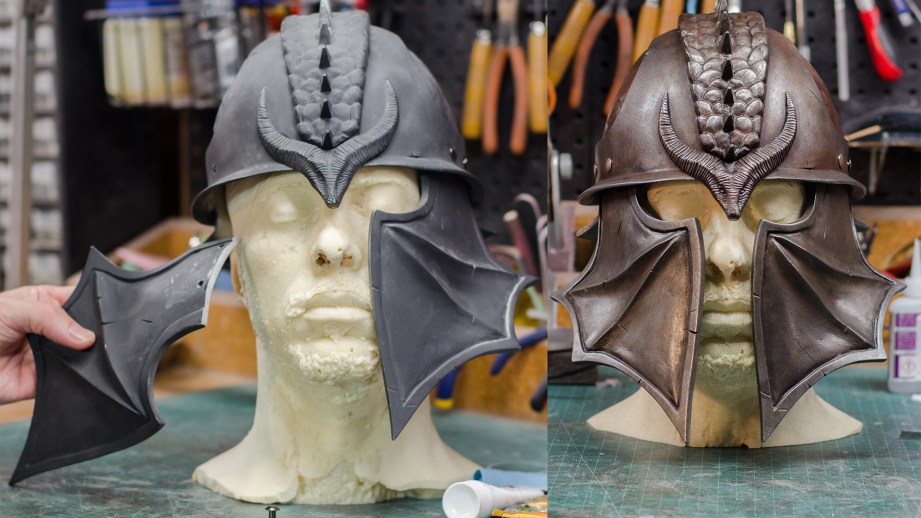
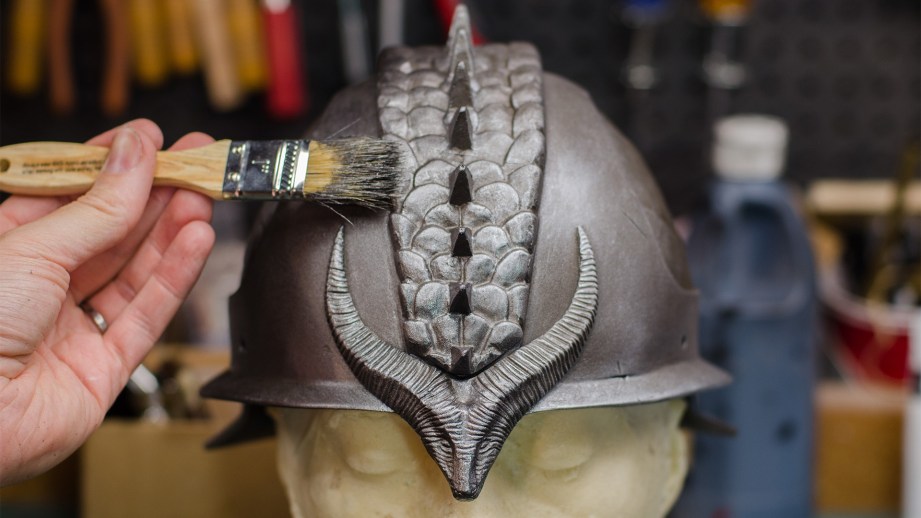
This is a plastic helmet. Urethane plastic, to be exact. It’s a resin kit that I got from my pal Allen a while back and I was chomping at the bit to get it painted, but really wanted to make sure that it didn’t end up looking like that original plastic. I wanted it to look like an old, weather beaten hunk of battle scarred steel. I wanted it to look like real metal.
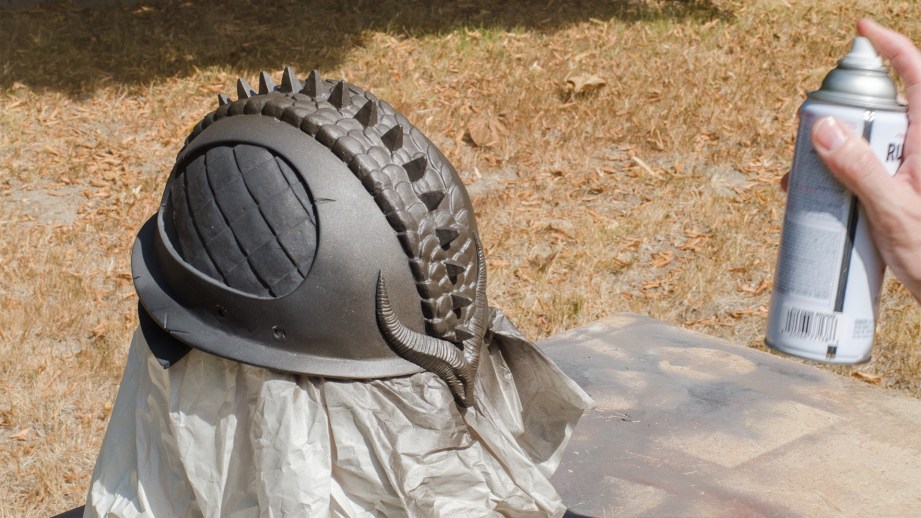
I’ve covered metallic finishes here on Tested before, but this was a very different beast. It couldn’t look chromed and shiny like Rey’s blaster. It needed to be dark, textured, rusty, and grimy. When painting something that needs to be metallic, there tends to be an impulse to reach for a “metal” can of spray paint cover every square inch of plastic in a silver metallic sheen. This is the easy way to do it, but if you look at a piece of bare steel, something that spends its days exposed to the elements like a manhole cover, you’ll note that there isn’t a single bit of shiny silver anywhere on it. This is why I started with a dark color.
The kit was already primed, so all I needed to do was hit it with the base color. In this instance I used a rattle can of nice bronze paint.
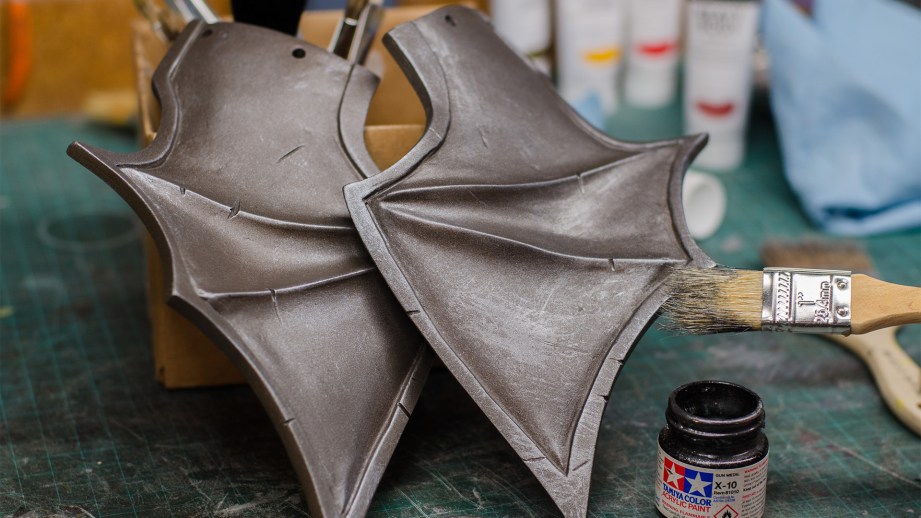
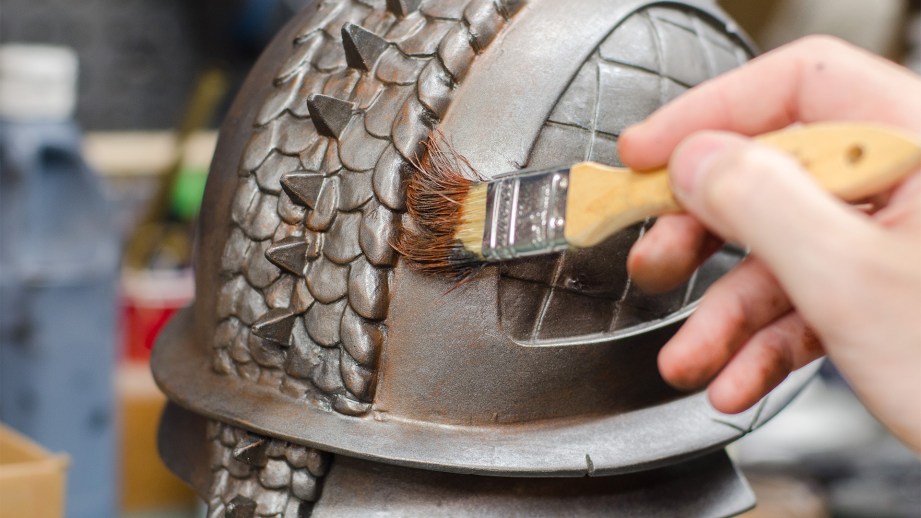
Once this base coat of dull, dark paint dried, then the real fun began. I started with some silver acrylic paint. Yes I said earlier that we wouldn’t see any silver spots, but don’t worry, I was incredibly subtle with my use of this bright paint. My application was a slightly heavy drybrush. I applied just a little bit of silver paint to a ratty old brush, wiped most of that paint off on a paper towel, and then “scratched” the bronze base coat with the brush.
This was done in several passes on all parts of the helmet. You can always add more paint where you need it, but it’s a pain to try and take it off or cover it up. The goal was to add subtle texture to the surfaces and to highlight the edges just a little bit.
Once I was happy with the layer of silver, I did almost the same thing with a darker, gunmetal acrylic paint. This was done to cut back on the bright silver and to add a little bit of value contrast.
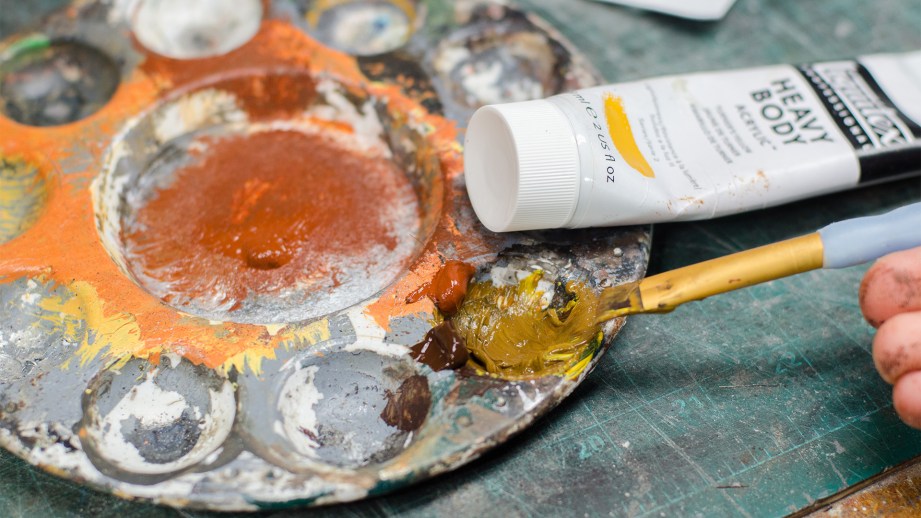
One of the things that really sells an old piece of metal is rust. There are many colors that can be used for rust, and you should experiment with as many as possible, but it’s hard to go wrong by starting with good old fashioned burnt sienna. Similar to the metallic layers, this acrylic paint was applied with a gross old brush in a scratchy, subtle manner. Then I used my finger to smear it a bit, blending it in with the other paints.
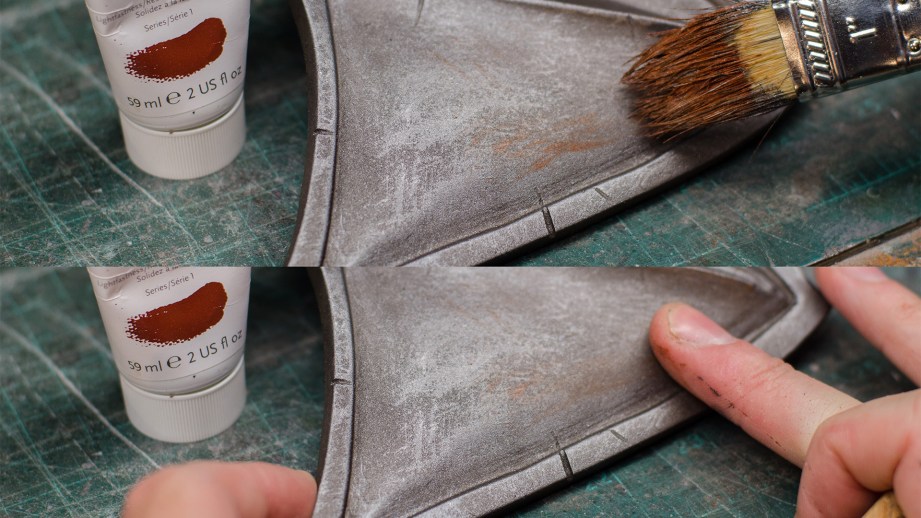
Subtlety is the key.
Just like all the other paints, this was done a little bit at a time. I found myself revisiting some areas to punch up the color just a little bit where I felt it was necessary. By using a brush that was nearly dry with paint, I was able to put just a tiny bit down at a time. This kind of application is tedious, but it gives you a lot of control over the finish.
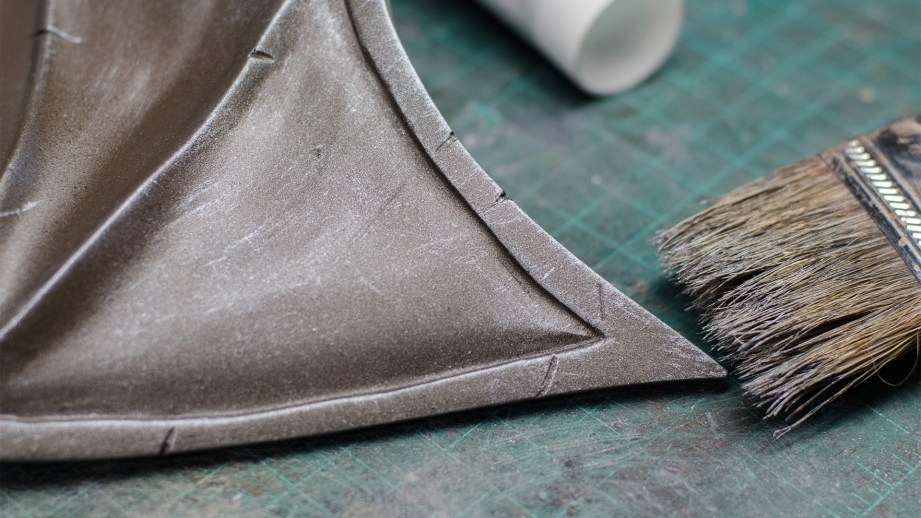
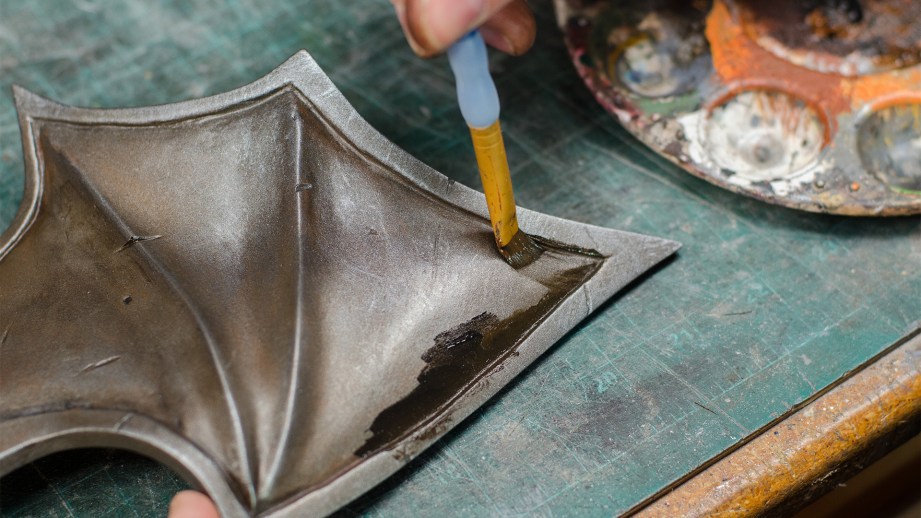
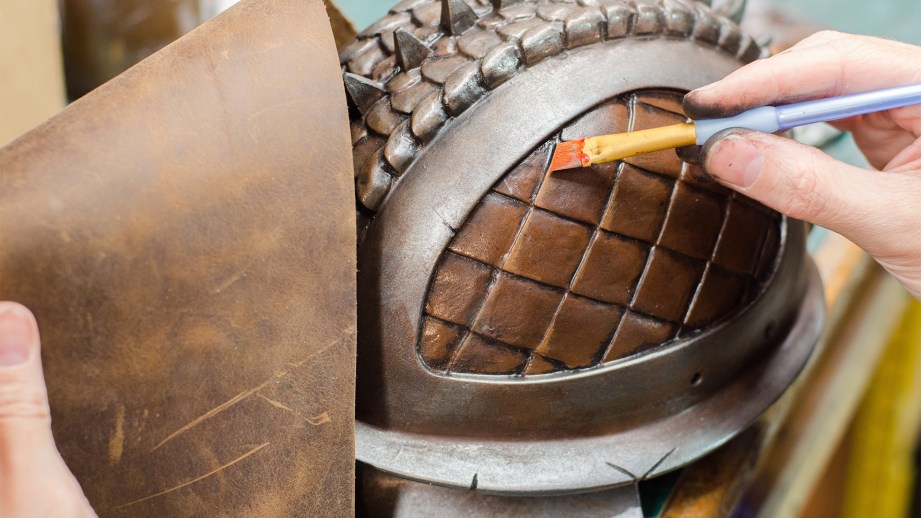
Happy with the direction the metal was going, I turned my attention to the side panels of the helmet. I do believe that in the original game art these parts are meant to be a metal, but I thought they would look sharp with a faux leather finish. To get started I base coated the panels with a couple of layers of dark brown acrylic paint.
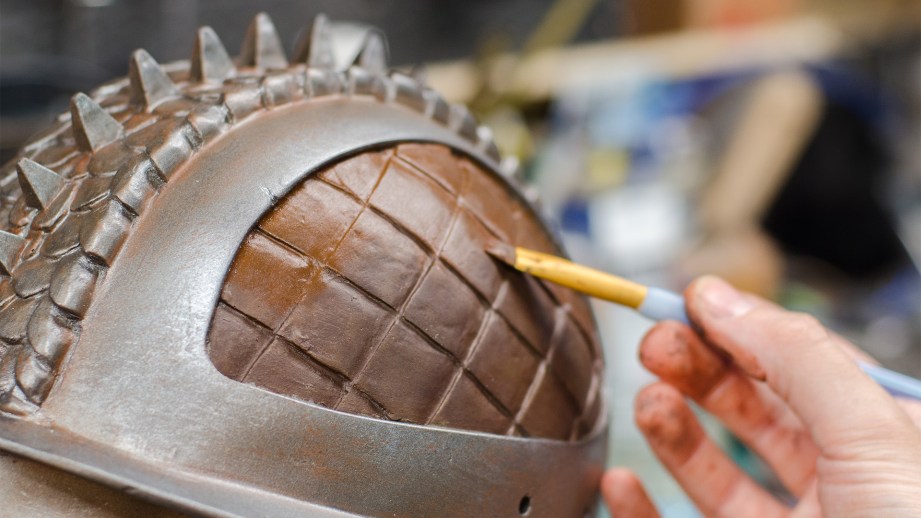
To give the leather a little bit of visual interest, I used a stencil brush and some darker brown paints to stipple on just a hint of contrasting texture. Just like before I did this in a couple of passes, adding a little bit more each time until I was happy.
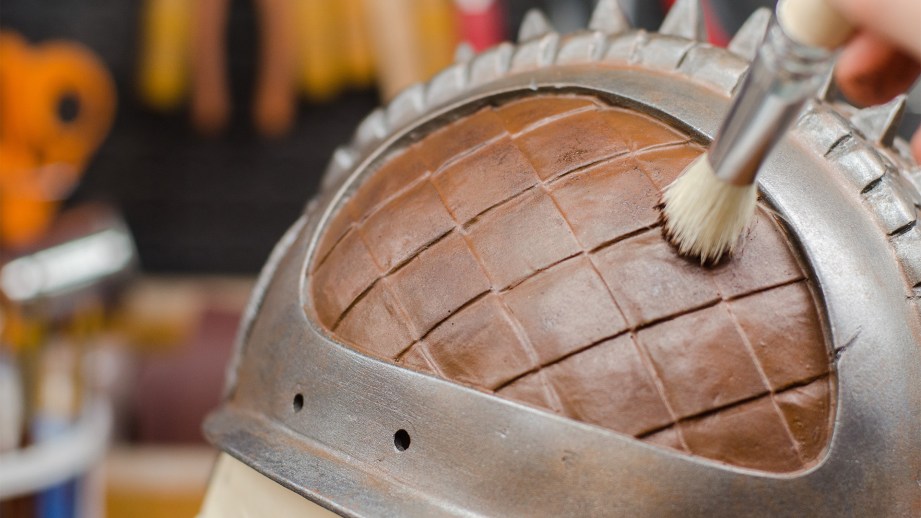
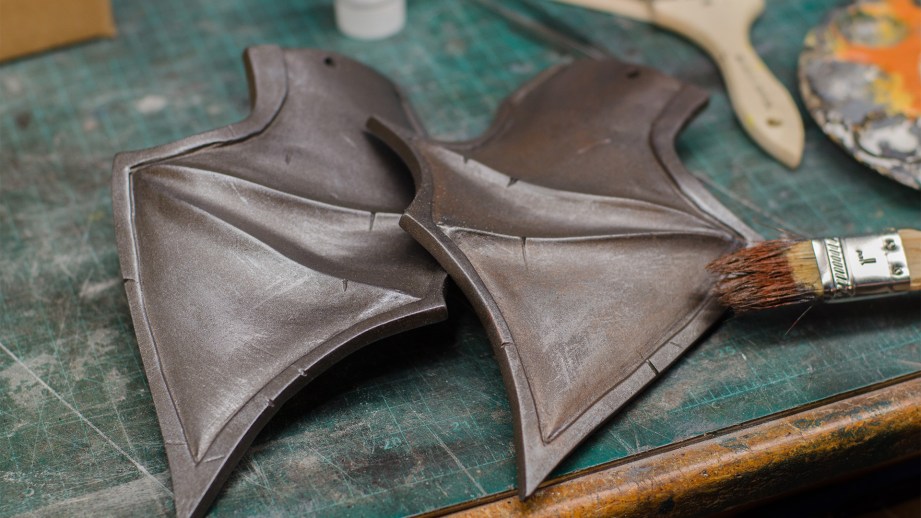
The leather painting concluded all of my basic colors and I was excited to start adding some more grime to the piece, but I figured it would be a good time to seal everything. All of the pieces were covered in a gloss varnish, brushed on. Varnish leaves a nice finish and dries quickly–two qualities I prefer in a finish.
Once the varnish was dry I dove right into weathering. Most of this was done with your standard washes of black, brown, and burnt sienna acrylic paints. I brushed on some smears of colors into the deep crevasses of the helmet and then wiped most of the paint away, adding some grime to the grooves as well as some nice contrast. This was done over the entire helmet for one initial pass.
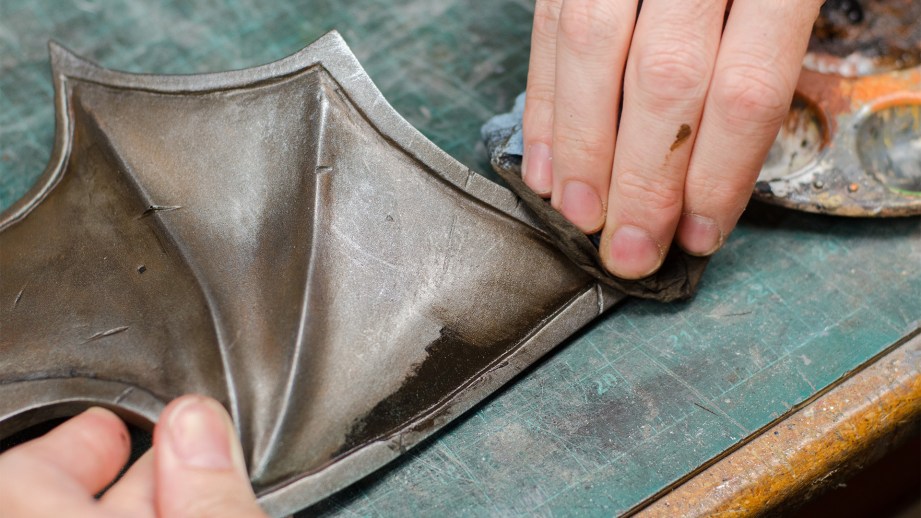
On my second pass I realized that some of the cheaper, black acrylic paint that I was using was a little bit thin for what I was trying to do. The more pigment laden “heavy body” paints did a better job of sticking to the surface, which meant I really needed to scrub with a paper towel to “clean” it off. This gave me more control over the areas that were left with some dirt and grime, including adding some more texture. It really is worth experimenting with different brands of paints.
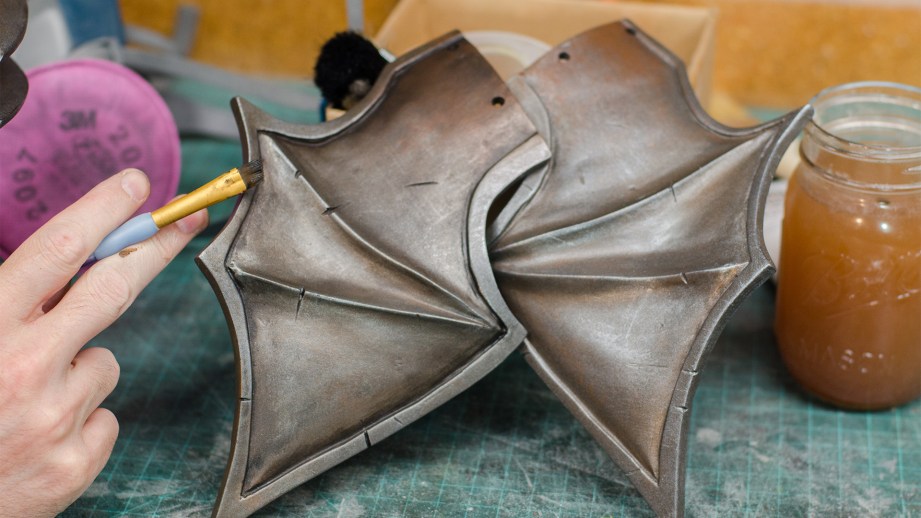
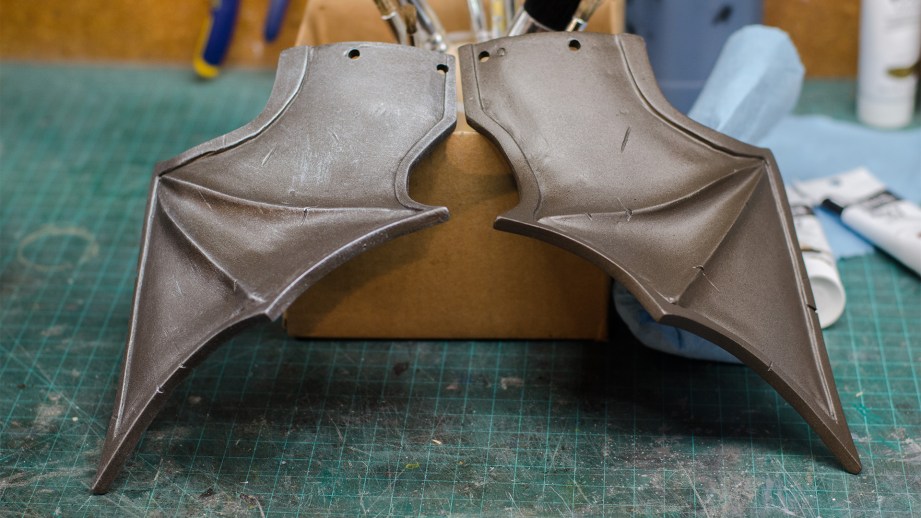
This weathering was repeated over the entire helmet, including the faux leather areas. I also added some highlights to the leather to make the edges look lighter and worn. To do my best to make it look authentic, I had a piece of genuine leather on hand to check my work. I think I did an OK job at matching the finish, but that is definitely one area where I could use a little more practice.
The last touch on this helmet was assembly. The kit came with a handful of Chicago screws to attach the wings to the dome, but they were all new and shiny. That simply would not do, so I gave them the old Punished Props treatment and beat them up. First I sanded the metal surface, then I brushed on some rusty looking paints, finally I mottled the finish a bit with a paper towel. Piece of cake!

With that final touch, the helmet was screwed together and completed! This was a wonderful learning experience and a lot of fun. Recently I’ve been taking a good look at my painting techniques and trying to branch out from the more basic techniques and learn a bit more about adding the subtleties that turn an OK finish into something that looks like the genuine article. The best part about this finish is that it didn’t require any special tools or materials. Just some spray paint, crummy brushes, a handful of acrylic paints and a little varnish.
Tested in the High Arctic, Day 4
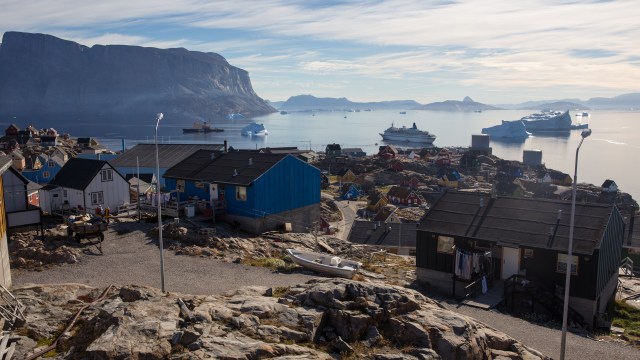
A short check-in today as we take an excursion to the sunny town of Uummannaq in northwest Greenland. Norm calls out a little bit of the landscape, including the sled dogs that blend into the hills.
Tested in the High Arctic, Day 3
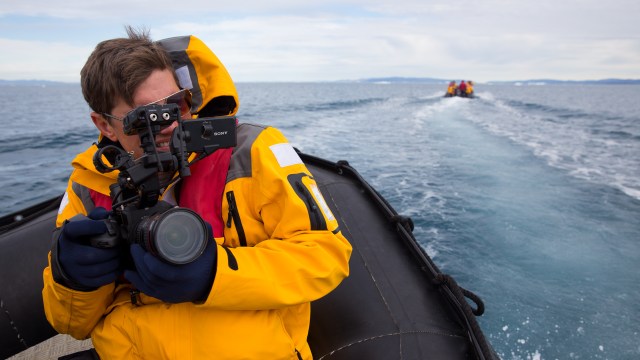
On the first Zodiac excursion of our trip, Joey and Norm get up close with icebergs, spot some humpback whales, and get a taste for 10,000 year old ice!